Difference between revisions of "Mesh/ja"
(Created page with "上の動画にあるように、これらのツールでは画像の一部を選択して、オブジェクトを編集できます。4つの選択ツールがあります:") |
(Created page with ";{{List button|rectSelTool.png}} 矩形選択:クリックした点から開始して、マウスを動かす方向に矩形を描きます。左マウスボタンを放すと...") |
||
| Line 39: | Line 39: | ||
上の動画にあるように、これらのツールでは画像の一部を選択して、オブジェクトを編集できます。4つの選択ツールがあります: | 上の動画にあるように、これらのツールでは画像の一部を選択して、オブジェクトを編集できます。4つの選択ツールがあります: | ||
| − | ;{{List button|rectSelTool.png}} | + | ;{{List button|rectSelTool.png}} 矩形選択:クリックした点から開始して、マウスを動かす方向に矩形を描きます。左マウスボタンを放すと、選択が決定されます。 |
| − | ;{{List button|elliSelTool.png}} | + | ;{{List button|elliSelTool.png}} 楕円形選択: クリックした点を中心として、マウスを雨後各方法に広がる楕円形を描きます。左マウスボタンを放すと、選択が決定されます。 |
| − | ;{{List button|lineSelTool.png}} | + | ;{{List button|lineSelTool.png}} フリークローズライン選択: 左マウスボタンをクリックしたまま線を描きます。左マウスボタンを放すと、線がクローズされて、その中の領域がすべて選択されます。 |
| − | ;{{List button|polygonSelTool.png}} | + | ;{{List button|polygonSelTool.png}} 多角形選択: 2つの点をクリックすると線となり、3つ目以降の点をクリックすると多角形が作成されます。ダブルクリックすると多角形がクローズされ、その中の領域がすべて選択されます。 |
===Actions=== | ===Actions=== | ||
Revision as of 10:35, 23 September 2017
構造
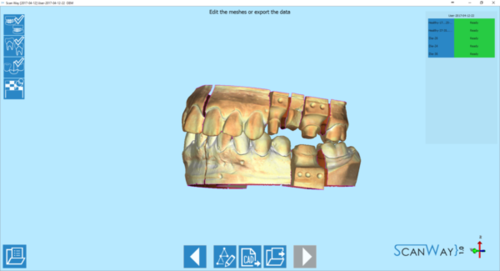
プロジェクトの最後のステップでは、生成されたメッシュが表示され、これを編集したりエクスポートしたりできます。
インターフェースに生成されたすべてのメッシュの画像が表示されます。右上には生成されたメッシュのリストがあり、ここで個々のファイルを選択して編集できます。ツールバーもあります。
ツールバーには以下のオプションがあります:
 戻る
戻る- 前のステップに戻ります。このアイコンは、最初のスキャンステップでは無効になっています。
 メッシュ編集
- メッシュ編集ページを開きます。このページでは、メッシュの品質を向上できるさまざまなツールがあります。これらのツールについては、後続のセクションで詳しく説明します。
 CADへエクスポート
 - 画像を選択したCADにエクスポートします。
 エクスポート
 - 選択したフォルダにファイルをエクスポートします。
 次へ
次へ- プロジェクト内の次のステップに進みます。ここはウィザードの最後のステップなので、このオプションは利用できません。
メッシュツール
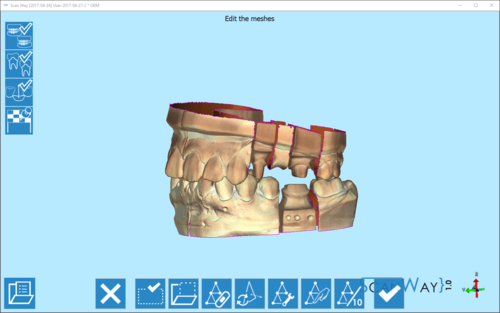
![]() をクリックすると、メッシュ編集ツールバーを利用できるようになります。メッシュツールはメッシュ生成中にある程度自動で適用されるので、ほとんどの場合でメッシュをさらに編集する必要はありません。
をクリックすると、メッシュ編集ツールバーを利用できるようになります。メッシュツールはメッシュ生成中にある程度自動で適用されるので、ほとんどの場合でメッシュをさらに編集する必要はありません。
 終了
終了- オプションセクションを終了します。
 選択ツール
選択ツール- 選択ツールパネルを開きます。このパネルでは、画像の一部分を選択する方法を選択できます。利用可能なツールについては、後続のセクションで説明します。
 選択アクション
- アクションパネルを開きます。このパネルでは、画像で選択した部分でどのような操作を実行するか選択できます。利用可能なアクションについては、後続のセクションで説明します。
 穴埋め
穴埋め- メッシュの穴を検出して埋めます。このオプションについては、後続のセクションで説明します。
 垂線の反転
垂線の反転- メッシュの垂線をフリップして、上面と下面を反転させます。インプレッションおよびバイトのプロファイルでは、このツールは自動で実行されます。
 メッシュ修正
- メッシュに構造上の問題がある場合、自動的に検出して修正します。
 スムース
スムース- メッシュをなめらかにして、輪郭をくっきりさせるアドバンスツールです。このオプションについては、後続のセクションで説明します。
 トライアングル削減
- メッシュのトライアングル数を減らし、生成されるSTLファイルのサイズを削減します。このオプションについては、後続のセクションで説明します。
 確定
確定- 変更内容を確定し、オプションセクションを閉じます。
選択ツール
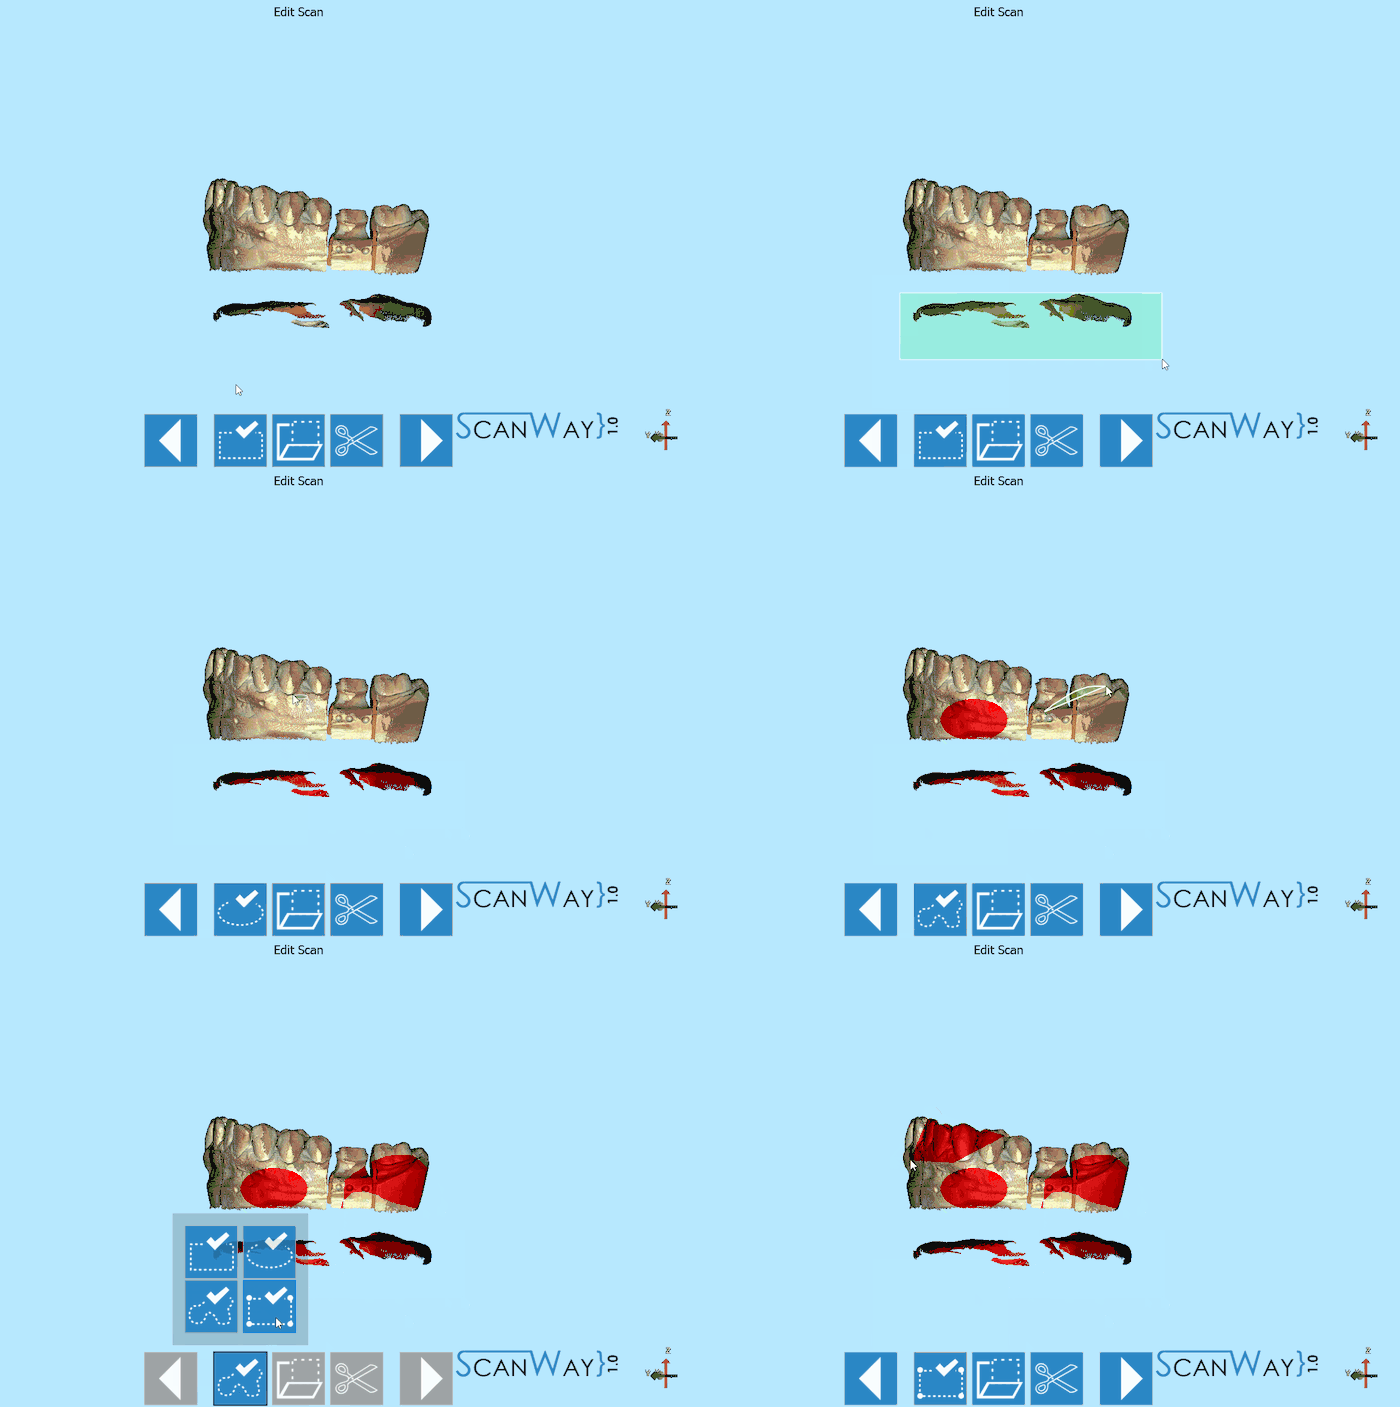
上の動画にあるように、これらのツールでは画像の一部を選択して、オブジェクトを編集できます。4つの選択ツールがあります:
 矩形選択
矩形選択- クリックした点から開始して、マウスを動かす方向に矩形を描きます。左マウスボタンを放すと、選択が決定されます。
 楕円形選択
楕円形選択- クリックした点を中心として、マウスを雨後各方法に広がる楕円形を描きます。左マウスボタンを放すと、選択が決定されます。
 フリークローズライン選択
- 左マウスボタンをクリックしたまま線を描きます。左マウスボタンを放すと、線がクローズされて、その中の領域がすべて選択されます。
 多角形選択
多角形選択- 2つの点をクリックすると線となり、3つ目以降の点をクリックすると多角形が作成されます。ダブルクリックすると多角形がクローズされ、その中の領域がすべて選択されます。
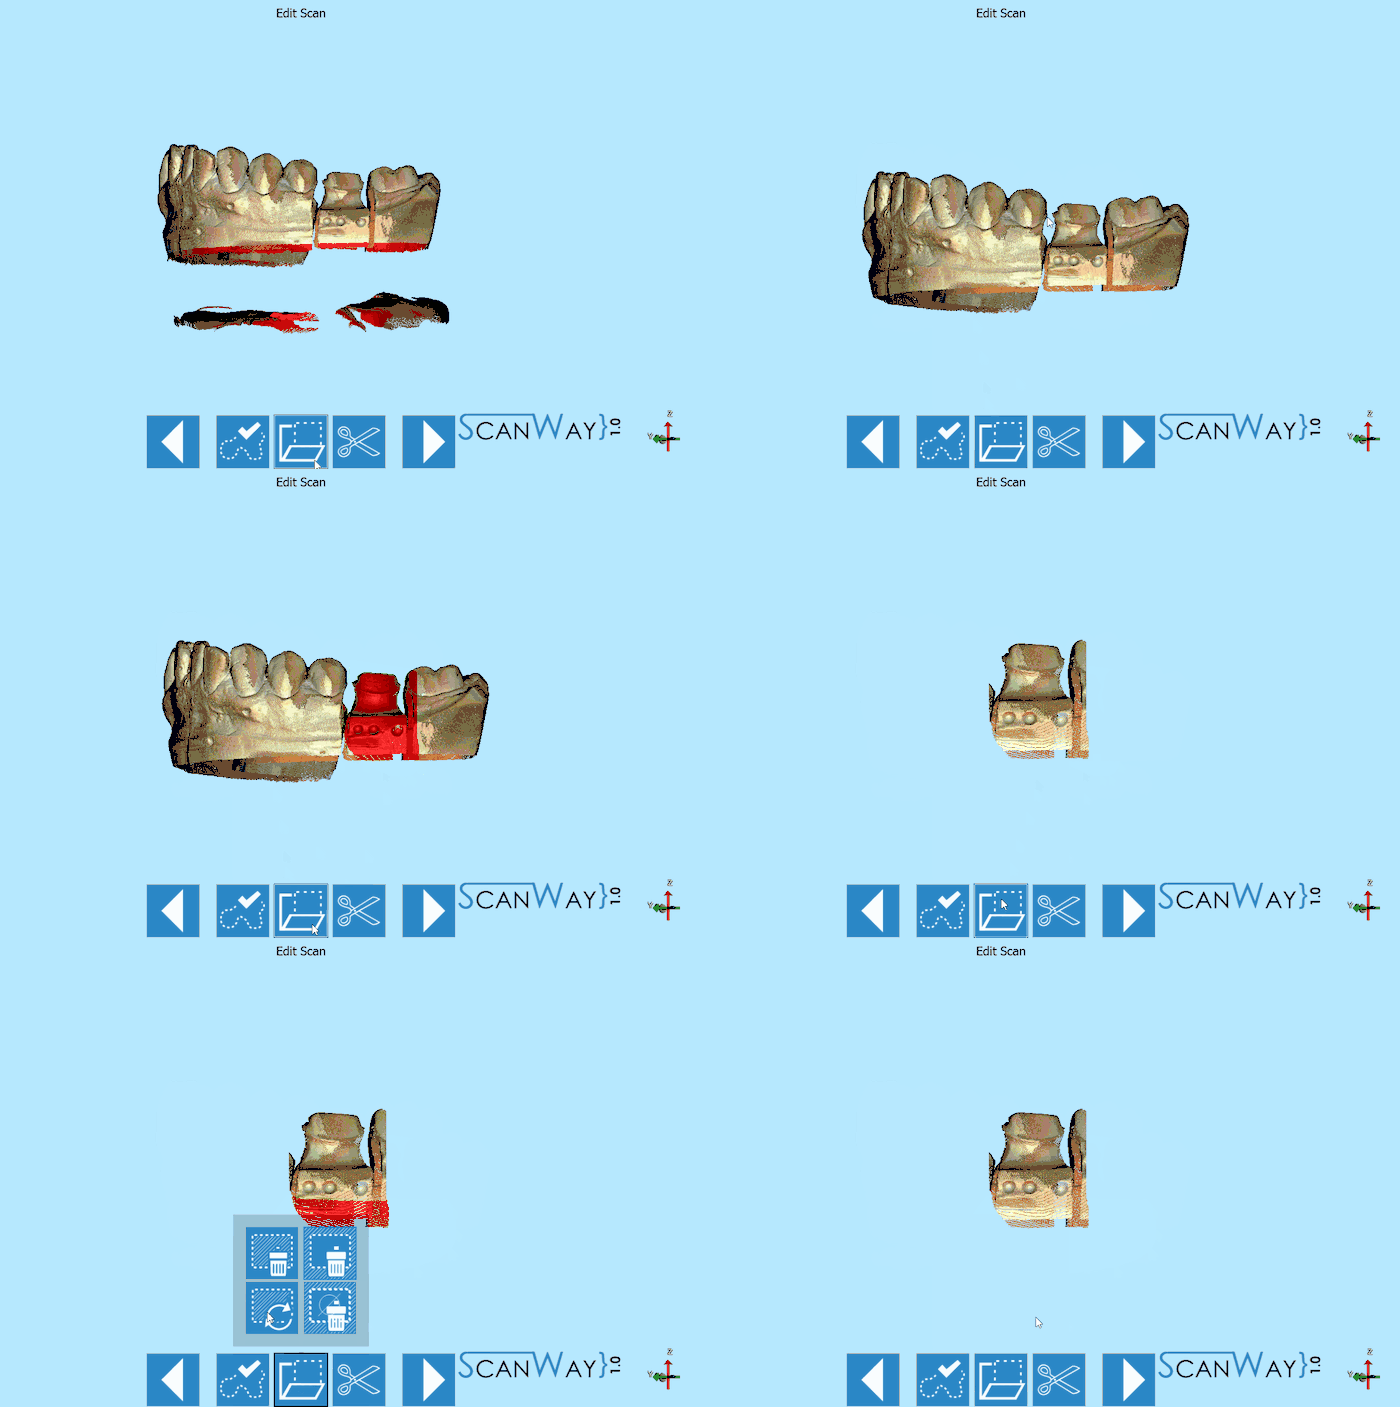
Actions
These actions allow to modify the selected information. The following actions are available:
 Delete Selection (DEL)
 - Deletes the currently selected data.
 Crop Selection (
 + K)
+ K) - Keeps only the selected data and removes all the rest.
 Invert Selection (
 + I)
+ I) - Selects all the data that is not selected and deselects the selected data.
 Clear Selection (
 + C)
+ C) - Deselects all the data.
Fill All Holes
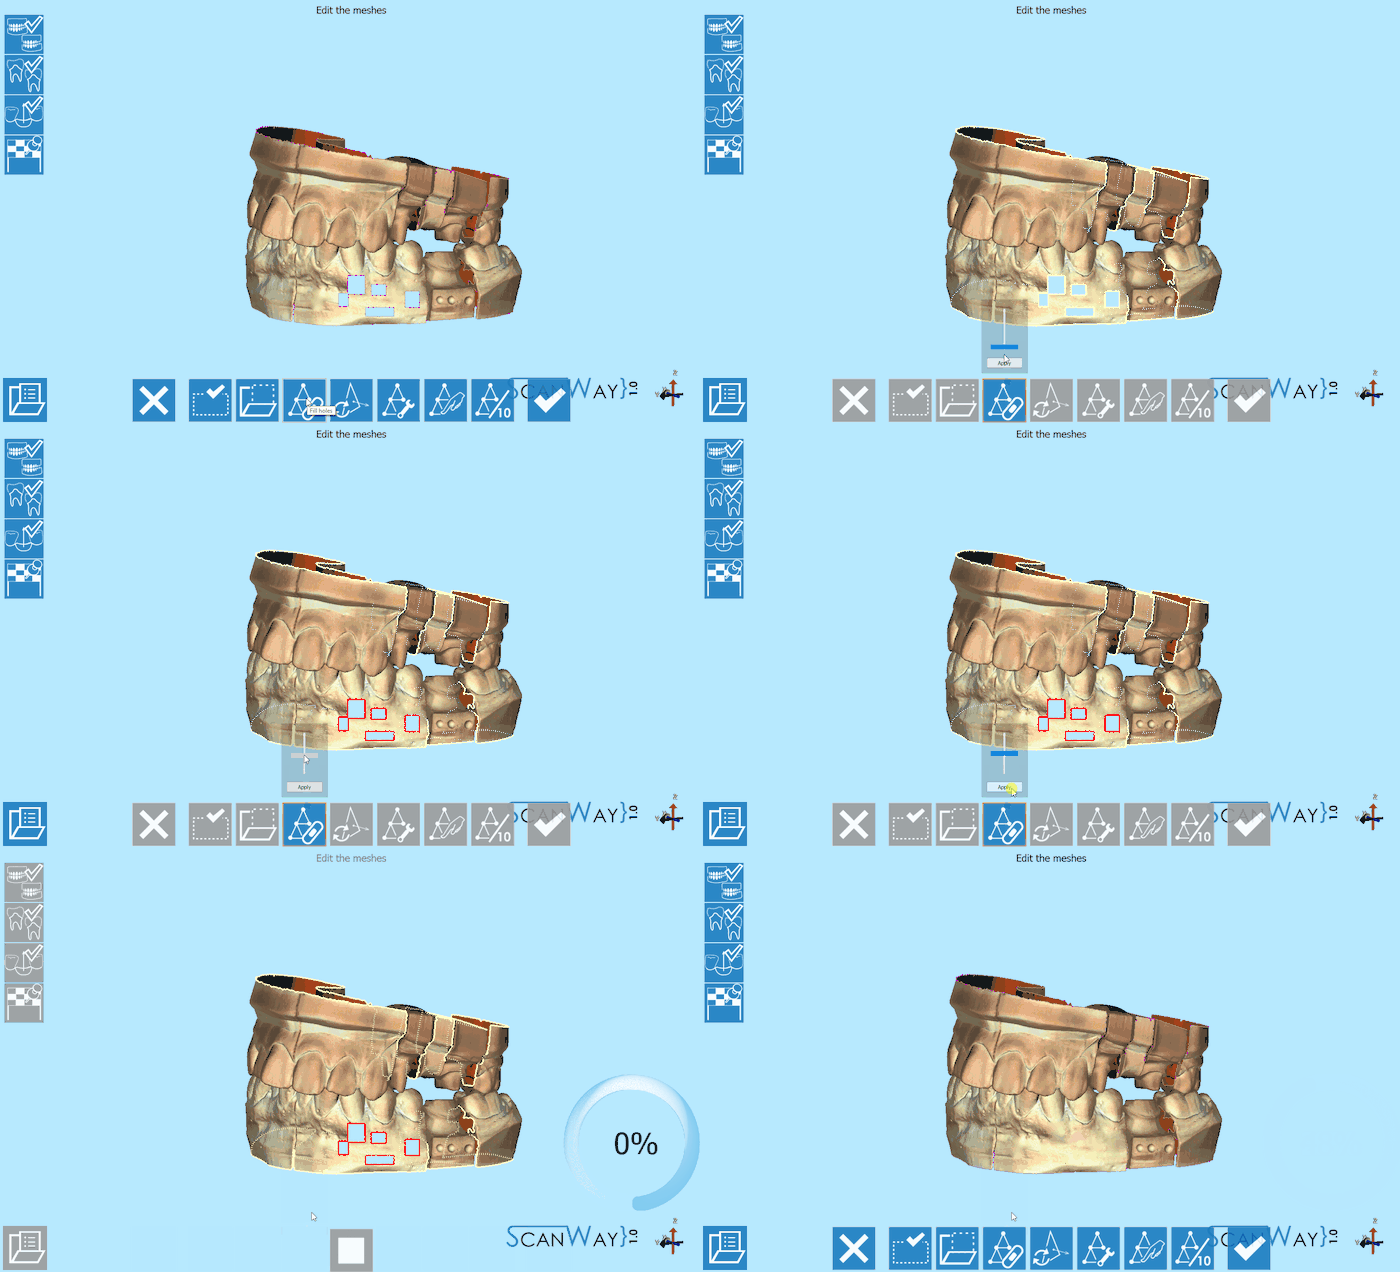
This is an interactive tool that allows to fill the holes in the currently selected mesh.
As shown in the video, drag the bar to choose the size of the holes that need to be filled. The holes contour will turn red when they are selected. Click apply to accept and fill the selected holes.
Smooth
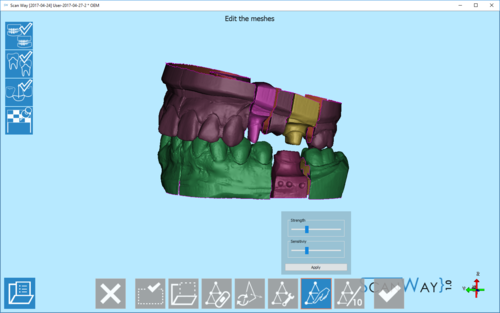
This tool smooths the whole surface of the mesh, compensating its irregularities, if there are any.
This tool applies two parameters:
- Strength
How much the tool can change the object surface. The higher the value the more the mesh is smoothed and sharpened.
- Sensitivity
How many parts of the surface will be identified as 'Details' (margins, edges). The detail parts will be sharpened, but not smoothed.
Decimate
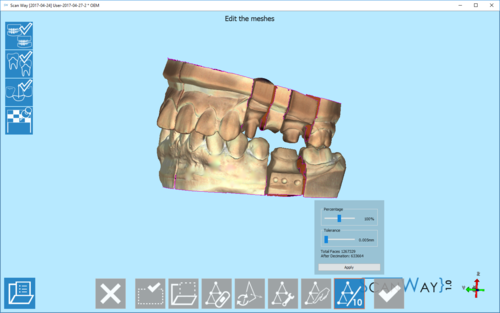
This tool reduces the number of triangles in a mesh, to save more space, trying to preserve as much detail as possible.
It is possible to insert a percentage of triangles to be kept (For example 50% to halve the mesh size).
It is also possible to establish a tolerance value. If the tolerance is enabled, the software will stop the decimation when this would modify the mesh more than the tolerance parameter.
On the bottom of the dialog appears the initial number of triangles (or Faces) and the number of triangles after decimation.
Just click on Apply to see the result.
