Difference between revisions of "Edit/ja"
(Created page with "===アクション===") |
(Created page with ";{{List button|cutSelAction.png}} 選択領域の削除 (DEL) : 現在選択されているデータを削除します。 ;{{List button|cropSelAction.png}} 選択領域のト...") |
||
| Line 33: | Line 33: | ||
これらのアクションでは、選択した情報を編集できます。以下のアクションを利用できます。 | これらのアクションでは、選択した情報を編集できます。以下のアクションを利用できます。 | ||
| − | ;{{List button|cutSelAction.png}} | + | ;{{List button|cutSelAction.png}} 選択領域の削除 (DEL) : 現在選択されているデータを削除します。 |
| − | ;{{List button|cropSelAction.png}} | + | ;{{List button|cropSelAction.png}} 選択領域のトリミング ({{Inline button|Key_ctrl.png}} + K) : 選択されたデータのみを残し、残りのデータを削除します。 |
| − | ;{{List button|invertSelAction.png}} | + | ;{{List button|invertSelAction.png}} 選択領域の反転 ({{Inline button|Key_ctrl.png}} + I) : 選択されていないデータをすべて選択し、選択されているデータの選択を解除します。 |
| − | ;{{List button|clearSelAction.png}} | + | ;{{List button|clearSelAction.png}} 選択のクリア ({{Inline button|Key_ctrl.png}} + C) : すべてのデータの選択を解除します。 |
===Cut Base=== | ===Cut Base=== | ||
Revision as of 08:33, 22 September 2017
Contents
構造
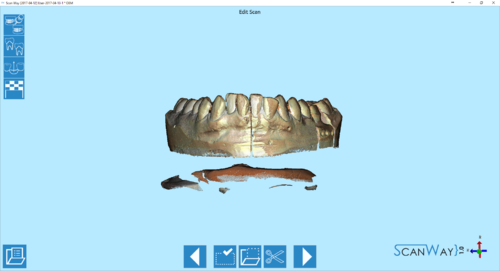
各スキャン手順を完了すると、咬合器の場合を除き、ウィザードインターフェースで画像編集ステップが表示されます。このステップでは、下部のツールバーでツールやアクションを選択できます。
ほかに、マーカーやダイを識別する編集ステップもあります(マルチダイではなくカスタムステップでスキャンする場合)。
Edit Toolbar
 戻る
戻る- 前のステップに戻ります。このアイコンは、最初のスキャンステップでは無効になっています。
 選択ツール
選択ツール- 選択ツールパネルを開きます。このパネルでは、画像の一部分を選択する方法を選択できます。利用可能なツールについては、後続のセクションで説明します。
 選択アクション
- アクション選択パネルを開きます。このパネルでは、画像で選択した部分でどのような操作を実行するか選択できます。利用可能なアクションについては、後続のセクションで説明します。
 ベースのカット
- オブジェクトのベースを水平にカットします。このツールについては、後続のセクションで説明します。
 次へ
次へ- プロジェクト内の次のステップに進みます。このアイコンは、実行中のステップが完了している、またはスキップできる場合に利用できます。
選択ツール
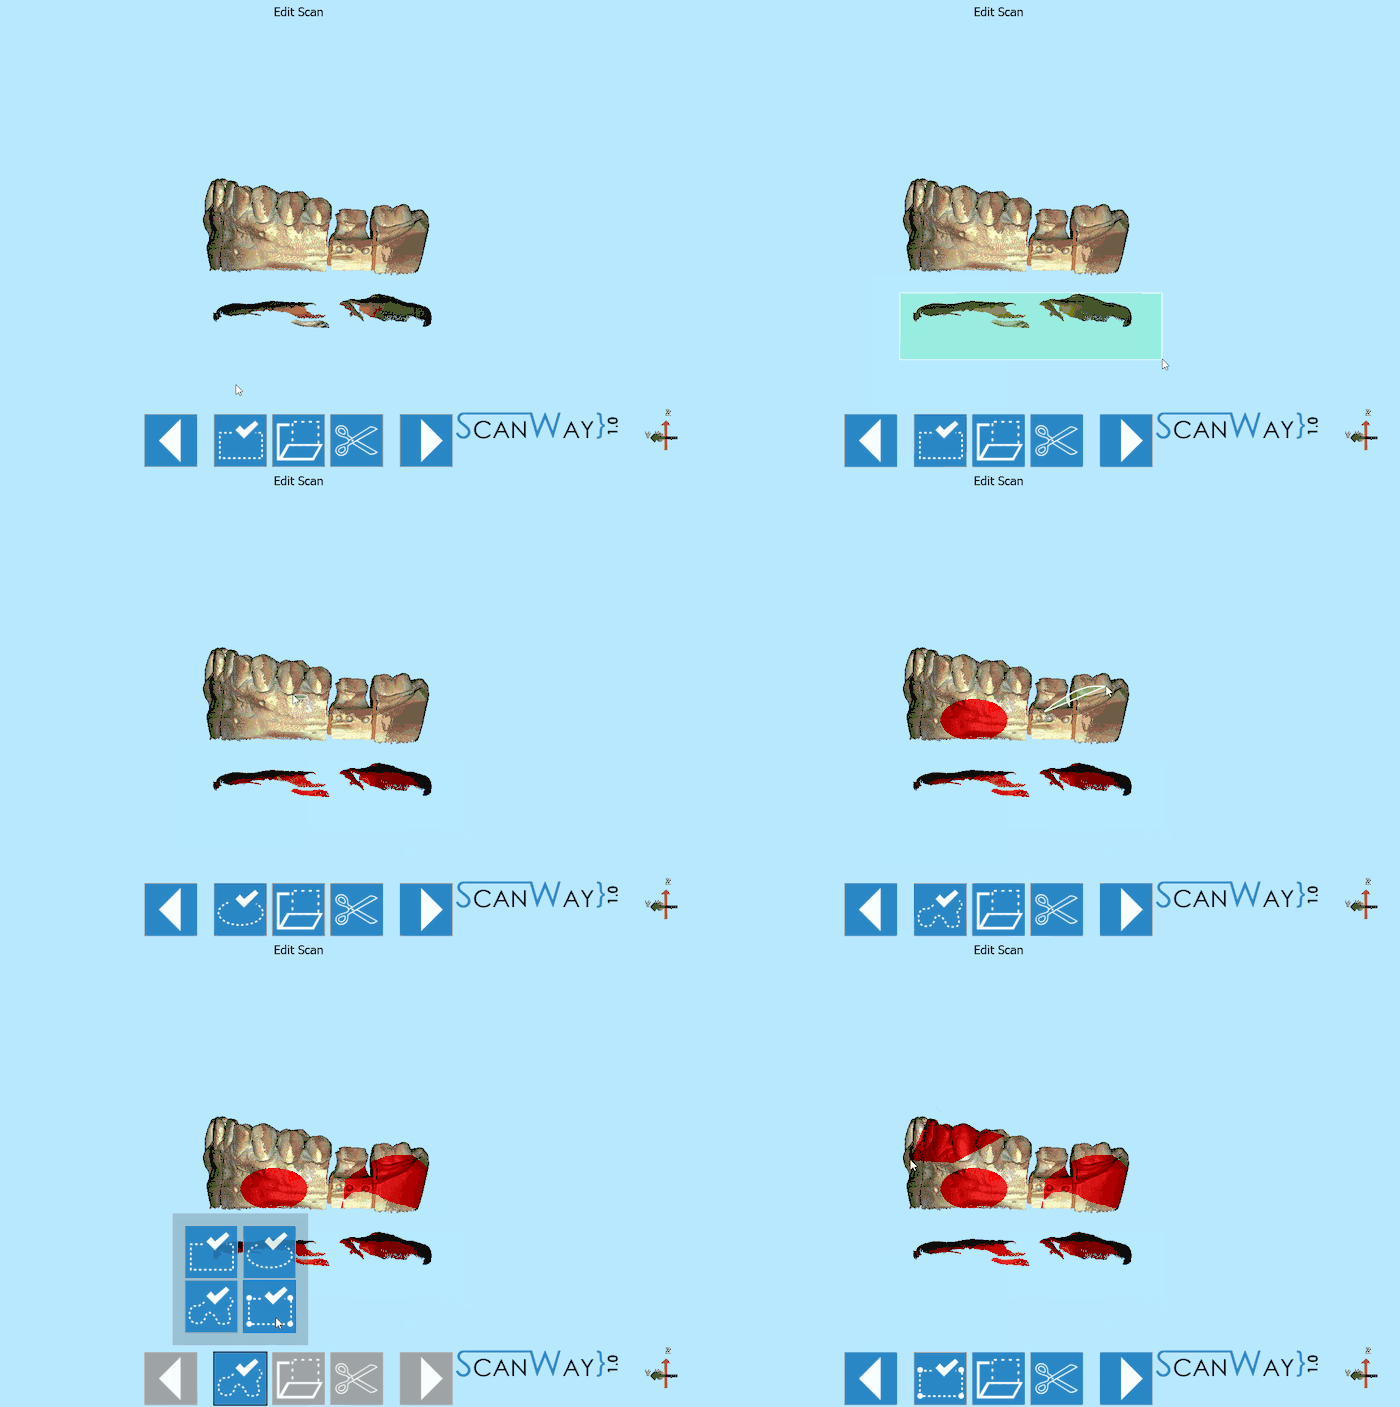
上記の画像にある通り、これらのツールでは画像の一部を選択して、オブジェクトを編集できます。4つのツールを利用できます。
 矩形選択
矩形選択- クリックした点から開始して、マウスを動かす方向に矩形を描きます。左マウスボタンを放すと、選択が決定されます。
 楕円形選択
楕円形選択- クリックした点を中心として、マウスを雨後各方法に広がる楕円形を描きます。左マウスボタンを放すと、選択が決定されます。
 フリークローズライン選択
- 左マウスボタンをクリックしたまま線を描きます。左マウスボタンを放すと、線がクローズされて、その中の領域がすべて選択されます。
 多角形選択
多角形選択- 2つの点をクリックすると線となり、3つ目以降の点をクリックすると多角形が作成されます。ダブルクリックすると多角形がクローズされ、その中の領域がすべて選択されます。
アクション
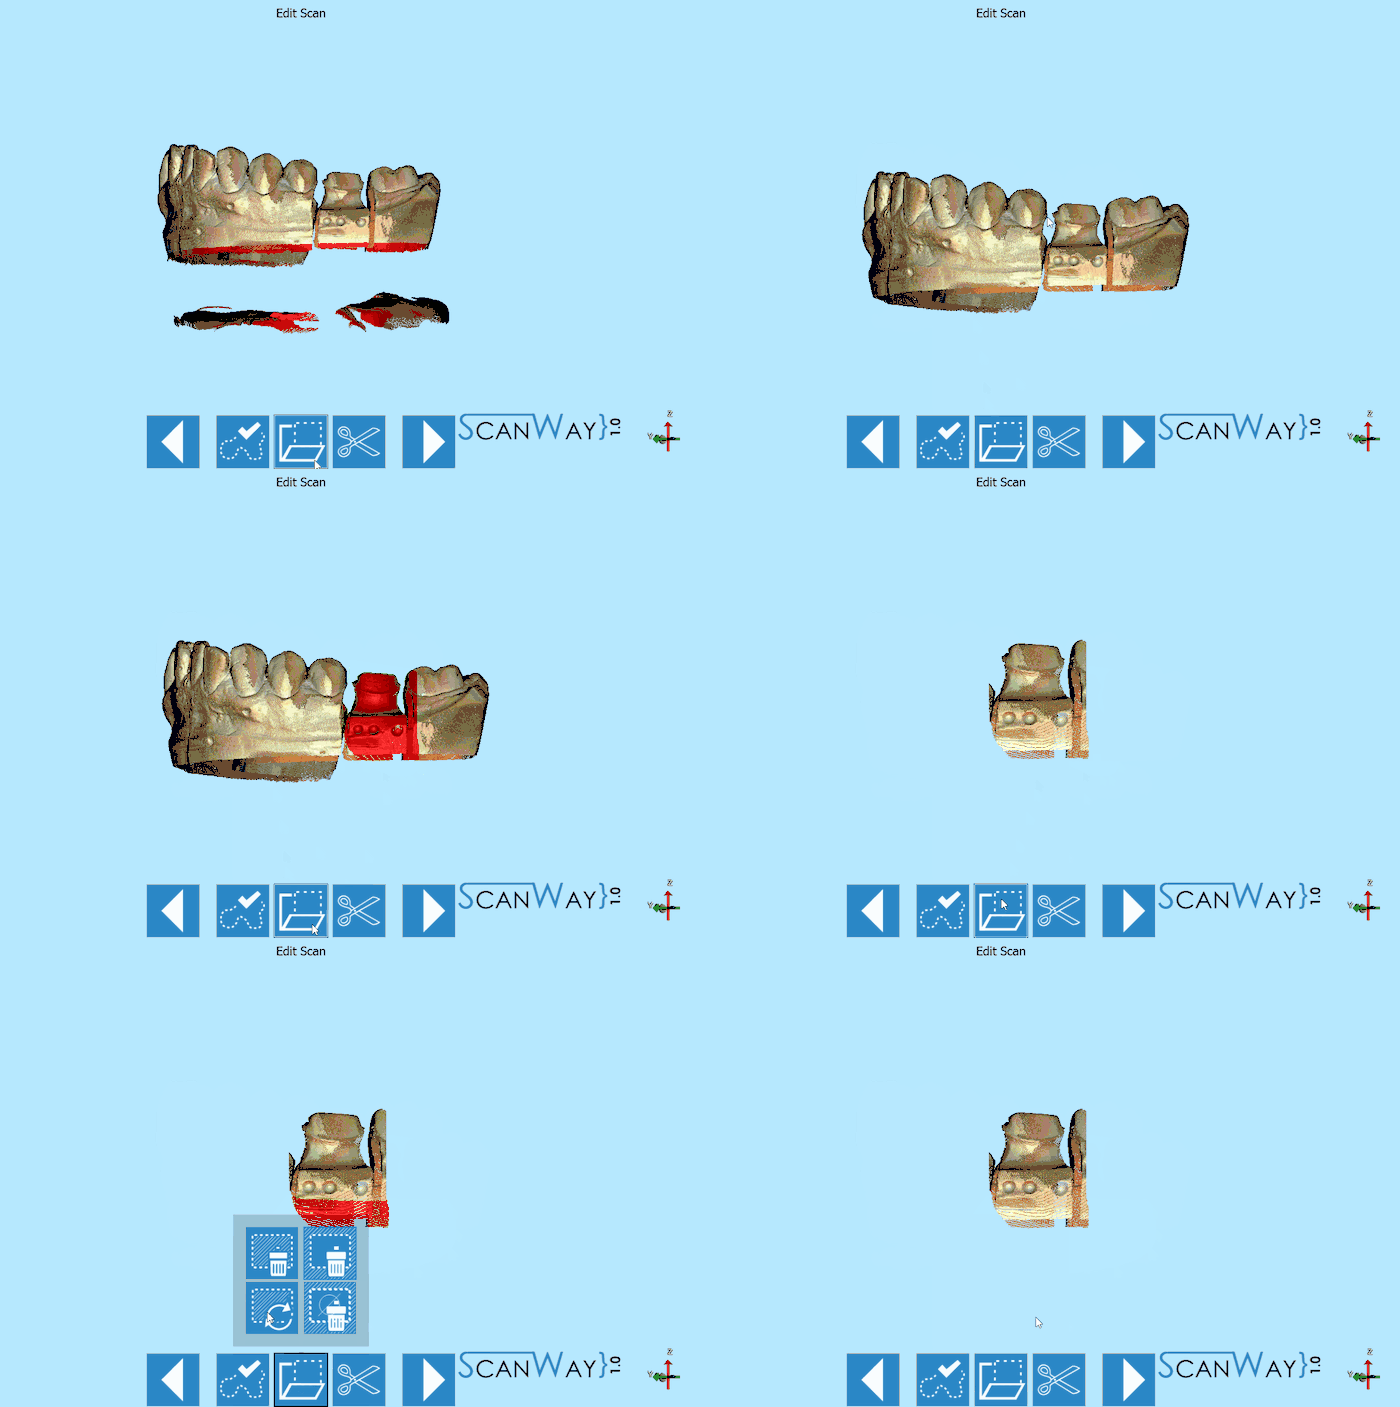
これらのアクションでは、選択した情報を編集できます。以下のアクションを利用できます。
 選択領域の削除 (DEL)
 - 現在選択されているデータを削除します。
 選択領域のトリミング (
 + K)
+ K) - 選択されたデータのみを残し、残りのデータを削除します。
 選択領域の反転 (
 + I)
+ I) - 選択されていないデータをすべて選択し、選択されているデータの選択を解除します。
 選択のクリア (
 + C)
+ C) - すべてのデータの選択を解除します。
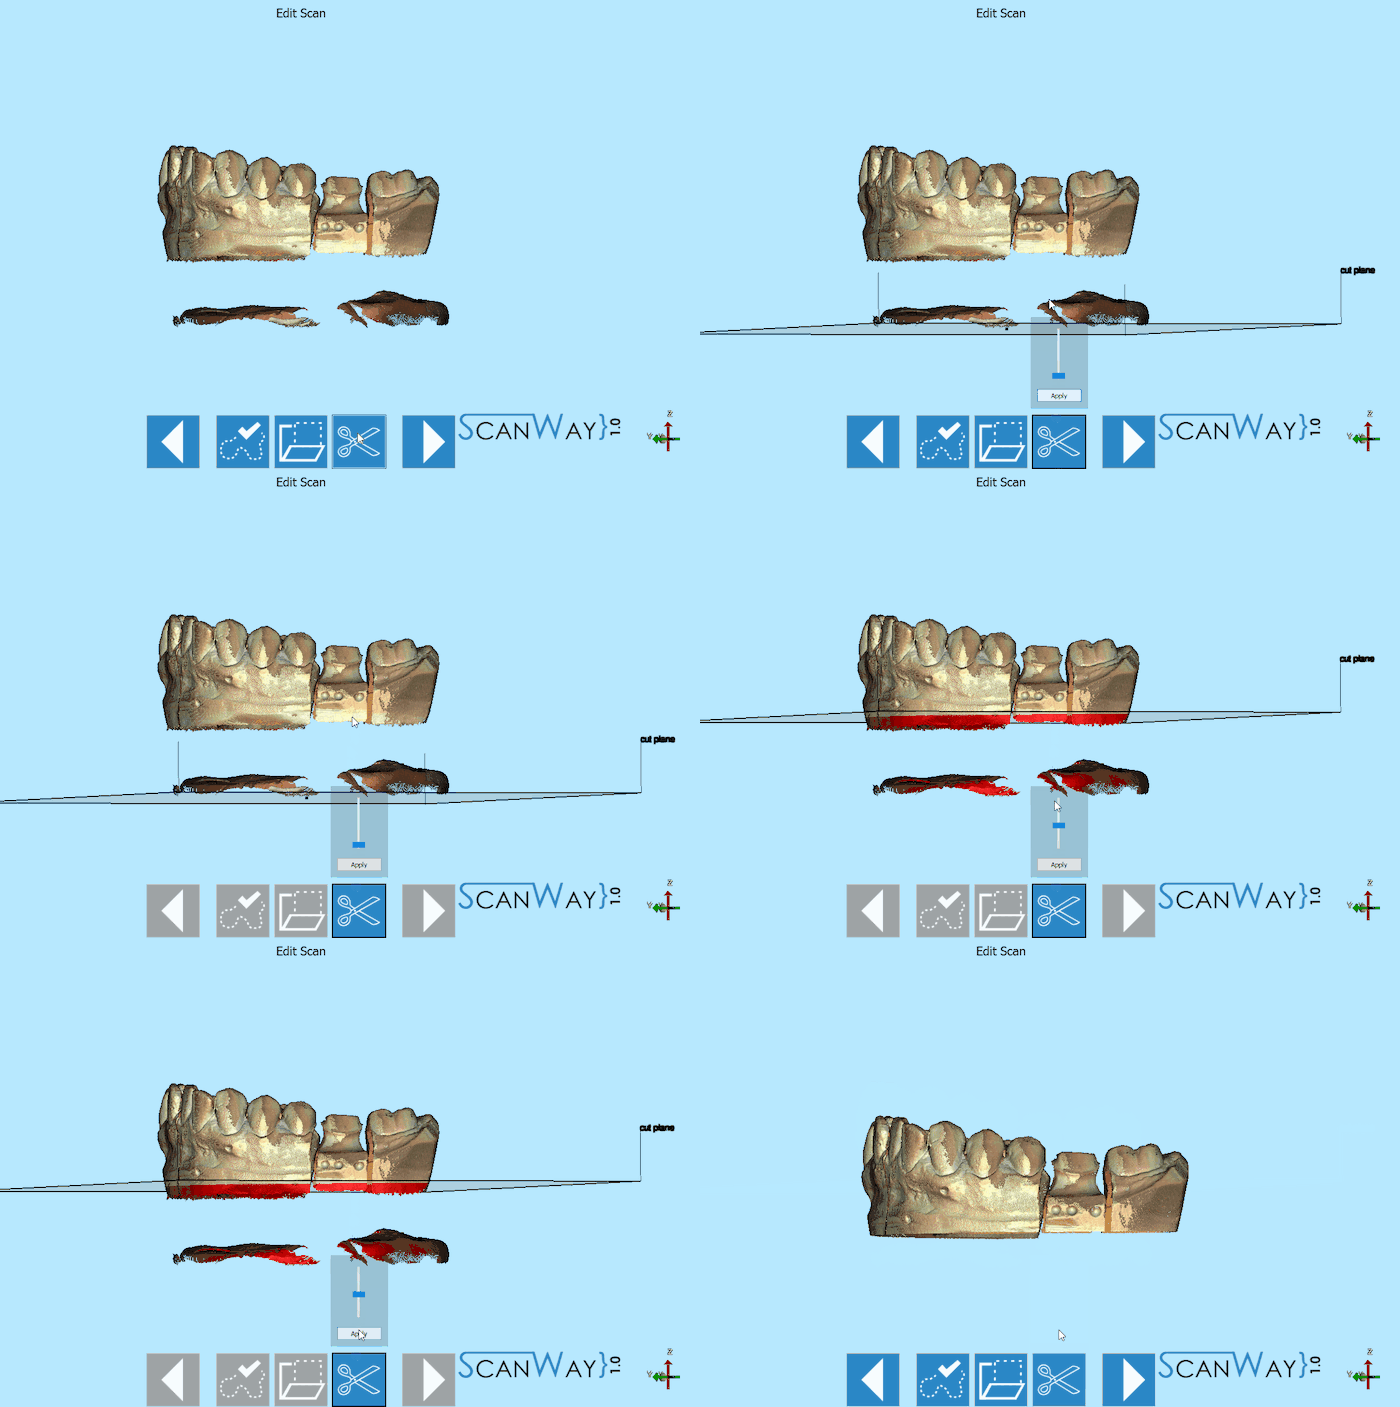
Cut Base
To use the Base Cut tool, click on the ![]() button then, either click on the model or drag the cursor to determine the height of the cut. Click Apply to accept the changes. Here below an explanatory video.
button then, either click on the model or drag the cursor to determine the height of the cut. Click Apply to accept the changes. Here below an explanatory video.
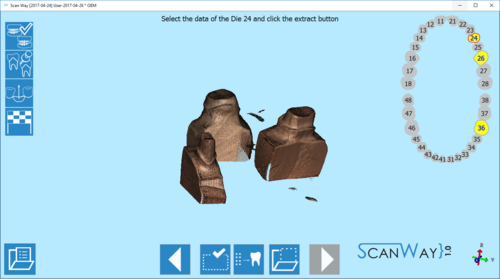
Dies identification
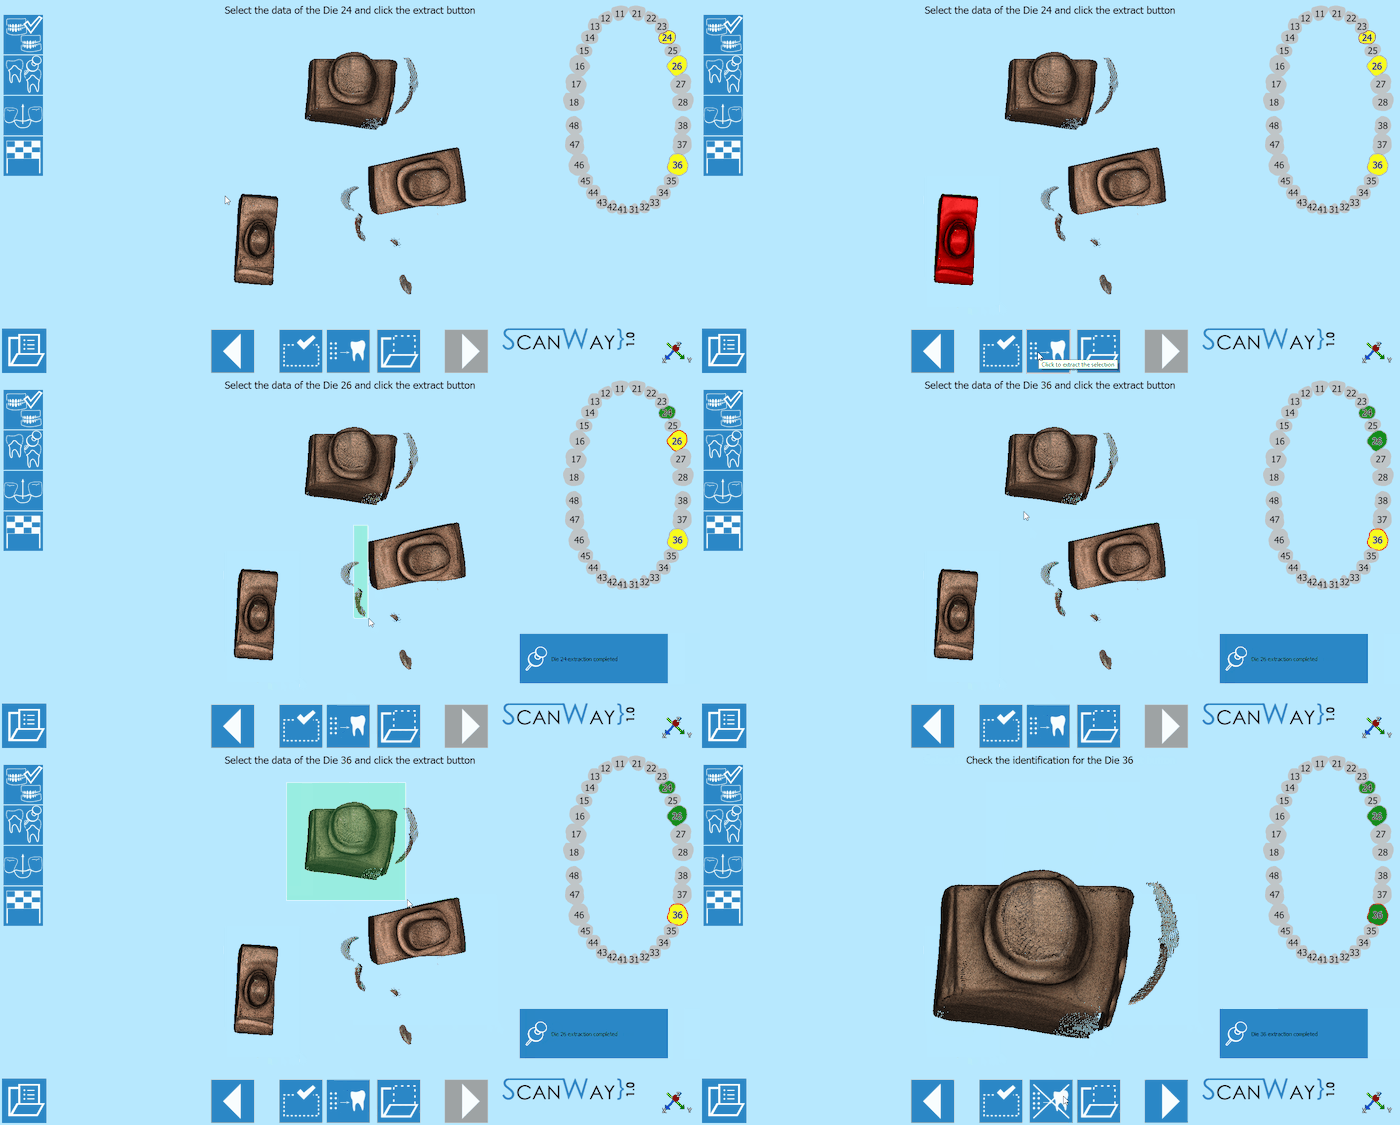
When scanning dies using the custom setup, as shown in the Scan Interface page, the dies need to be identified.
The interface shows a specific main toolbar, a teeth graphic on the right showing the elements that need to be identified. Before the identification the dies are marked in yellow, the item marked with the red border is the one that needs to be identified and separated from the others. The wizard will underline all the items in an established sequence, the user can select manually the item to be identified by left clicking on its number in the teeth graph.
The main toolbar offers these tools:
 Previous
- Goes back to the previous step. Icon not active during the first scanning step.
 Selection Tools
- Opens the selection tool panel in which it is possible to choose how to select part of the image. The available tools will be described later in this page.
 Extraction
- Extracts the image of the selected die from the general scan, thus identifying and separating it from the others.
 Select Action
- Opens the actions panel in which it is possible to choose what to do with the selected part of the image. The available actions will be described later in this page.
 Next
Next- Goes forward one step in the project. This option is not available untill all the items have been identified and separated.
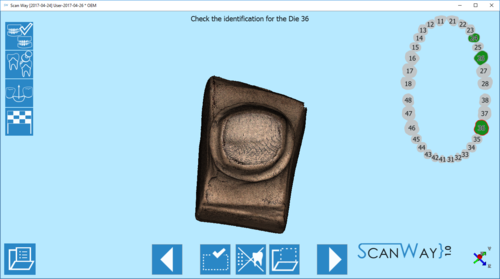
Once the items have been identified and separated, they are marked in green in the graph. In case an error occurs during identification and two or more stumps get mixed up, it is possible to restart the identification by clicking on one of the ![]() icon.
icon.
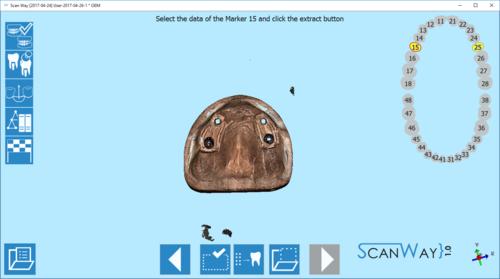
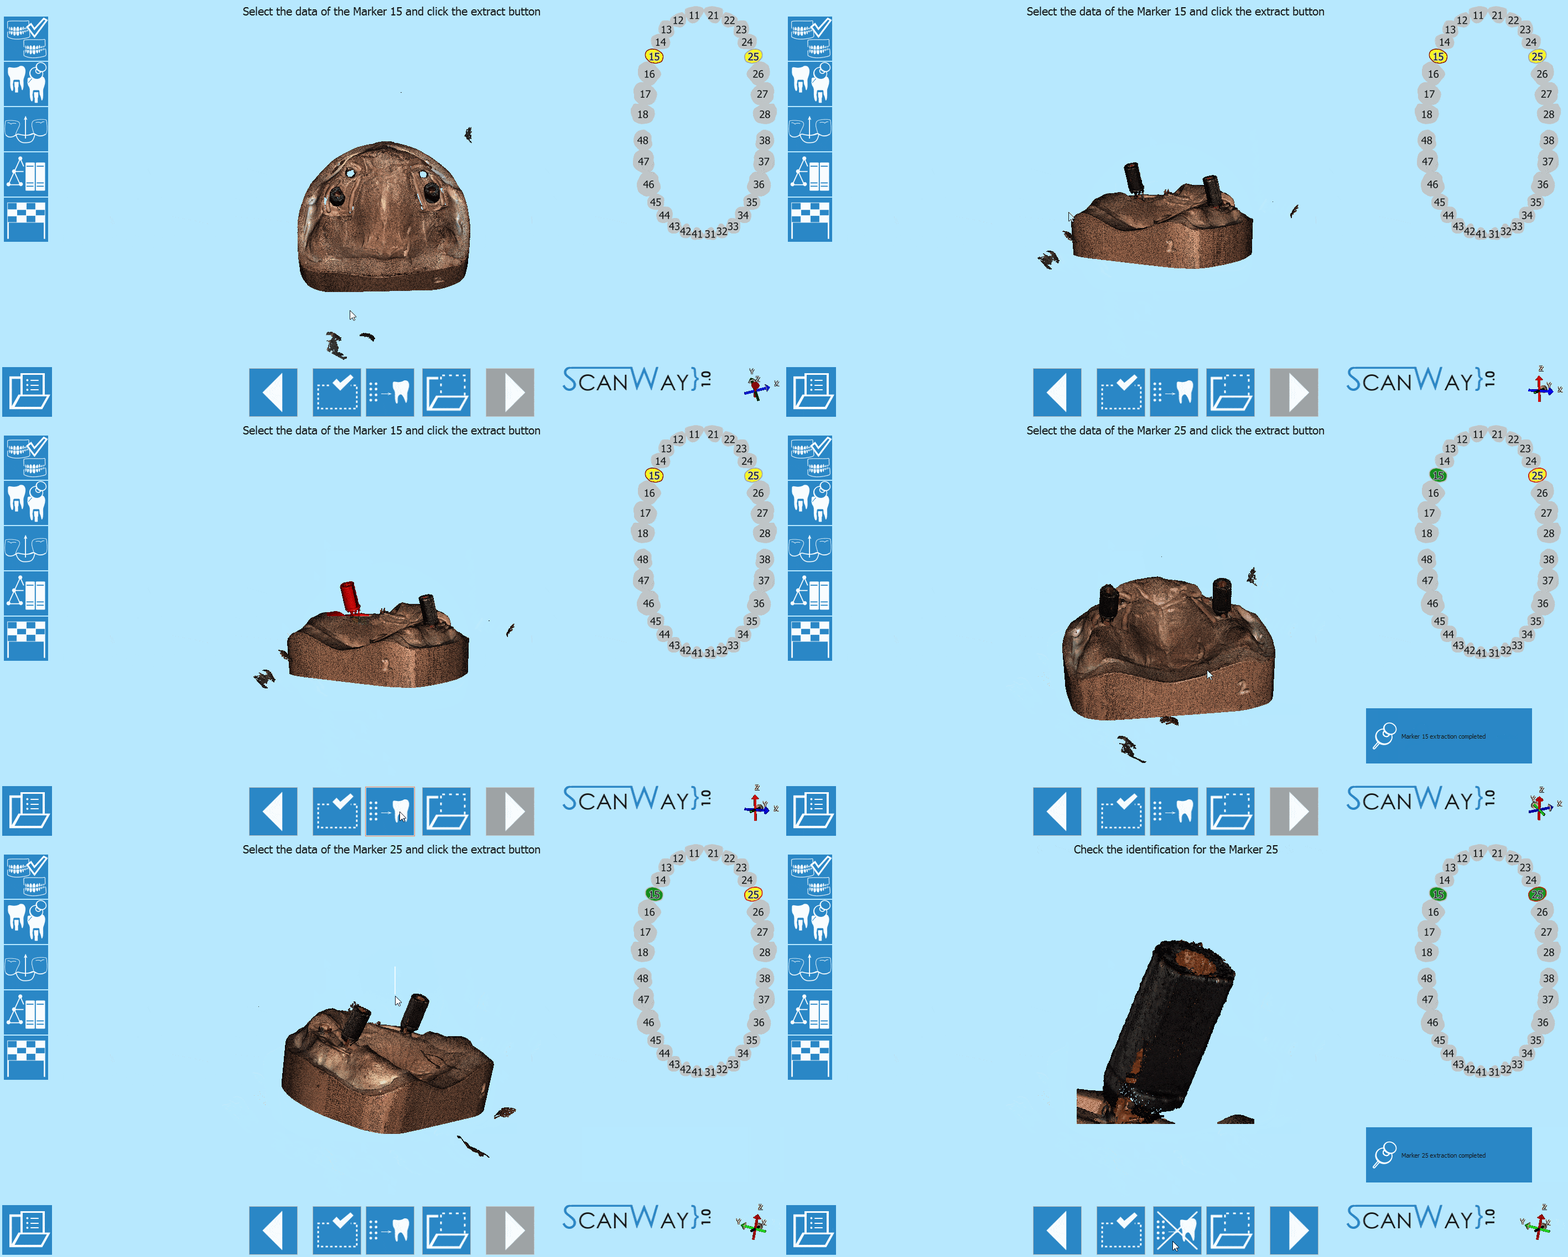
Marker identification
When scanning implant cases, the user needs to use markers as reference for the position of the implant. Once scanned, each marker needs to be identified and separated from the others.
The interface shows a specific main toolbar, a teeth graphic on the right showing the elements that need to be identified. Before the identification the teeth are marked in yellow, the item marked with the red boder is the one that needs to be identified and separated from the others. The wizard will underline all the items in an established sequence, the user can select manually the item to be identified by left clicking on its number in the teeth graph.
The main toolbar offers these tools:
 Previous
- Goes back to the previous step. Icon not active during the first scanning step.
 Selection Tools
- Opens the selection tool panel in which it is possible to choose how to select part of the image. The available tools will be described later in this page.
 Extraction
- Extracts the image of the selected die from the general scan, thus identifying and separating it from the others.
 Select Action
- Opens the actions panel in which it is possible to choose what to do with the selected part of the image. The available actions will be described later in this page.
 Next
Next- Goes forward one step in the project. This option is not available untill all the items have been identified an separated.
Once the items have been identified and separated, they are marked in green in the graph. In case an error occurs during identification and two or more markers get mixed up, it is possible to restart the identification by clicking on one of the ![]() icon.
icon.
