Full Jaw Project
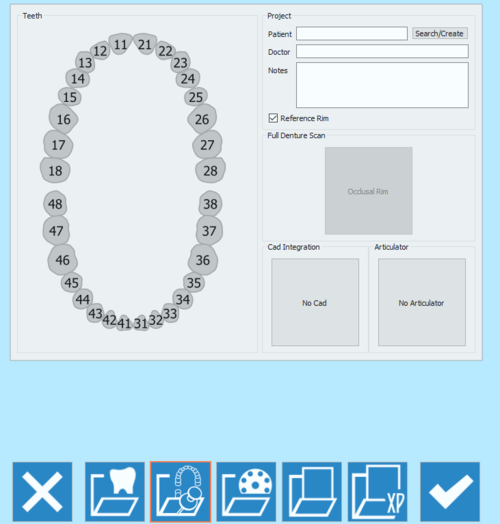
プロジェクト定義ページの2つ目のアイコンを押すと、全顎プロジェクトページが開きます。
このページでは、歯列矯正の症例、可搬式フレームワークの症例、またはその他の対顎のある/ない全顎のスキャンが必要な症例で使用する、全顎スキャンプロジェクトを作成できます。
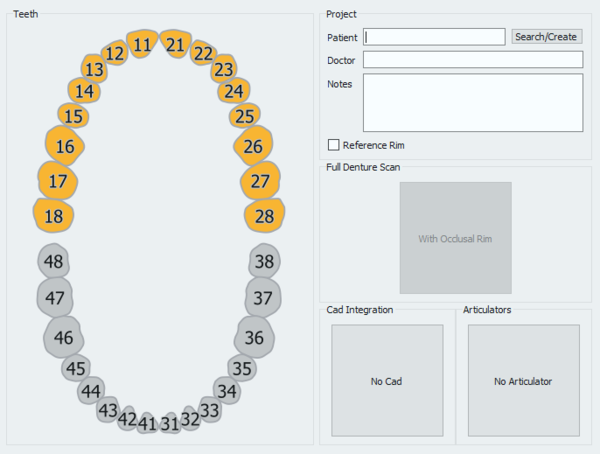
プロジェクト定義ページには5つのセクションがあります。
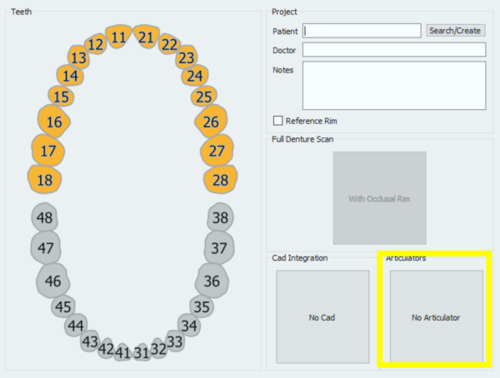
歯の定義
最初のteeth(歯)のセクションでは、任意の歯をクリックして全顎を選択または選択解除します。
プロジェクト
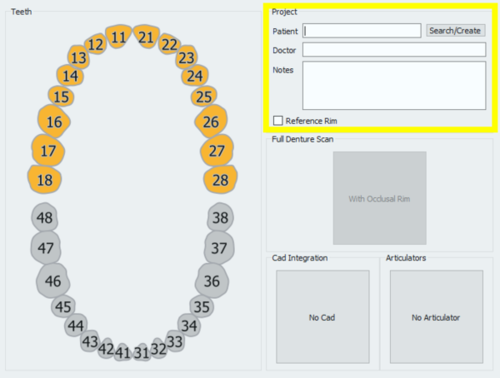
Project(プロジェクト)セクションでは、一般情報を入力できます。
- 患者名
- ドクター名(オプション)
- メモ(オプション)
- リファレンスリムの使用有無を決めるチェックボックス
Doctor(ドクター名)およびNotes(メモ)には自由に入力できます。Patient(患者名)では、以下の選択肢があります。
- 任意の内容を入力する
- Search/Create(検索/作成)ボタンをクリックして新規プロフィールを作成する
- Search/Create(検索/作成)ボタンをクリックして既存のプロフィールをデータベースから検索する
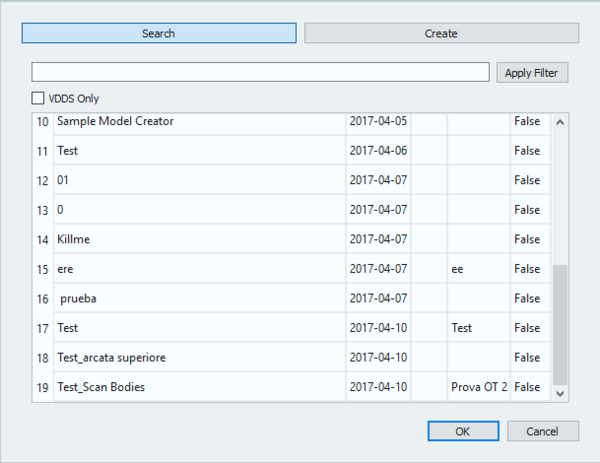
Search/Create(検索/作成)ボタンをクリックすると、以下のウインドウが開きます。
このウインドウでは、プロジェクトデータベースから既存の患者を検索できます。フィルターを適用することができ、VDDSプロトコルを使用している場合は、検索対象を特定のデータベースに制限することもできます。
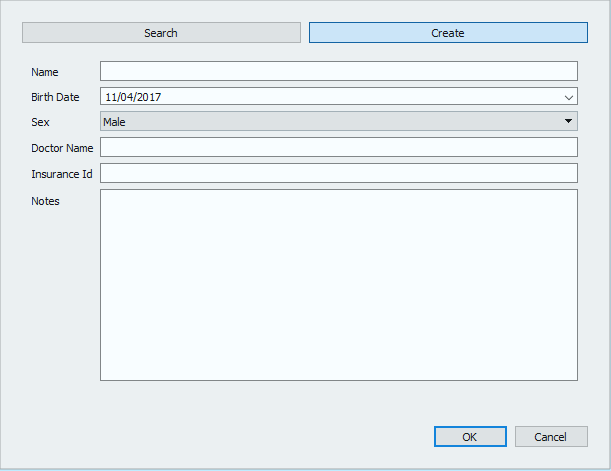
Create(作成)ボタンをクリックすると、以下のウインドウが開きます。
患者作成パネルでは、以下のような患者と治療に関する一般情報を入力できます。
- 患者名
- 患者の生年月日
- 患者の性別
- ドクター名
- 患者の保険情報(該当する場合)
- メモ
Once all the information has been filled in, select Ok to accept the data or Cancel to discard the changes and go back to the project definition page.
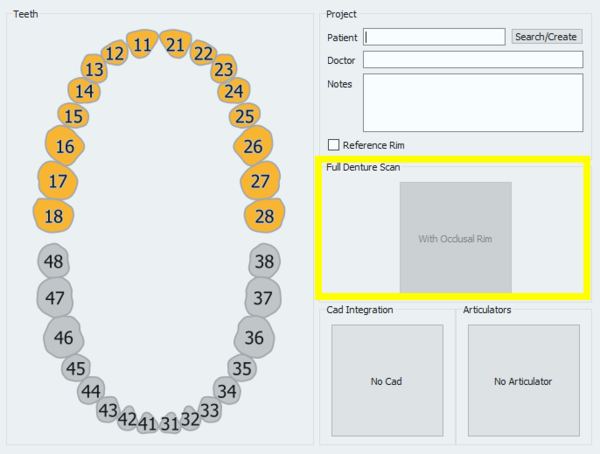
Full Denture Scan
In this section it is possible to signal the software that the occlusal rim needs to be scanned for a full denture project.
Just click on the With Occlusal Rim box to activate this option.
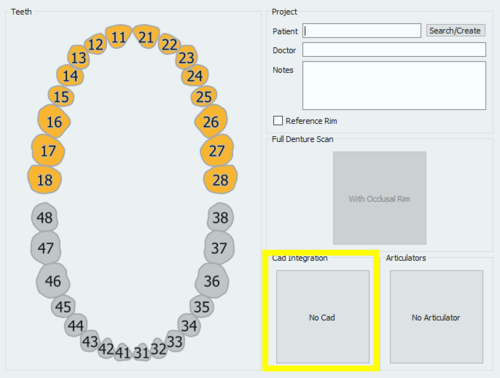
CAD Integration
When the project is started directly from Exocad, the STL files produced in the scanning process will be transmitted to Exocad in just one click. On the other end, if the project gets created in the scanning software, the automatic export to CAD will not be configured, unless it is selected in this section.
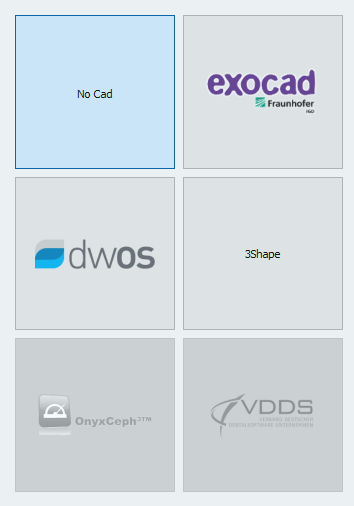
By clicking on the No CAD box the CAD selection window opens
and it allows to choose one of the software integrated with our scanning system for automatic trasmission of the STL information.
- Exocad
- VDDS protocol (for orthodontics)
- Onyx Ceph (for orthodontics)
If No Cad is selected, the software will then ask the user to define an export path for the STL files.
Articulators
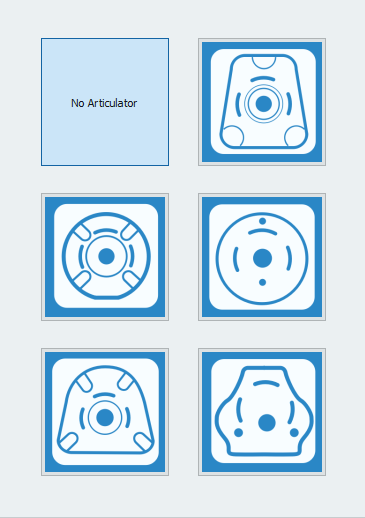
The last section allows to select an articulator to use the Dynamic Articulation Module.
If the Dynamic Articulation module is not active on the license this section will not be available
Remember that it is always possible to scan any kind of articulator, this section is only to be used if you want to scan with the dynamic articulation module and pass the occlusion position in the Virtual Articulator of Exocad.
The Articulators available in Exocad and therefore in our software are:
 Artex
Artex - to scan the Artex Articulator and to use the same in Exocad's Virtual Articulator
 Sam/ Adesso
 - to scan the Sam Articulator or the Adesso splitcast and to use the same in Exocad's Virtual Articulator
 Protar- Kavo
 - to scan the Kavo Articulator and to use the same in Exocad's Virtual Articulator
 A7 - Bioart
 - to scan the Bioart Articulator and to use the same in Exocad's Virtual Articulator
 Denar by Whipmix
 - to scan the Denar Articulator and to use the same in Exocad's Virtual Articulator
To start the project accept the definition with the ![]() button.
button.
To find specific information on how to scan in Free / Expert mode, go to the Full Jaw Project example page.
