Difference between revisions of "Pc Connection/it"
(Created page with "== Connettere lo Scanner ==") |
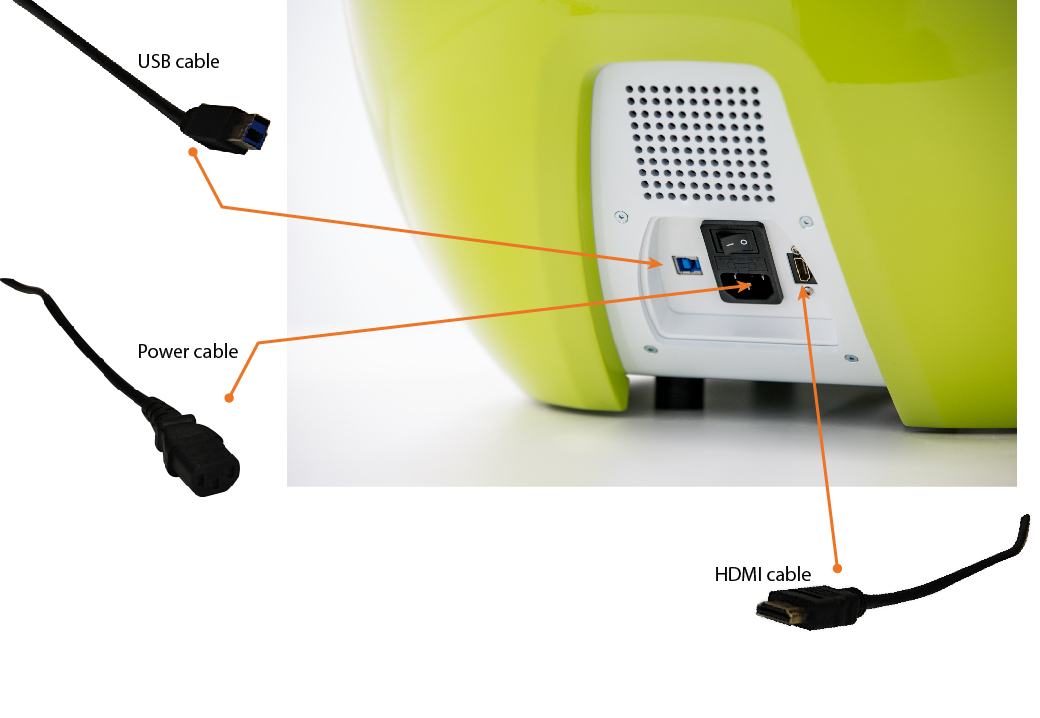
(Created page with "Come mostrato nelle immagini seguenti, nella parte posteriore dello scanner ci sono, da sinistra a destra, la porta USB, l'interruttore della corrente, la presa di corrente e...") |
||
| Line 3: | Line 3: | ||
== Connettere lo Scanner == | == Connettere lo Scanner == | ||
| − | + | Come mostrato nelle immagini seguenti, nella parte posteriore dello scanner ci sono, da sinistra a destra, la porta USB, l'interruttore della corrente, la presa di corrente e la porta HDMI: | |
| − | |||
[[File:Connections.jpg]] | [[File:Connections.jpg]] | ||
Revision as of 13:57, 11 May 2017
Connettere lo Scanner
Come mostrato nelle immagini seguenti, nella parte posteriore dello scanner ci sono, da sinistra a destra, la porta USB, l'interruttore della corrente, la presa di corrente e la porta HDMI:
The power cable is an average 230V cable and must be connected to a power line that
can hold such voltage in all phases of work and that is protected from overloads and
short-circuits.
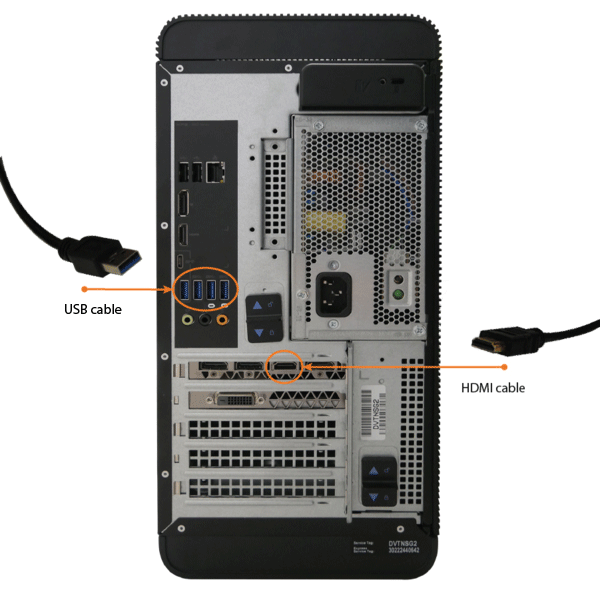
The HDMI cable must be connected to the Computer, in the Graphic Card's HDMI port. The location of this port in the computer may vary according to the Computer's brand and model.
This is the position of the HDMI port in the computers we provide:
The Usb cable must be connected directly to the Computer's Motherboard to a USB 3.0 port. The Usb ports are usually color-coded, and generally the Usb 3.0 ports are marked in blue.


