Difference between revisions of "Options/pt-br"
(Created page with "Opções") |
(No difference)
|
Revision as of 07:30, 23 June 2017
Interaction
The options are divided in two pages: General options and CAD Options. The toolbar on the bottom part of the window allows to navigate the options page.
 Exit
Exit- Exits the Option section.
 General Options
- Opens the general options panel. This section is shown directly after opening the options.
 CAD System Options
- Opens the options area dedicated to the connection of a CAD System to the scanning software.
 Accept
- Accepts the changes and closes the option section.
General Options
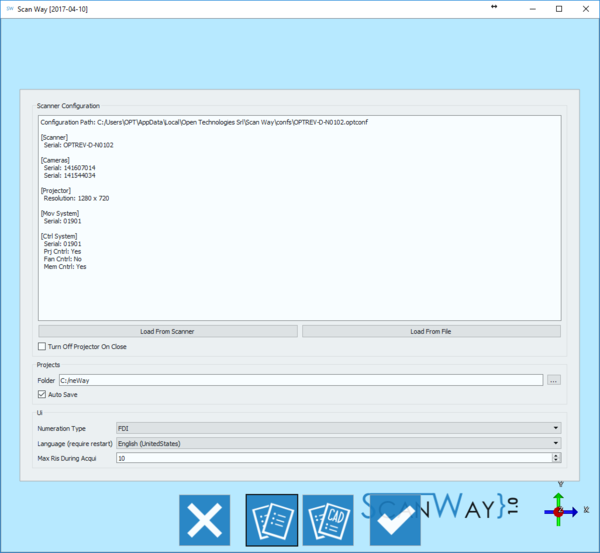
This options section provides minimum information on the scanner connection, projects and interface.
Scanner Configuration
This section allows to configure the connection to the scanner in use. ScanWay is infact configured to work with many scanners, however only one scanner at a time can be active. The current active scanner is shown in the Configuration box. The Configuration box provides information on the location of the configuration file, on the scanner's serial number and on the internal components on the connected machine.
There are two ways to add a scanner configuration:
- Load from Scanner
- downloads the configuration file from the scanner's memory.
- Load from file
- opens an Open File Dialog to find and load a configuration file from the disk.
The last available option in this section regards the projector's behaviour:
- Turn Off Projector on Close
- if selected, switches off the projector when the software gets closed.
Project
In this section can be configured the path for saving the projects:
- Dental Projects
- the path where the software saves all the projects created by the user
- Auto Save
- if this option is checked, the software will automatically save the project after every main step (Acquisition, Alignment, Mesh Generation)
UI
This section handles minor settings of the user interface:
- Numeration Type
- allows to choose whether to use the FDI numeration or the Universal Tooth Numbering system, most commonly used in the United States.
- Language
- allows to choose the language for the software. After selecting a new language the software needs to be restarted for the change to take effect.
CAD Options
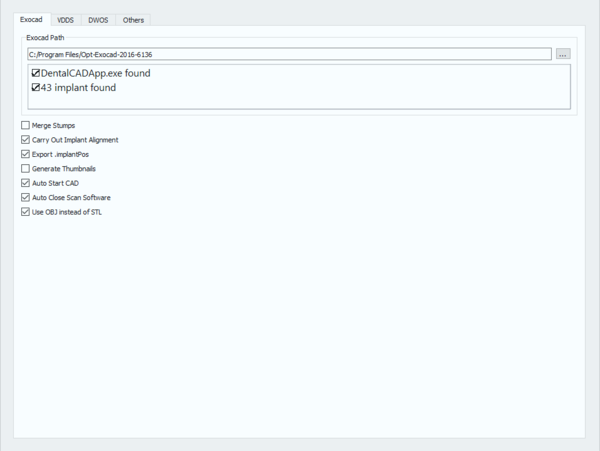
This option panel allows to configure the software to work with the CAD system of choice. Open Technologies Resellers can configure the scanner to export in many ways, for the final user however, only the Exocad options are available.
- Exocad Path
- General folder of the Exocad CAD software, if correctly set it allows to automatically launch Exocad after exporting the data.
- Merge stumps
- If this option is enabled the software will merge all the dies and the healthy parts and export only one file for the entire jaw; if disabled the software will export one file for every die and one file for the healthy parts of the jaw.
- Export .implantPos
- If this option is enabled the software will export a special "implantPosition" file with the information about the alignment of an implant marker that can be imported by Exocad.
- Generate Thumbnails
- Chech this box to save .png images of the articulator.
- Auto Start CAD
- Check this box to start the CAD automatically after exporting the data.
- Auto Close Scan Software
- Check this box to automatically close the scan software after exporting the data.
- Use OBJ instead of STL
- If this box is checked, the file exported to Exocad will be in OBJ format and not in STL. Exocad will thus show the actual color of the scanned object and not a default color representation.


