Difference between revisions of "NewPrjFree/pt-br"
(Created page with "* Nome do paciente * Nome do médico (opcional) * Notas (Opcional) * Uma caixa de seleção para decidir se deve ou não usar a Margem de Referência") |
(Created page with "É possível escrever livremente nas caixas do Médico e de Notas. Quanto ao Paciente, é possível:") |
||
| Line 24: | Line 24: | ||
* Uma caixa de seleção para decidir se deve ou não usar a Margem de Referência | * Uma caixa de seleção para decidir se deve ou não usar a Margem de Referência | ||
| − | + | É possível escrever livremente nas caixas do Médico e de Notas. Quanto ao Paciente, é possível: | |
*Write freely in the box | *Write freely in the box | ||
Revision as of 15:16, 23 June 2017
O quarto ícone da página de definição do projeto abre a página de projeto livre.
O Projeto Livre, ao contrário de todos os outros projetos, não é guiado por um assistente. O usuário, portanto, pode escanear qualquer elemento a qualquer momento sem qualquer restrição. Isso significa também que o usuário terá que decidir:
- Qual perfil de escaneamento a ser usado para os elementos a serem escaneados,
- Em que ordem escanear os elementos,
- Como alinhar os elementos e a qual referência,
- Como fazer o mesh e exportar os itens digitalizados.
Para usuários experientes, esse tipo de projeto pode ser um real poupador em tempo, enquanto que para iniciantes isso pode levar a uma perda de tempo desnecessária.
Como o projeto não tem estrutura inicial, na fase de definição quase nada precisa ser configurado.
Praticamente, o usuário só precisa inserir algumas " Informações Gerais ':
- Nome do paciente
- Nome do médico (opcional)
- Notas (Opcional)
- Uma caixa de seleção para decidir se deve ou não usar a Margem de Referência
É possível escrever livremente nas caixas do Médico e de Notas. Quanto ao Paciente, é possível:
- Write freely in the box
- Create a new profile clicking on the Search/Create button
- Search the database for an already existing profile clicking on the Search/Create button
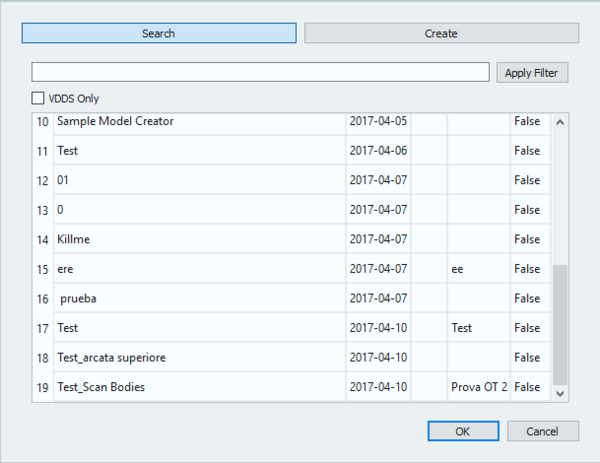
The Search/Create Button opens the following window:
This window allows to search the project database for already existing patients. A filter can be applied and, for those who use VDDS protocols, the research can be restricted to that specific database.
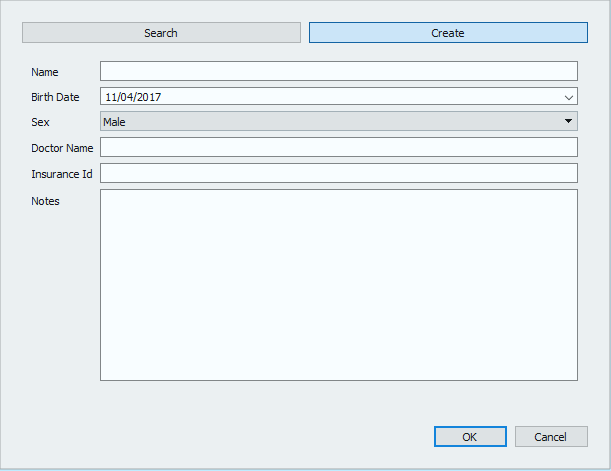
By clicking on the Create button, the following window opens:
The patient creation panel allows to input general information regarding the patient and the treatment, such as:
- The patient's name
- The patient's birth date
- The patient's sex
- The doctor's name
- The patient's insurance ID, where applies
- Some notes
Once all the information has been filled in, select Ok to accept the data or Cancel to discard the changes and go back to the project definition page.
To start the project accept the definition with the ![]() button.
button.
To find specific information on how to scan in Free / Expert mode, go to the Free Scanning Project example page.


