Alignment Interface
General Alignment
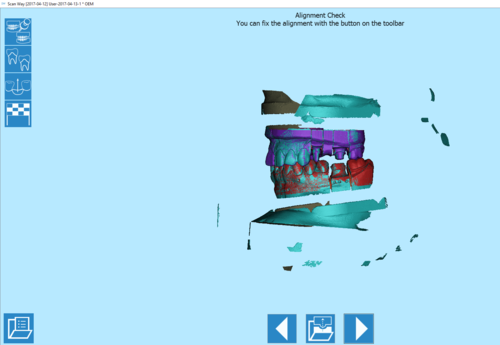
Alinierea este un pas intermediar care trece adesea neobservat, deoarece este aproape întotdeauna automat. Atunci când alinierea automată este reușită, utilizatorul va vedea doar o fereastră de verificare a alinierii.
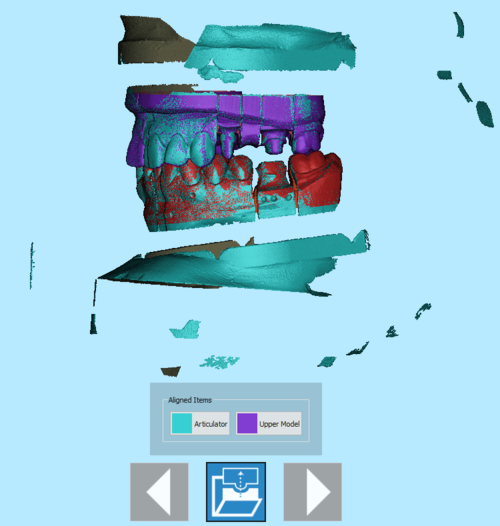
Fereastra de verificare a alinierii arată toate elementele aliniate în diferite culori și o anumită bara de instrumente:
 Înapoi
- Reveniți la pasul anterior. Pictograma nu este activă în timpul primului pas de scanare.
 Fix Alingment
- Afișează o listă a elementelor aliniate pentru a permite utilizatorului să repare una dintre ele, dacă este incorectă.
 Înainte
- Merge înainte cu un pas în proiect. Această opțiune nu este disponibilă până când toate elementele nu au fost identificate și separate.
Când faceți clic pe butonul ![]() , este afișată lista de elemente aliniate.
, este afișată lista de elemente aliniate.
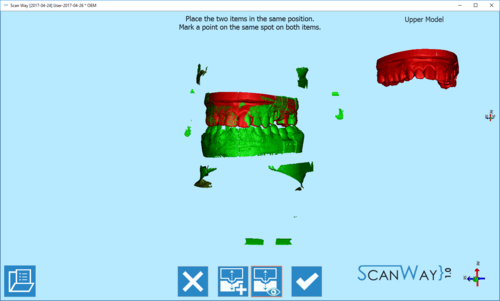
Dând clic pe unul dintre elementele aliniate, se deschide panoul de aliniere manuală pentru a permite utilizatorului să fixeze alinierea efectuată automat.
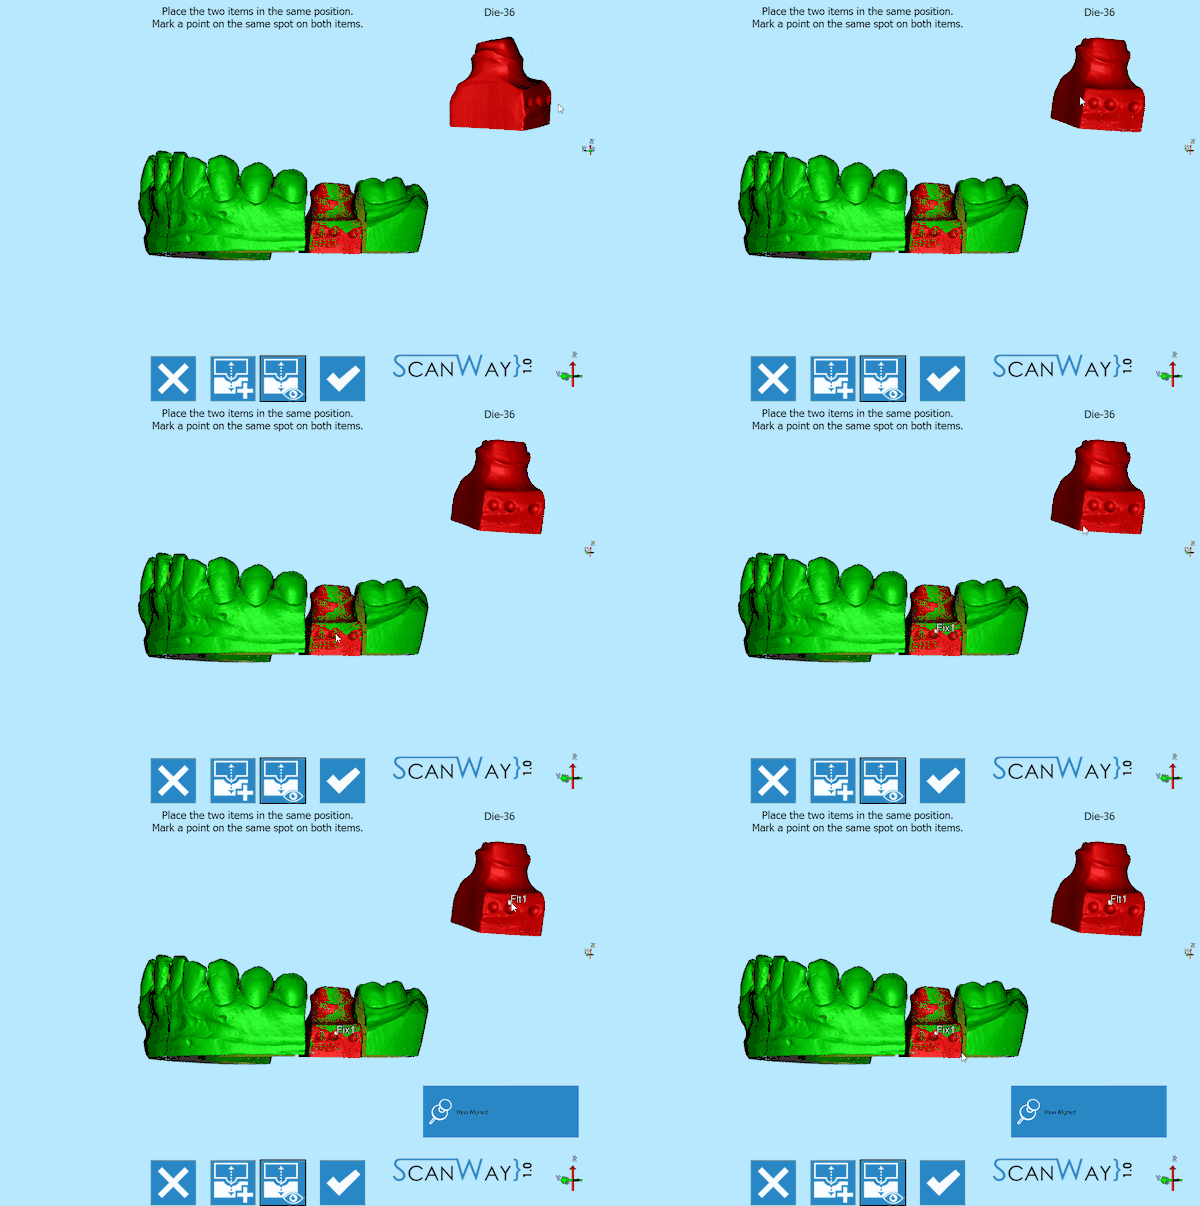
În pasul de aliniere manuală sunt afișate, în centrul ferestrei, elementul fix sau elementul de referință la care elementul detaliat va fi aliniat; în colțul din dreapta sus, elementul plutitor sau în mișcare care va corespunde referinței; o bară de instrumente specifică.
 Ieșire
- Ieșirea din secțiunea Opțiuni.
 Best Fit
- Corectează alinierea celor două imagini. Această acțiune este de obicei automată.
 Vizualizare Floating
- Afișează sau ascunde imaginea articolului plutitor / în mișcare.
 Accept
- Accepta modificarile si inchide sectiunea optiuni.
Pentru a realiza alinierea, puneți cele două imagini (fixe și în mișcare) în aceeași poziție și marcați un punct pe același punct al celor două elemente. Dacă este necesar, din cauza potrivirilor dificile sau a lipsei de informații, este posibil să plasați mai multe puncte pe imagini.
Acceptați sau anulați modificările pentru a continua proiectul.
Implant Markers
When acquiring the data for a project on implants, acquiring the implant itself is problematic. It's not like a stump or a piece of stone model. The implant connections/interfaces are normally small and metallic.
Moreover, the fitting has to be mechanically perfect, with no margin of error.
To solve this problem, the implant connection is not directly scanned but an Implant Marker or Scan Body is used instead. A Scan Body is a specific object, designed to be scanned, which fits exactly over the implant.
The scan of the implant marker itself is not enough: its resulting data will be used to compute the exact position of the implant interface. In order to carry out this operation, an Implant Library is needed .
The alignment to the implant library can be performed in the CAD software. However, using an implant library for Exocad's Platform, the user can perform this operation directly in the scanning software ScanWay, in order to get better results.
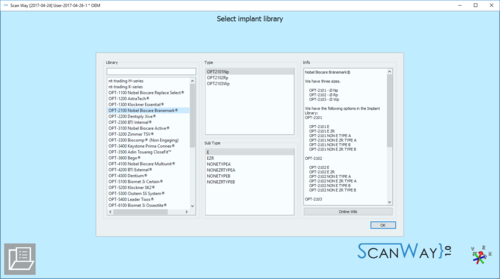
Library Selection
The implant library selection is automatically shown when all the items of the project have been acquired.
The Panel is divided in 4 Sections:
- Library
- For choosing the general connection and implant family, contains:
- A Filter box where it is possible to write part of the name of the needed implant. All the implants that match the name will be showed in the implant list
- An implant list with all the implants available in the current Implant Library
- Type and Sub Type
- For Choosing the diameter and type of connection. There can be many of these types, in our libraries for instance there are:
- Engaging Connections : the connection can not rotate on the implant, suggested for abutments or single restorations
- Not-Engaging Connections : the connection can rotate on the implant, suggested for bars and bridges
- For Zirconia : connections with specific shapes, suited for zirconia restorations
- Preview
- Shows the preview of the STL marker present in the library
- Info
- If the library is correctly configured to work with our software, in this section it is possible to have a small overview of the libraries with additional information on the availabe diameters and implant types.
All our libraries are provided with this feature and, being connected to this wiki, the Open in browser button opens the wiki on the implant list page.
To accept the implant selection click on Select, otherwise Cancel.
If the CAD design is launched using a wrong connection it will be necessary to restart all the design from the beginning
Marker Alignment
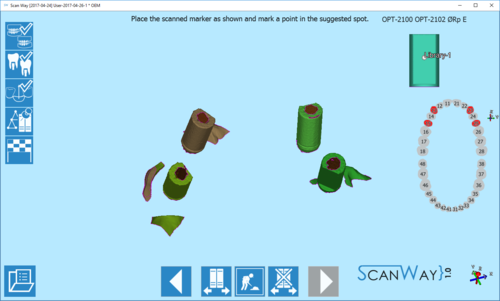
Once the library has been selected, the wizard shows the marker alignment step.
The interface shows all the acquired markers; an image of the STL of the library with a premarked point; a teeth graphic showing the elements that need to be aligned; a specific toolbar.
The toolbar offers this options:
 Previous
- Goes back to the previous step. Icon not active during the first scanning step.
 Change implant library
 - Allows to change implant library, for instance if in one case have been used different connections.
 Show model
 - Shows or hides the reference model underneath the markers.
 Reset
Reset- Restarts the alignment from the beginning.
 Next
Next- Goes forward one step in the project. This option is not available until all the items have been aligned.
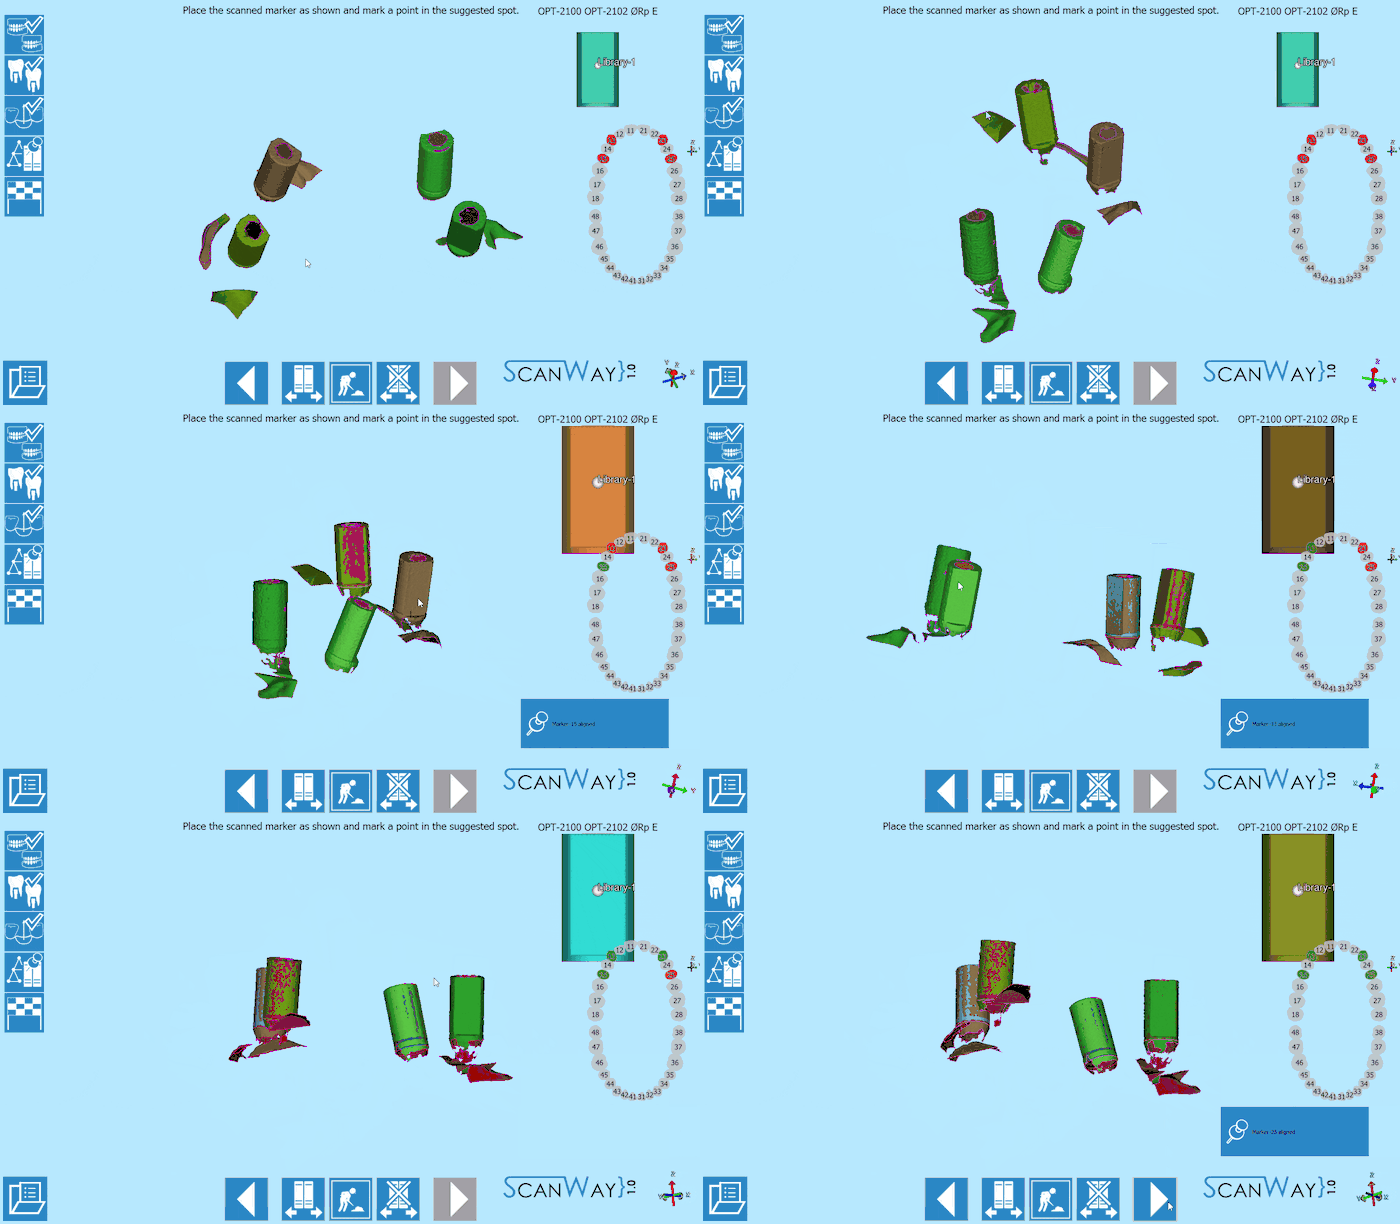
To align it is simply necessary to move the scanned markers to mimic the position of the library STL shown in the upper right corner of the window. When the marker is in the correct position ,mark one point as suggested in the library image. Repeat for all the acquired elements, not necessarily following any order.
