Difference between revisions of "NewPrjPro/ja"
(Created page with "患者作成パネルでは、以下のような患者と治療に関する一般情報を入力できます。") |
(Created page with "*患者名 *患者の生年月日 *患者の性別 *ドクター名 *患者の保険情報(該当する場合) *メモ") |
||
| Line 70: | Line 70: | ||
患者作成パネルでは、以下のような患者と治療に関する一般情報を入力できます。 | 患者作成パネルでは、以下のような患者と治療に関する一般情報を入力できます。 | ||
| − | * | + | *患者名 |
| − | * | + | *患者の生年月日 |
| − | * | + | *患者の性別 |
| − | * | + | *ドクター名 |
| − | * | + | *患者の保険情報(該当する場合) |
| − | * | + | *メモ |
Once all the information has been filled in, select '''Ok''' to accept the data or '''Cancel''' to discard the changes and go back to the project definition page. | Once all the information has been filled in, select '''Ok''' to accept the data or '''Cancel''' to discard the changes and go back to the project definition page. | ||
Revision as of 06:48, 16 September 2017
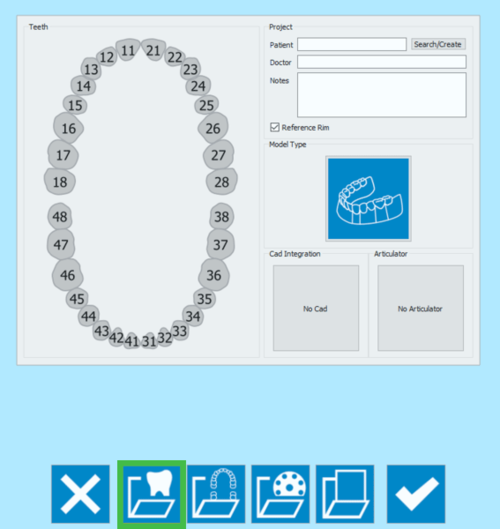
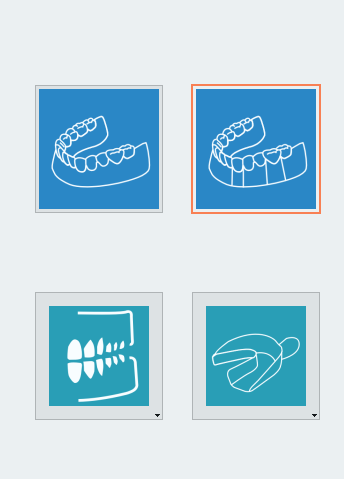
プロジェクト作成ページの最初のアイコンで、補綴プロジェクト定義を開きます。
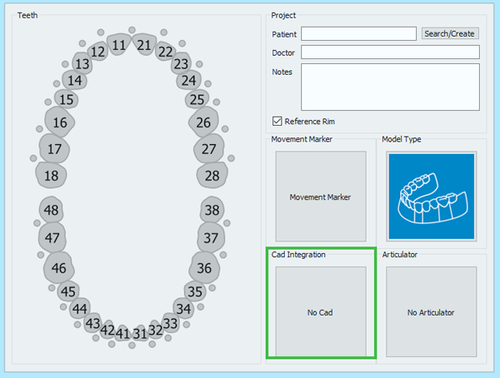
プロジェクト定義ウインドウには5つのセクションがあります。
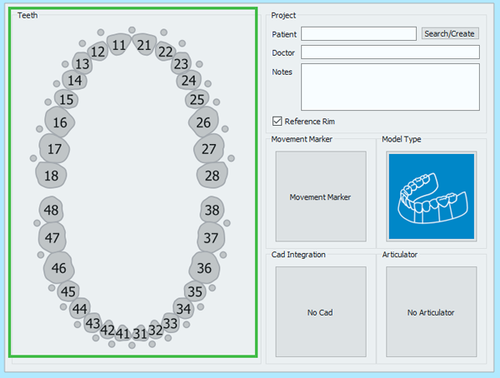
歯の定義
最初のウインドウの左側にあるTeeth(歯)では、スキャンするアイテム、オプション、および付属するスキャンを選択できます。
1つの要素をクリックすると、歯の定義パネルが開きます。
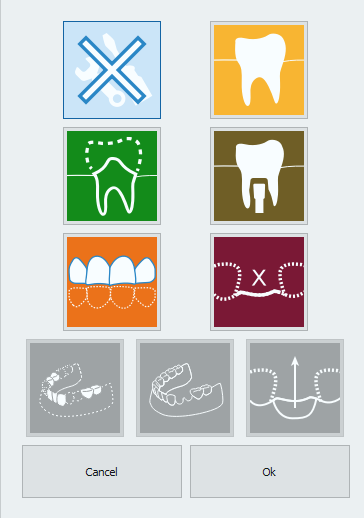
以下の選択項目があります。
 なし
なし- 歯をプロジェクトの一部としてマークせずに、歯の定義パネルを閉じて前の手順に戻ります。
 健全
健全- 歯を健全な要素としてマークします。この歯はメインの石膏模型の一部で、モデルの残りの部分と一緒に取得できます。すべてが健全な対顎が使用された場合、対合する石膏模型をスキャンするようプロジェクトが設定されます。
 ダイ
ダイ- 歯を成形されたダイとしてマークします。この歯は単独、またはマルチダイサポートで取得する必要がある可撤式歯型です。
 インプラント
- この位置をインプラントとして設定し、マーカーがスキャンされます。
 バイト対咬歯
- 選択した歯をシリコンバイトの一部としてマークします。石膏模型を対咬歯として設定する場合は、健全を使用します。
 ポンティック
- 歯をブリッジのポンティックとしてマークします。
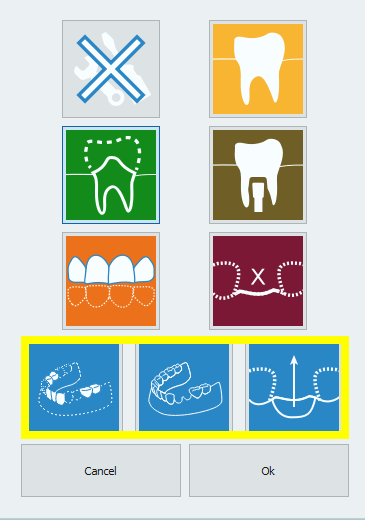
要素をダイ、インプラントまたはポンティックとしてマークした場合、追加のオプションが設定可能になります。
 ワックスアップ
- 選択された歯には、スキャン対象となるワックスアップ要素があることを示します。
 Situ
Situ- 選択された歯には、スキャン対象となるsituまたは治療前のモデルがあることを示します。
 歯肉
歯肉- 選択された要素には別途スキャンされる歯肉部分も含まれていることを示します。
歯のカテゴリを定義してオプションを選択したら、Okを押して確定するか、Cancelを押して変更内容を破棄します。
![]() を押しながら歯をクリックすると、最後に定義された要素のタイプが選択された歯へコピーされます。
を押しながら歯をクリックすると、最後に定義された要素のタイプが選択された歯へコピーされます。
![]() を押しながら歯をクリックすると、最後の設定パラメータが、最後の歯と選択された歯の間のすべての歯にコピーされます。
を押しながら歯をクリックすると、最後の設定パラメータが、最後の歯と選択された歯の間のすべての歯にコピーされます。
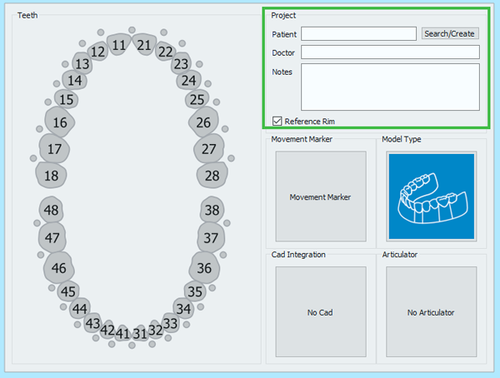
プロジェクト
プロジェクトセクションでは、以下のような一般情報を入力できます:
- 患者名
- ドクター名(オプション)
- メモ(オプション)
- リファレンスリムの使用有無を決めるチェックボックス
Doctor(ドクター名)およびNotes(メモ)には自由に入力できます。Patient(患者名)では、以下の選択肢があります。
- 任意の内容を入力する
- Search/Create(検索/作成)ボタンをクリックして新規プロフィールを作成する
- Search/Create(検索/作成)ボタンをクリックして既存のプロファイルをデータベースから検索する
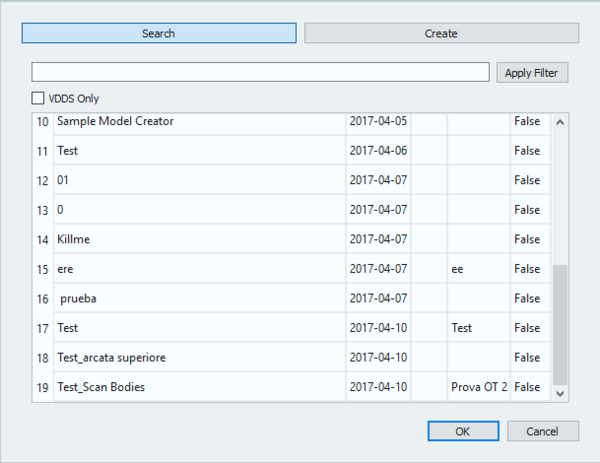
Search/Create(検索/作成)ボタンをクリックすると、以下のウインドウが開きます。
このウインドウでは、プロジェクトデータベースから既存の患者を検索できます。フィルターを適用することができ、VDDSプロトコルを使用している場合は、検索対象を特定のデータベースに制限することもできます。
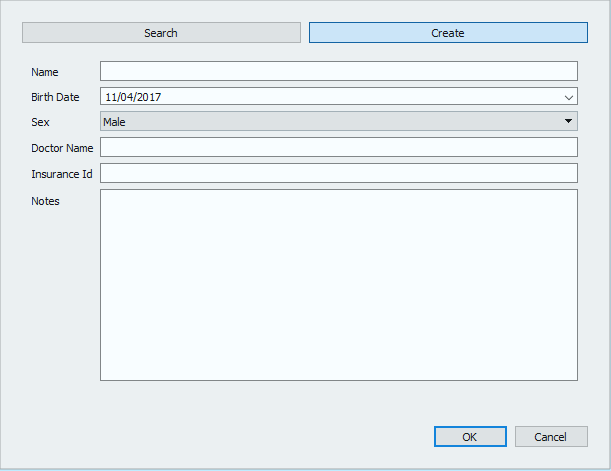
Create(作成)ボタンをクリックすると、以下のウインドウが開きます。
患者作成パネルでは、以下のような患者と治療に関する一般情報を入力できます。
- 患者名
- 患者の生年月日
- 患者の性別
- ドクター名
- 患者の保険情報(該当する場合)
- メモ
Once all the information has been filled in, select Ok to accept the data or Cancel to discard the changes and go back to the project definition page.
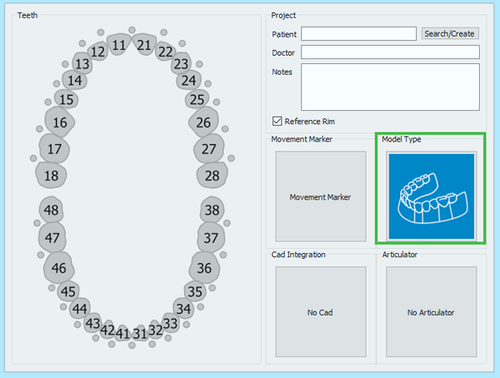
Model Types
This section allows to choose the kind of model that will be scanned.
By clicking on the model image, a model selection panel opens.
The available choices are:
 Unsectioned Model
 - enable this option if the model to be scanned is not sectioned, the scanner will not require a separate scan for every die.
 Sectioned Model
 - default workflow, in which every element is acquired separately and all the information gets merged at the end.
 Quadrant Model
 - if the Concept Quad Scan Module is enabled, it is possible to scan all the parts of a Quadrant Tray in just one step.
 Impression Scan
 - if the Impression Scan Module is enabled in the license, check this option to scan an impression and not a stone model.
CAD Integration
When the project is started directly from Exocad, the STL files produced in the scanning process will be transmitted to Exocad in just one click. On the other end, if the project gets created in the scanning software, the automatic export to CAD will not be configured, unless it is selected in this section.
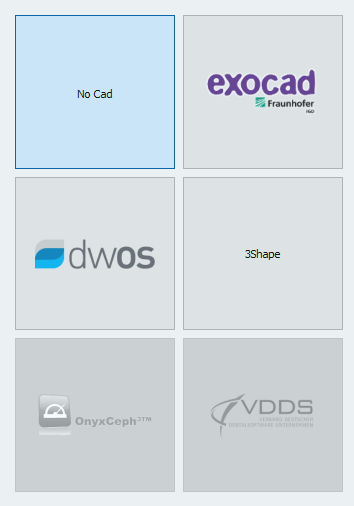
By clicking on the No CAD box the CAD selection window opens
and it allows to choose one of the software integrated with our scanning system for automatic trasmission of the STL information.
- Exocad
- VDDS protocol (for orthodontics)
- Onyx Ceph (for orthodontics)
If No Cad is selected, the software will then ask the user to define an export path for the STL files.
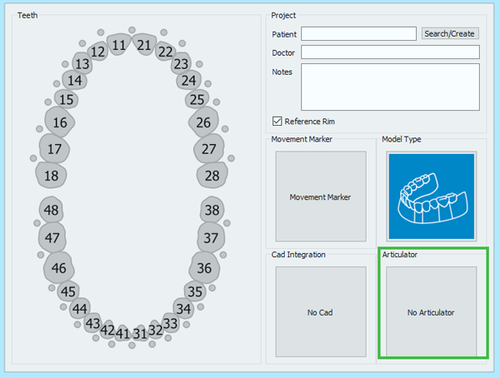
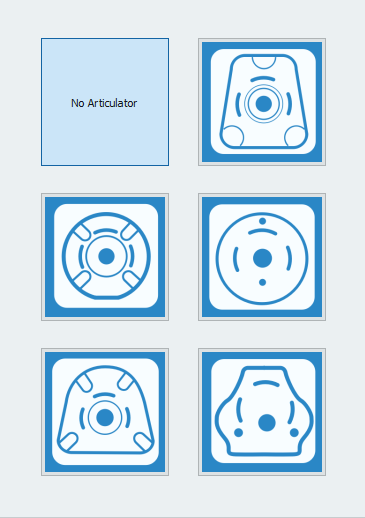
Articulators
The last section allows to select an articulator to use the Dynamic Articulation Module.
If the Dynamic Articulation module is not active on the license this section will not be available
Remember that it is always possible to scan any kind of articulator, this section is only to be used if you want to scan with the dynamic articulation module and pass the occlusion position in the Virtual Articulator of Exocad.
The Articulators available in Exocad and therefore in our software are:
 Artex
Artex - to scan the Artex Articulator and to use the same in Exocad's Virtual Articulator
 Sam/ Adesso
 - to scan the Sam Articulator or the Adesso splitcast and to use the same in Exocad's Virtual Articulator
 Protar- Kavo
 - to scan the Kavo Articulator and to use the same in Exocad's Virtual Articulator
 A7 - Bioart
 - to scan the Bioart Articulator and to use the same in Exocad's Virtual Articulator
 Denar by Whipmix
 - to scan the Denar Articulator and to use the same in Exocad's Virtual Articulator
To start the project accept the definition with the ![]() button.
button.
To find specific information on how to scan Prosthesis cases, go to the Prosthesis Project or Prosthesis Project on Implants example pages.
