Difference between revisions of "Calibrations/ja"
(Created page with "ソフトウェアには、スキャナーのキャリブレーションに必要なオブジェクトの画像が表示されます。これは、キャリブレーション...") |
(Created page with "# キャリブレーションキーをスキャナーに置きます # '''Recalibrate Axis'''をクリックします # 求められたら、'''Ok'''をクリックします") |
||
| Line 51: | Line 51: | ||
{{Screenshot|axes_cal.png}} | {{Screenshot|axes_cal.png}} | ||
| − | # | + | # キャリブレーションキーをスキャナーに置きます |
| − | # | + | # '''Recalibrate Axis'''をクリックします |
| − | # | + | # 求められたら、'''Ok'''をクリックします |
The calibration procedure is automatic. Once it is finished, the software will show one of the following messages: | The calibration procedure is automatic. Once it is finished, the software will show one of the following messages: | ||
Revision as of 14:11, 25 September 2017
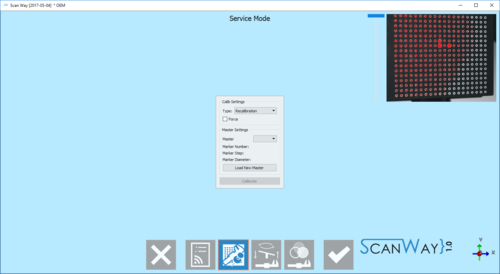
キャリブレーションを行うには、ようこそページでService(サービス)をクリックして、サービスモードに入ります。
サービスページでは、ユーザーはスキャナーの接続状況を確認したり、スキャナーの正常動作に必要なすべてのキャリブレーションを実行したりすることができます。詳しくは、サービスのページを参照して下さい。
このページでは、スキャナーのキャリブレーション方法を説明します。
ヘッドのリキャリブレーション
このツールを起動するには、ヘッドのキャリブレーション ![]() ボタンをクリックします。
ボタンをクリックします。
キャリブレーションには、2つのタイプがあります:
- リキャリブレーション
- 高速に行えるタイプで、定期的にスキャナーのキャリブレーションを更新したり、スキャナーを動かした際などに実行します
- フルキャリブレーション
- より複雑なタイプで、スキャナー修理後に実行します
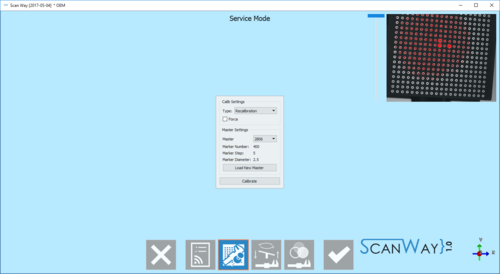
スキャナーの光学ヘッドの新規キャリブレーションを実行するため、このツールはキャリブレーションキットを使います。以下の手順で行います:
- キャリブレーションキットをスキャナー内部の正しい位置に置きます
- ドロップダウンメニューから正しいキャリブレーションタイプを選択します
- キャリブレーションダイアログ画面では、ドロップダウンメニューから正確なキャリブレーションキット名を選択します
- Startをクリックします
ドロップダウンメニューにキャリブレーションキット名がない場合、Load New Master Xml(新しいマスターXMLをロード)ボタンを使って、適切なXml記述ファイルから新しいキャリブレーションキットを追加できます。
キャリブレーション処理は自動で行われます。終了後、ソフトウェアは以下のいずれかのメッセージを表示します:
- 'Scanner Already Calibrated' : キャリブレーションは必要ありません
- 'Scanner Recalibrated Successfully' : キャリブレーションが正常に完了しました
- 'Scanner Recalibration Failed' : キャリブレーションを再度実行する必要があります
キャリブレーションに成功すると、軸のキャリブレーションが自動的に開始されます。
軸のリキャリブレーション
このツールを使って、スキャナーの駆動システムをチェックします。スキャナーはオブジェクトをスキャン/分析し、このデータを使って駆動システムのキャリブレーションを行います。
このツールは、ヘッドのリキャリブレーションが終わった後に自動的に開始されます。![]() ボタンを使って手動で開始することも可能です。
ボタンを使って手動で開始することも可能です。
'ダイナミックアーティキュレーションモジュール'が有効の場合、特定のキャリブレーションキーを使って軸をキャリブレーションします。その後、再度キャリブレーションを実行する必要があれば、同じキャリブレーションキーで行う必要があります。そうしない場合、キャリブレーションは失敗します。
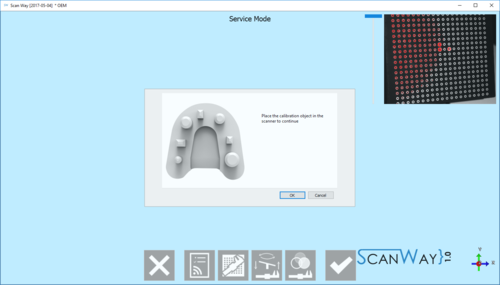
ソフトウェアには、スキャナーのキャリブレーションに必要なオブジェクトの画像が表示されます。これは、キャリブレーションキー(ライセンスでダイナミックアーティキュレーションモジュールが有効になっている場合)または石膏模型のいずれかになります。
- キャリブレーションキーをスキャナーに置きます
- Recalibrate Axisをクリックします
- 求められたら、Okをクリックします
The calibration procedure is automatic. Once it is finished, the software will show one of the following messages:
- 'Axes Recalibration Successfull' : the calibration has been completed,
- 'Axes Recalibration Successfull, Dynamic Articulation Calibration Failed' : the calibration has been completed, however the dynamic articulation positioning will not work. This message shows when the dynamic articulation module is active on the license, but the scanner has been calibrated with a normal stone model.
- 'Axes Recalibration Failed' : calibration has to be repeated
Color Calibration
This last calibration, that can be opened by clicking on the icon ![]() , allows to calibrate the acquired colors of the scanner to have realistic color results.
, allows to calibrate the acquired colors of the scanner to have realistic color results.
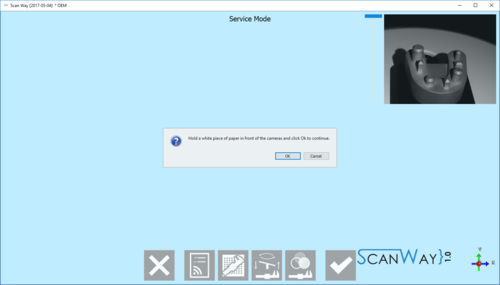
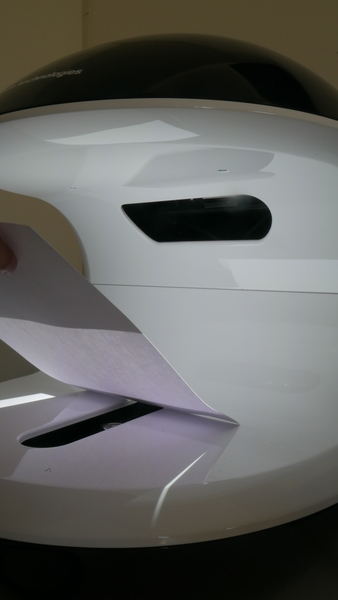
To calibrate the colors, hold a piece of paper in front of the cameras, as prompted by the message, and click OK.
It is important that the whole field is covered by the white paper. Take a look at the following pictures to replicate a correct positioning of the white sheet.
