Difference between revisions of "NewPrjPro/pt-br"
(Created page with "É possível escrever livremente nas caixas do Doutor e das Notas. Quanto ao Paciente, é possível:") |
(Created page with "* Escrever livremente na caixa * Criar um novo perfil clicando no botão '' Pesquisar / Criar '' * Pesquisar no banco de dados um perfil já existente clicando no botão '' Pe...") |
||
| Line 54: | Line 54: | ||
É possível escrever livremente nas caixas do Doutor e das Notas. Quanto ao Paciente, é possível: | É possível escrever livremente nas caixas do Doutor e das Notas. Quanto ao Paciente, é possível: | ||
| − | * | + | * Escrever livremente na caixa |
| − | * | + | * Criar um novo perfil clicando no botão '' Pesquisar / Criar '' |
| − | * | + | * Pesquisar no banco de dados um perfil já existente clicando no botão '' Pesquisar / Criar '' |
The '''Search/Create Button''' opens the following window: | The '''Search/Create Button''' opens the following window: | ||
Revision as of 12:48, 23 June 2017
O primeiro ícone na página Criação de Projeto abre a definição do Projeto de Prótese.
Template:Captura de tela
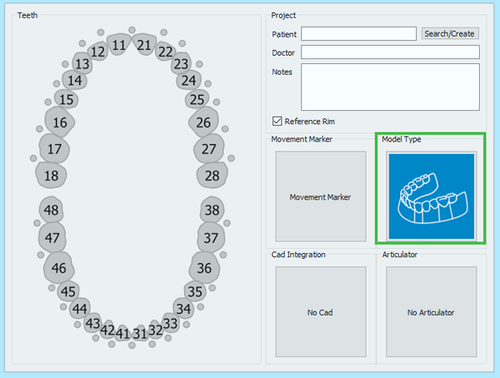
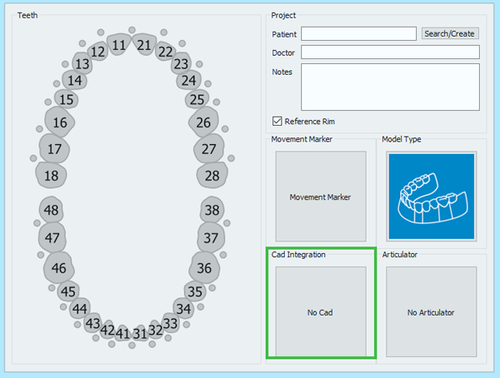
A janela de definição do Projeto é dividida em 5 seções.
Definição do Dente
A primeira janela à esquerda Dentes permite selecionar os itens que serão escaneados, suas opções e escaneamento de acessórios.
Ao clicar em um elemento, o painel de definição do dente se abre.
Arquivo: seleção de dentes.png
As opções possíveis são:
- Template:Botão Listar Nenhum
- Não marca o dente como parte do projeto e fecha o painel de definição do dente para voltar ao passo anterior.
- Template:Botão Listar Saudável
- marca o dente como elemento saudável. Este dente faz parte do modelo de gesso principal, pode ser escaneado com o resto do modelo. Se usado em uma arcada antagonista completamente saudável, ele define o projeto para escanear um modelo de gesso antagonista.
- Template:Botão Listar Munhão
- marca o dente como um munhão preparado. Este dente é um munhão removível que deve ser escaneado sozinho ou no suporte Multi-Munhão.
- Template:Botão Listar Implante
- indica que, na posição estabelecida, existe um implante e que um scanbody será escaneado.
- Template:Botão Listar Antagonista de Mordida
- Marca que o dente selecionado faz parte de uma mordida de silicone. Para definir um modelo de gesso como antagonista use saudável .
- Template:Botão Listar Pontic
- Marcar o dente como elemento de ponte.
Se um elemento estiver marcado como 'Munhão' , 'Implante' ou 'Elemento de Ponte' , outras opções estão disponíveis:
- Template:Botão Listar Enceramento
- Indica que, no dente selecionado, há um elemento modelado en cera a ser escaneado.
- Template:Botão Listar Situ
- Indica que, para o dente selecionado, há um modelo in situ ou pré operatório que deve ser escaneado.
- Template:Botão Listar Gengiva
- Indica que o elemento selecionado também possui um item de gengiva que será escaneado separadamente.
Uma vez definida a categoria do dente e as opções selecionadas, aceite com 'Ok' ou descarte as alterações com 'Cancelar' .
Segurando Template:Botão na linha ao clicar em um dente, o último tipo de elemento definido será copiado para o dente selecionado.
Segurando Template:Botão na linha ao clicar em um dente, os últimos parâmetros definidos serão copiados para todos os dentes entre o último dente e aquele selecionado.
Projeto
A seção Projeto permite ao usuário inserir algumas 'Informações Gerais' :
- Nome do paciente
- Nome do médico (opcional)
- Notas (Opcional)
- Uma caixa de verificação para decidir se deve ou não usar o ----- de Referência.
É possível escrever livremente nas caixas do Doutor e das Notas. Quanto ao Paciente, é possível:
- Escrever livremente na caixa
- Criar um novo perfil clicando no botão Pesquisar / Criar
- Pesquisar no banco de dados um perfil já existente clicando no botão Pesquisar / Criar
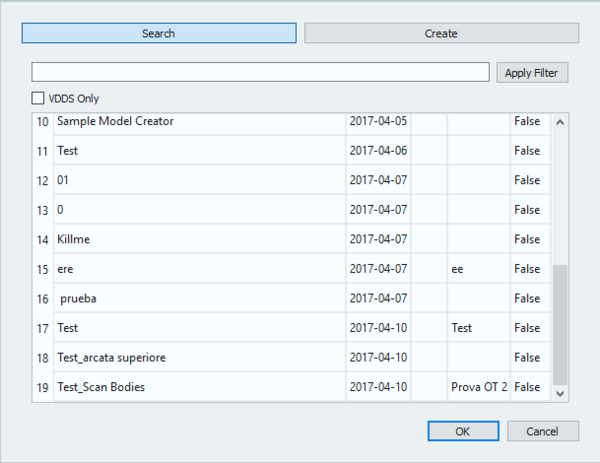
The Search/Create Button opens the following window:
This window allows to search the project database for already existing patients. A filter can be applied and, for those who use VDDS protocols, the research can be restricted to that specific database.
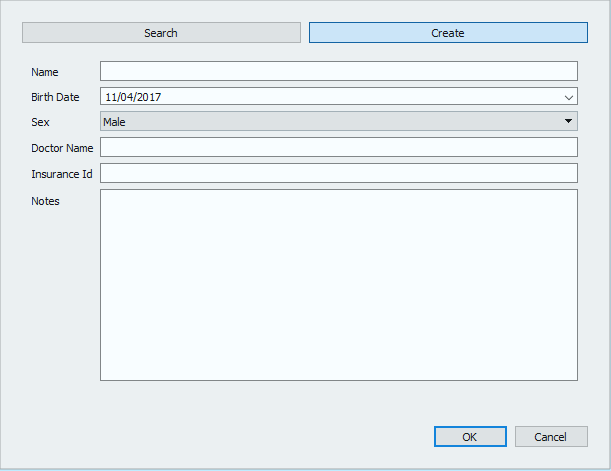
By clicking on the Create button, the following window opens:
The patient creation panel allows to input general information regarding the patient and the treatment, such as:
- The patient's name
- The patient's birth date
- The patient's sex
- The doctor's name
- The patient's insurance ID, where applies
- Some notes
Once all the information has been filled in, select Ok to accept the data or Cancel to discard the changes and go back to the project definition page.
Model Types
This section allows to choose the kind of model that will be scanned.
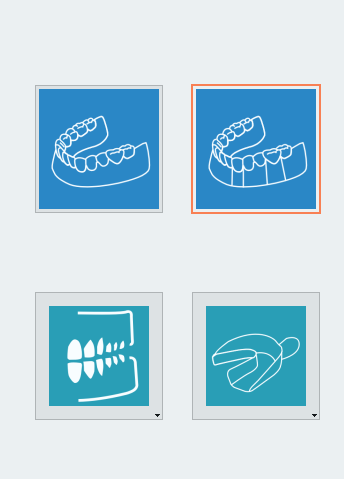
By clicking on the model image, a model selection panel opens.
The available choices are:
 Unsectioned Model
 - enable this option if the model to be scanned is not sectioned, the scanner will not require a separate scan for every die.
 Sectioned Model
 - default workflow, in which every element is acquired separately and all the information gets merged at the end.
 Quadrant Model
 - if the Concept Quad Scan Module is enabled, it is possible to scan all the parts of a Quadrant Tray in just one step.
 Impression Scan
 - if the Impression Scan Module is enabled in the license, check this option to scan an impression and not a stone model.
CAD Integration
When the project is started directly from Exocad, the STL files produced in the scanning process will be transmitted to Exocad in just one click. On the other end, if the project gets created in the scanning software, the automatic export to CAD will not be configured, unless it is selected in this section.
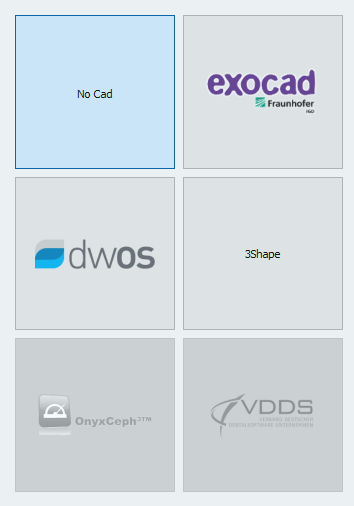
By clicking on the No CAD box the CAD selection window opens
and it allows to choose one of the software integrated with our scanning system for automatic trasmission of the STL information.
- Exocad
- VDDS protocol (for orthodontics)
- Onyx Ceph (for orthodontics)
If No Cad is selected, the software will then ask the user to define an export path for the STL files.
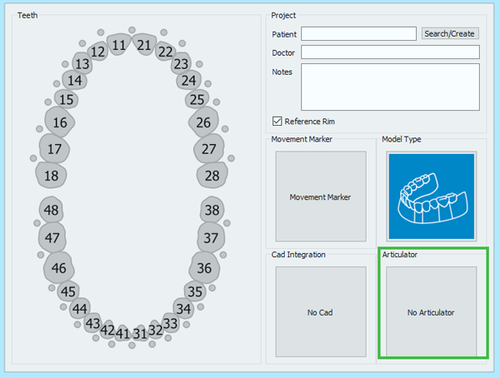
Articulators
The last section allows to select an articulator to use the Dynamic Articulation Module.
If the Dynamic Articulation module is not active on the license this section will not be available
Remember that it is always possible to scan any kind of articulator, this section is only to be used if you want to scan with the dynamic articulation module and pass the occlusion position in the Virtual Articulator of Exocad.
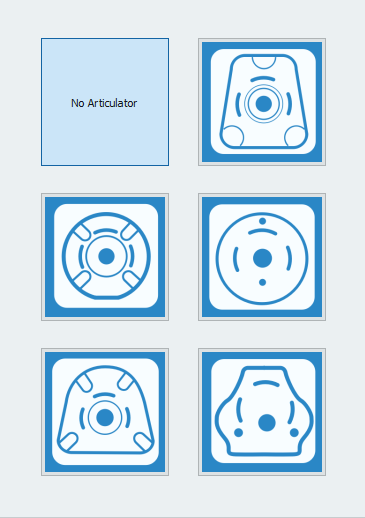
The Articulators available in Exocad and therefore in our software are:
 Artex
Artex - to scan the Artex Articulator and to use the same in Exocad's Virtual Articulator
 Sam/ Adesso
 - to scan the Sam Articulator or the Adesso splitcast and to use the same in Exocad's Virtual Articulator
 Protar- Kavo
 - to scan the Kavo Articulator and to use the same in Exocad's Virtual Articulator
 A7 - Bioart
 - to scan the Bioart Articulator and to use the same in Exocad's Virtual Articulator
 Denar by Whipmix
 - to scan the Denar Articulator and to use the same in Exocad's Virtual Articulator
To start the project accept the definition with the ![]() button.
button.
To find specific information on how to scan Prosthesis cases, go to the Prosthesis Project or Prosthesis Project on Implants example pages.
