Difference between revisions of "ExamplesCemented/ja"
(Created page with "===スキャンステップ===") |
(Created page with "下顎モデルをモデルホルダーに置き、'''スキャンボタン'''{{Inline button|scanAction.png}} をクリックします。スキャンが完了すると、結...") |
||
| Line 70: | Line 70: | ||
===スキャンステップ=== | ===スキャンステップ=== | ||
| − | + | 下顎モデルをモデルホルダーに置き、'''スキャンボタン'''{{Inline button|scanAction.png}} をクリックします。スキャンが完了すると、結果が表示されます。 | |
[[File:lower-model-steps.png]] | [[File:lower-model-steps.png]] | ||
Revision as of 06:33, 24 September 2017
このページでは、咬合する2つのモデルと3つのダイ(上顎に2つ、下顎に1つ)をスキャンする例を、ウィザードに従って説明します。
Contents
Exocadでプロジェクト定義を開始する
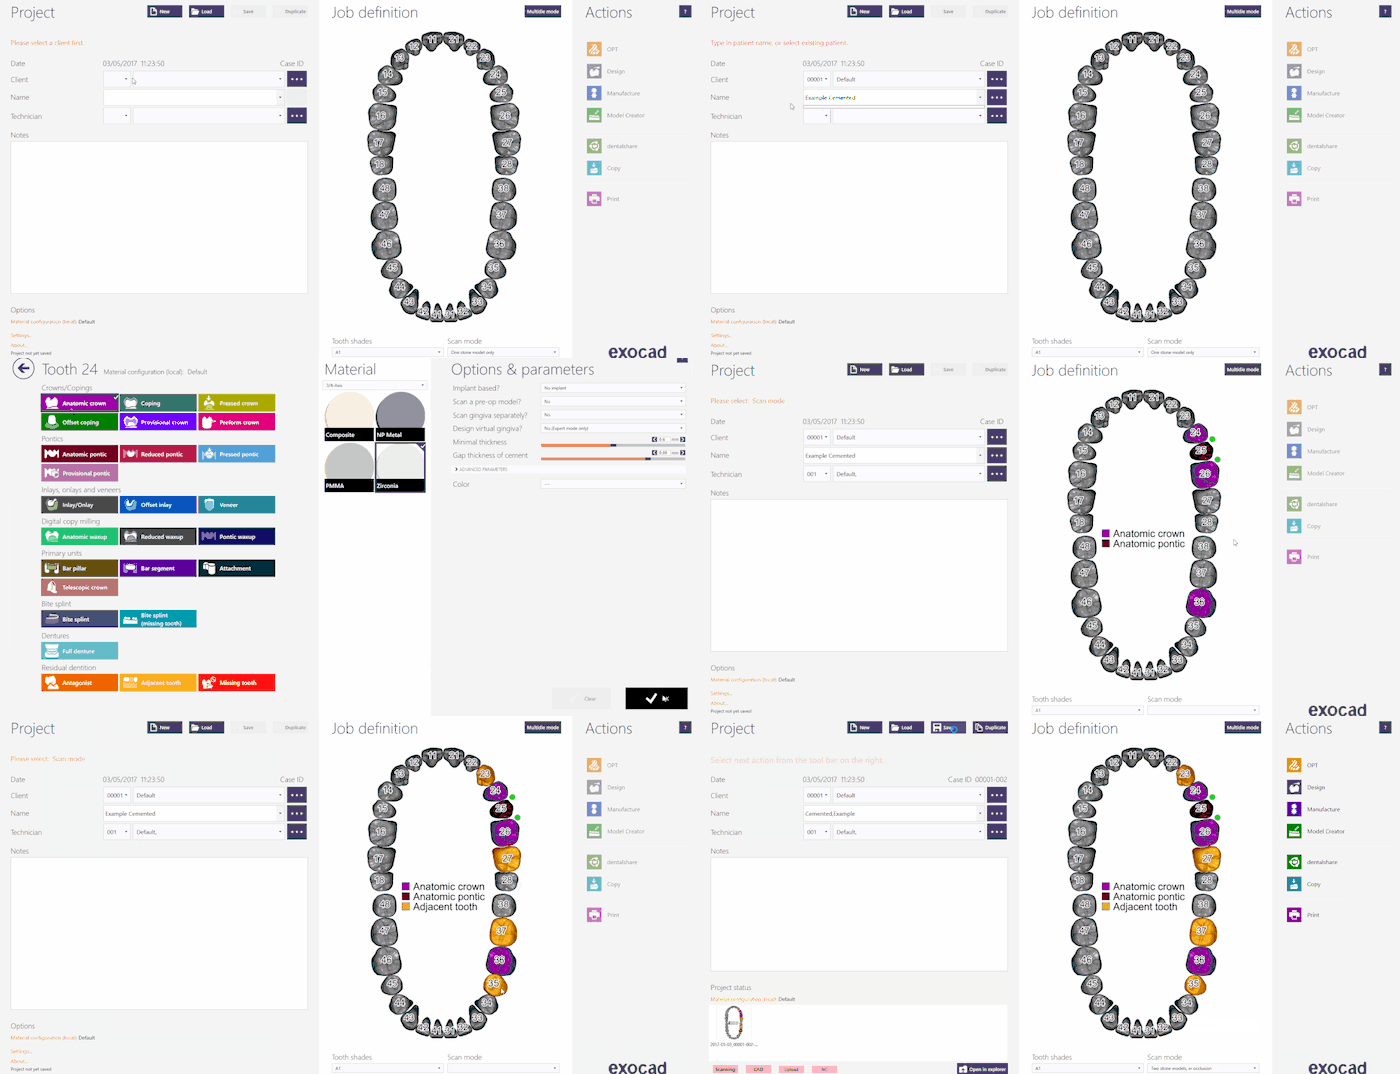
このプロジェクトをExocadで作成するには、デスクトップでDentalDBアイコンをクリックします。プロジェクトマネージャーが開きます。
プロジェクト情報、設計する修復の種類、その他のパラメーターを入力します。この種類のプロジェクトでは、Scan Mode(スキャンモード)がTwo stone models in occlusion(咬合する2つの石膏模型)に設定されていることを確認して下さい。
Exocadでプロジェクトを作成する方法について詳しくは、Exocad Wiki!を参照して下さい。
今回のデモ用プロジェクトでは以下の通りプロジェクトを定義します。
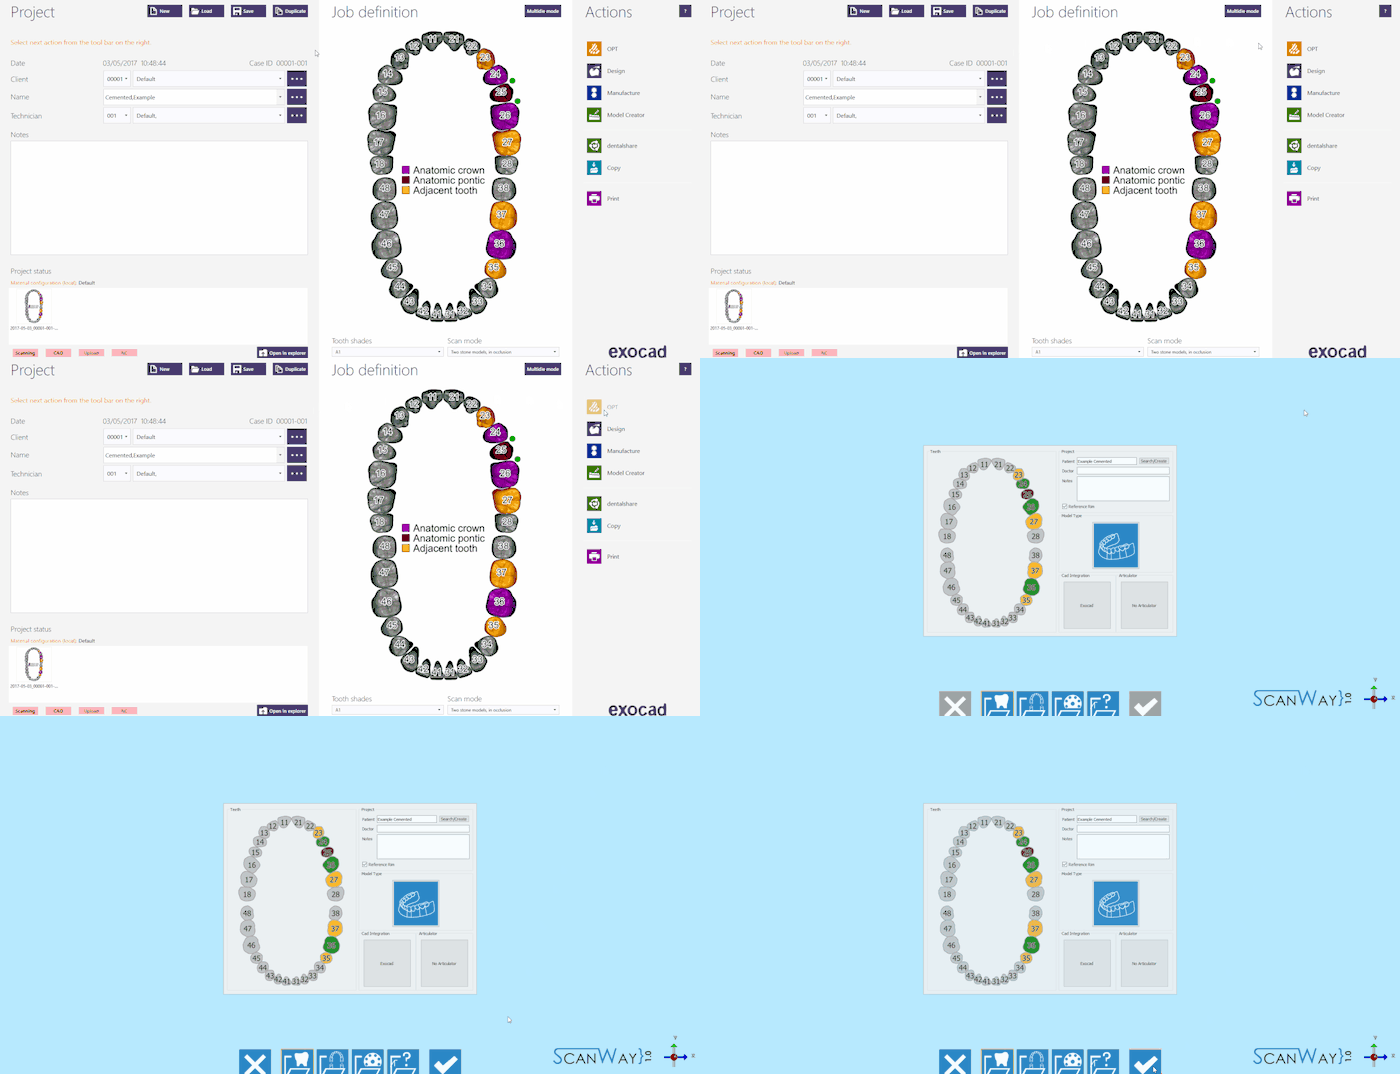
プロジェクトの定義が完了したら、Actions(アクション)セクションのOPTをクリックして、スキャンソフトウェアを起動します。
スキャンソフトウェアでは、Exocadで作成されたプロジェクトが最初に表示されます。プロジェクトが正しく定義されている場合は、確定ボタン ![]() をクリックします。
をクリックします。
ScanWayでプロジェクト定義を開始する
すべてのプロジェクトは、後で設計に使用するCADにかかわらず、スキャンソフトウェアでも定義できます。
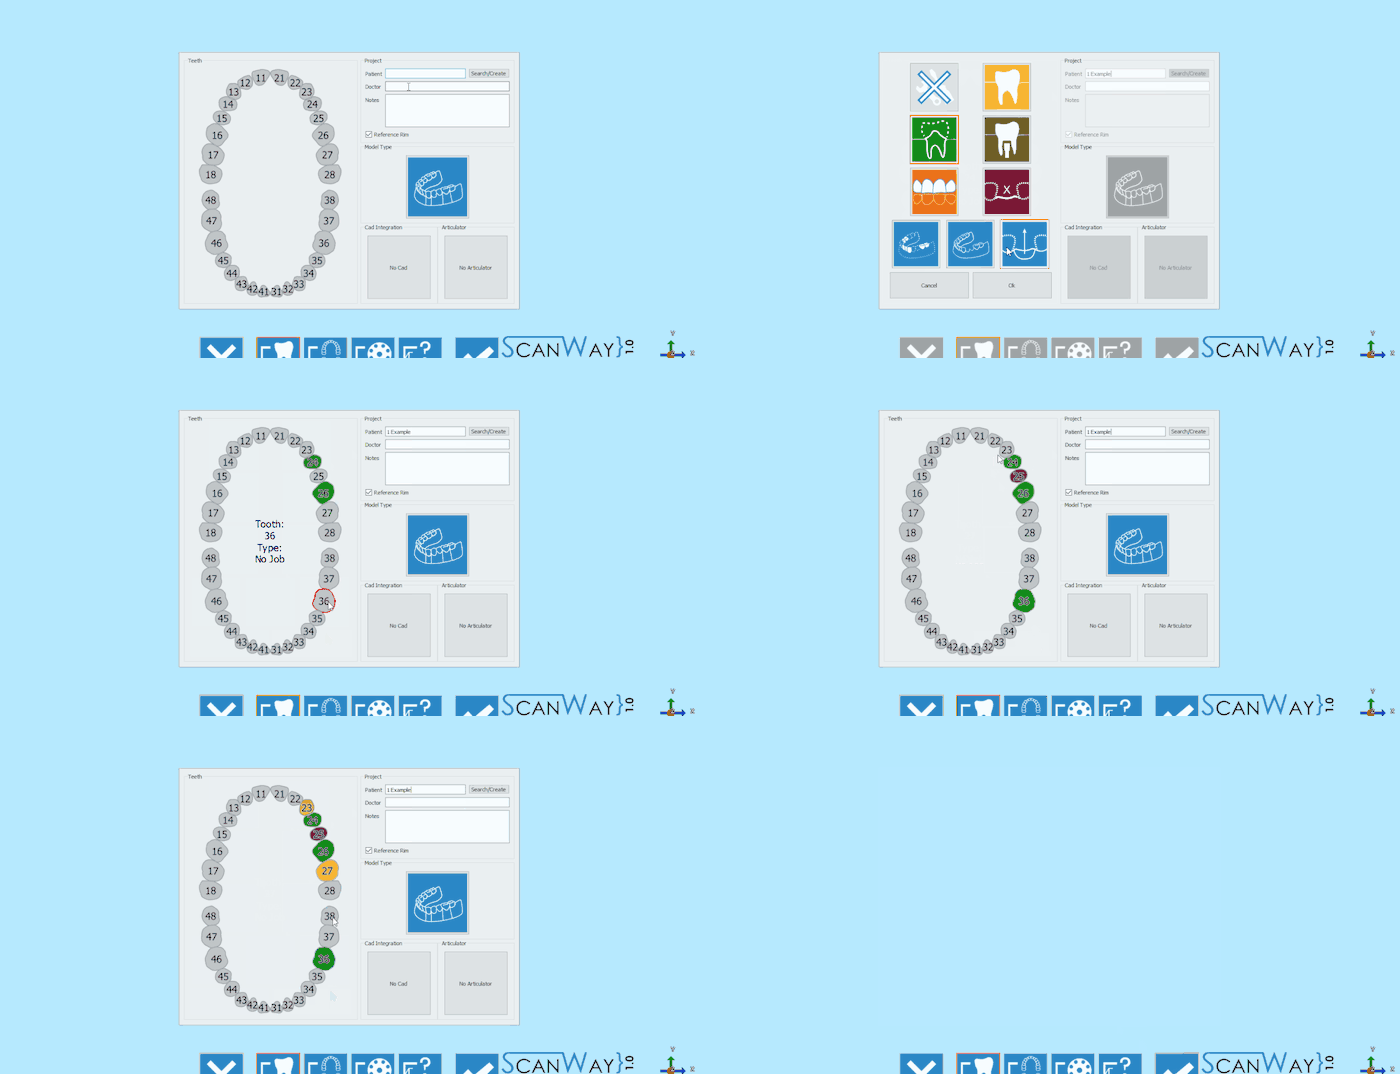
デスクトップのScanWayアイコンをダブルクリックして、スキャンソフトウェアを起動します。ようこそページが開きます。プロジェクトを作成するには、最初のアイコンをクリックします。
プロジェクトの定義方法について詳しくは、新規プロジェクトの作成のページを参照して下さい。
今回のデモ用プロジェクトでは以下の通り定義します。
どちらの方法でプロジェクトを定義しても、同じウィザードに進みます。ここからは、このウィザードに従っていきます。
ステップ1: 咬合器スキャン
両顎を持つように設定されたすべてのプロジェクトの最初のステップは、咬合器スキャンです。
咬合器スキャンでも、常に咬合器をスキャンする必要はありません。このスキャンに必要なのは、専用サポート上の咬合器を使った咬合スキャン、またはモデルホルダー上での2つのモデルの咬合スキャンです。
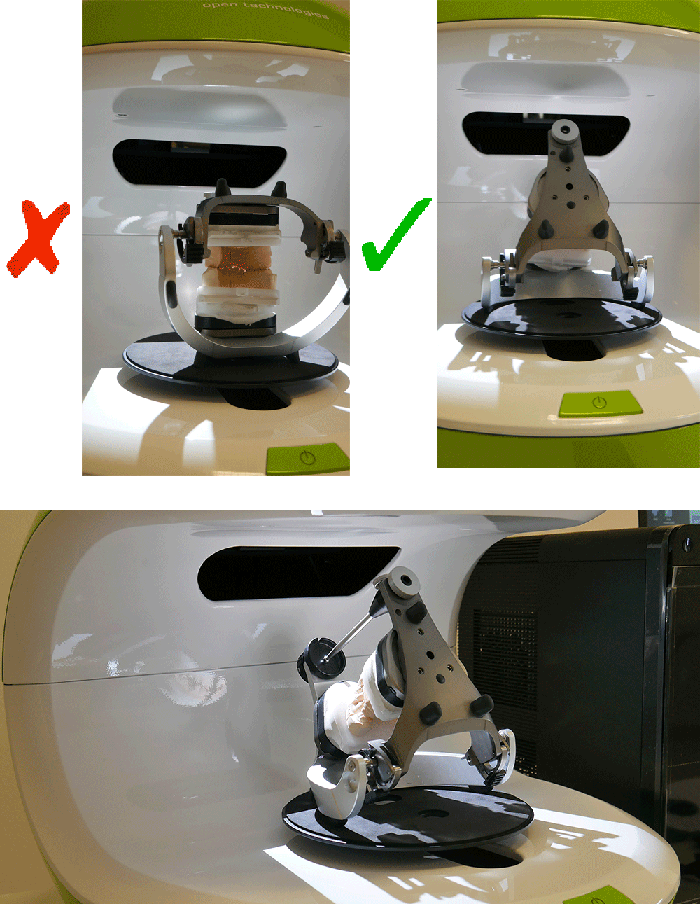
ユーザーが咬合器をスキャンする必要がある場合は、後ろへ傾けることをおすすめします。こうすることで、できるだけ多くの情報を得ることができるようになります。傾けることができない咬合器もあるので、その場合は不要です。
スキャンインターフェースのライブビューでは、咬合器が実際にまっすぐ置かれていると、咬合状態を正確に取得するのが難しくなることが確認できます。
一方、前述のように、咬合させた2つのモデルを輪ゴムやワックスで固定してスキャンすることも可能です。
オブジェクトをスキャナーに置いたら(咬合器を使って、またはモデルを重ねて)、スキャンボタン![]() でスキャンを開始できます。スキャンが終了すると、結果が表示されます。
でスキャンを開始できます。スキャンが終了すると、結果が表示されます。
利用可能なその他の機能については、スキャンインターフェースのページを参照して下さい。
ステップ2: 下顎
両顎を持つように設定されたすべてのプロジェクトの2つ目のステップは、下顎スキャンです。咬合器を除くすべてのステップには、2つのサブステップ(実際のスキャンと、取得された画像の編集)があります。
スキャンステップ
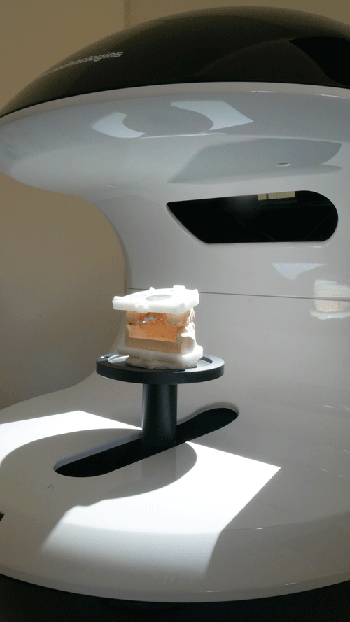
下顎モデルをモデルホルダーに置き、スキャンボタン![]() をクリックします。スキャンが完了すると、結果が表示されます。
をクリックします。スキャンが完了すると、結果が表示されます。
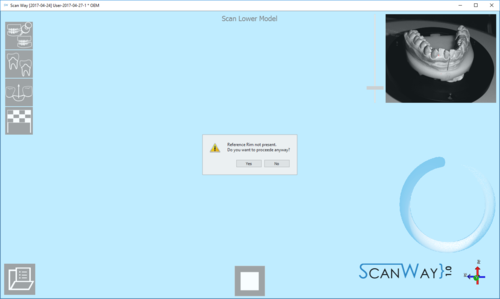
This scan has been performed with the Reference Rim. Everytime the user launches a scan for models, dies or markers, if the software recognises that the reference rim has not been used the following message shows.
The user can therefore decide whether to cancel the scan, put the reference rim on the model holder and start a new scan, or to scan without using the reference rim. For information on the reference rim visit the Accessories page.
Click ![]() to access the second part of the Lower model step.
to access the second part of the Lower model step.
Edit Step
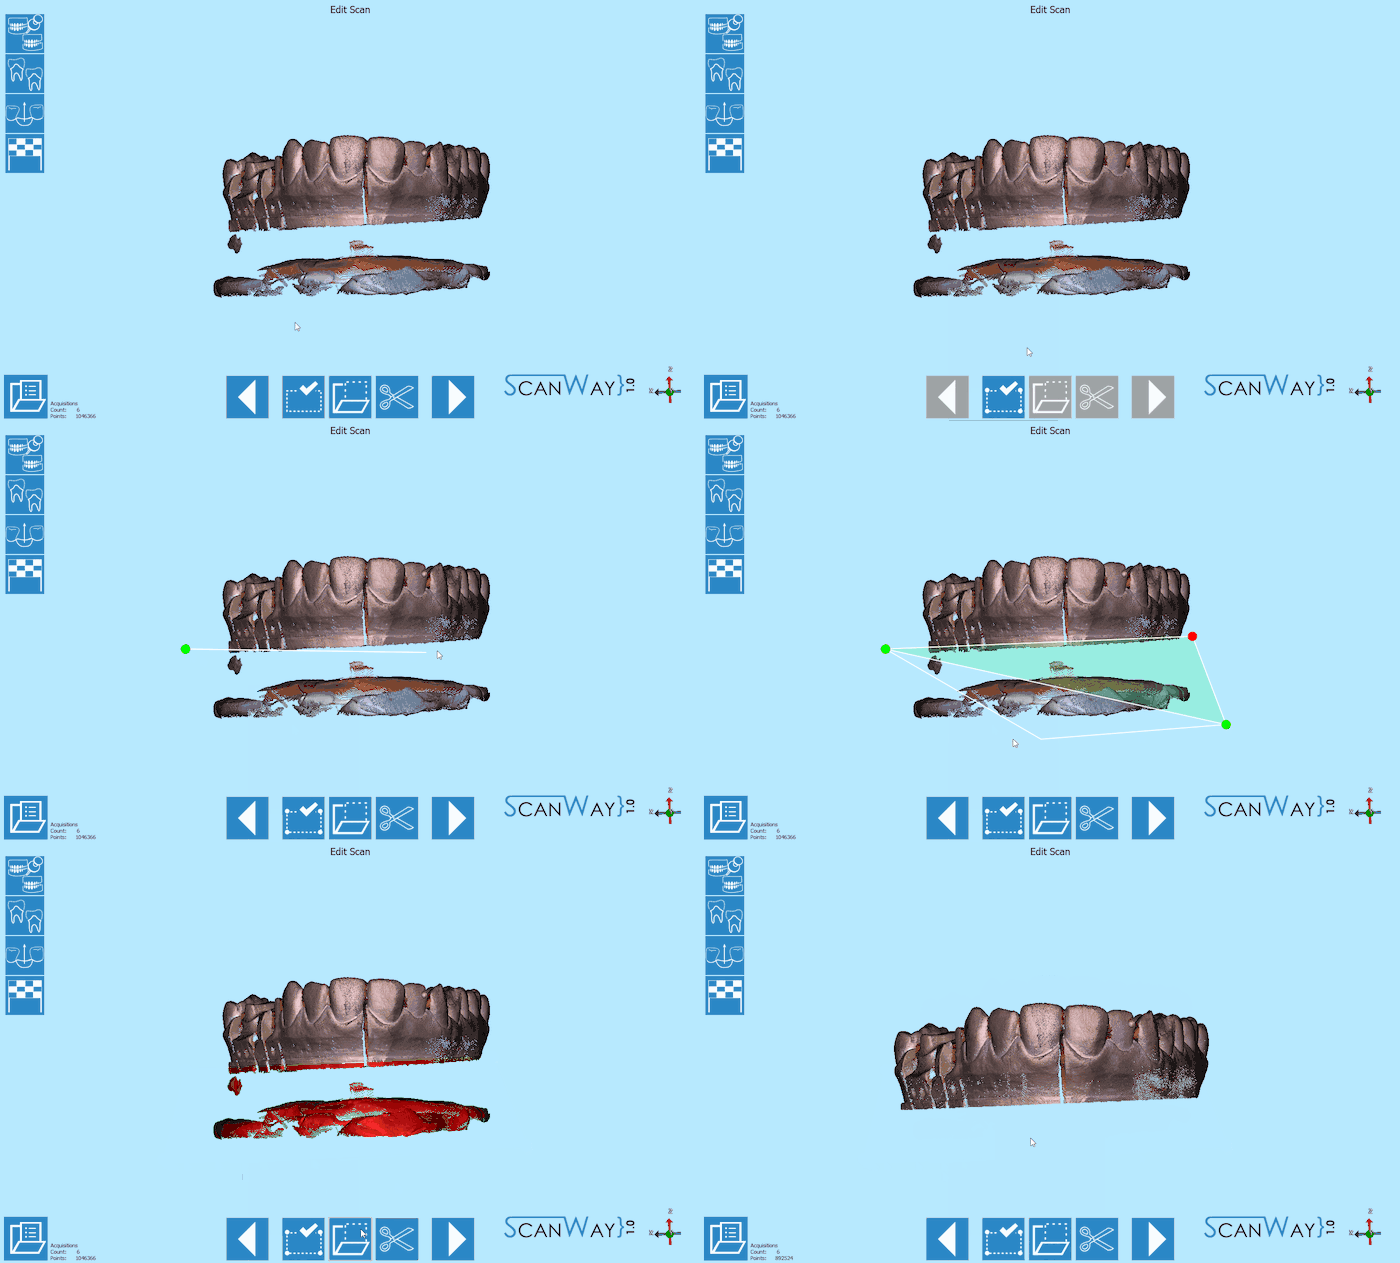
This step allows to edit the aquired image; for detailed information on all the available options in this step visit the Edit Tools page.
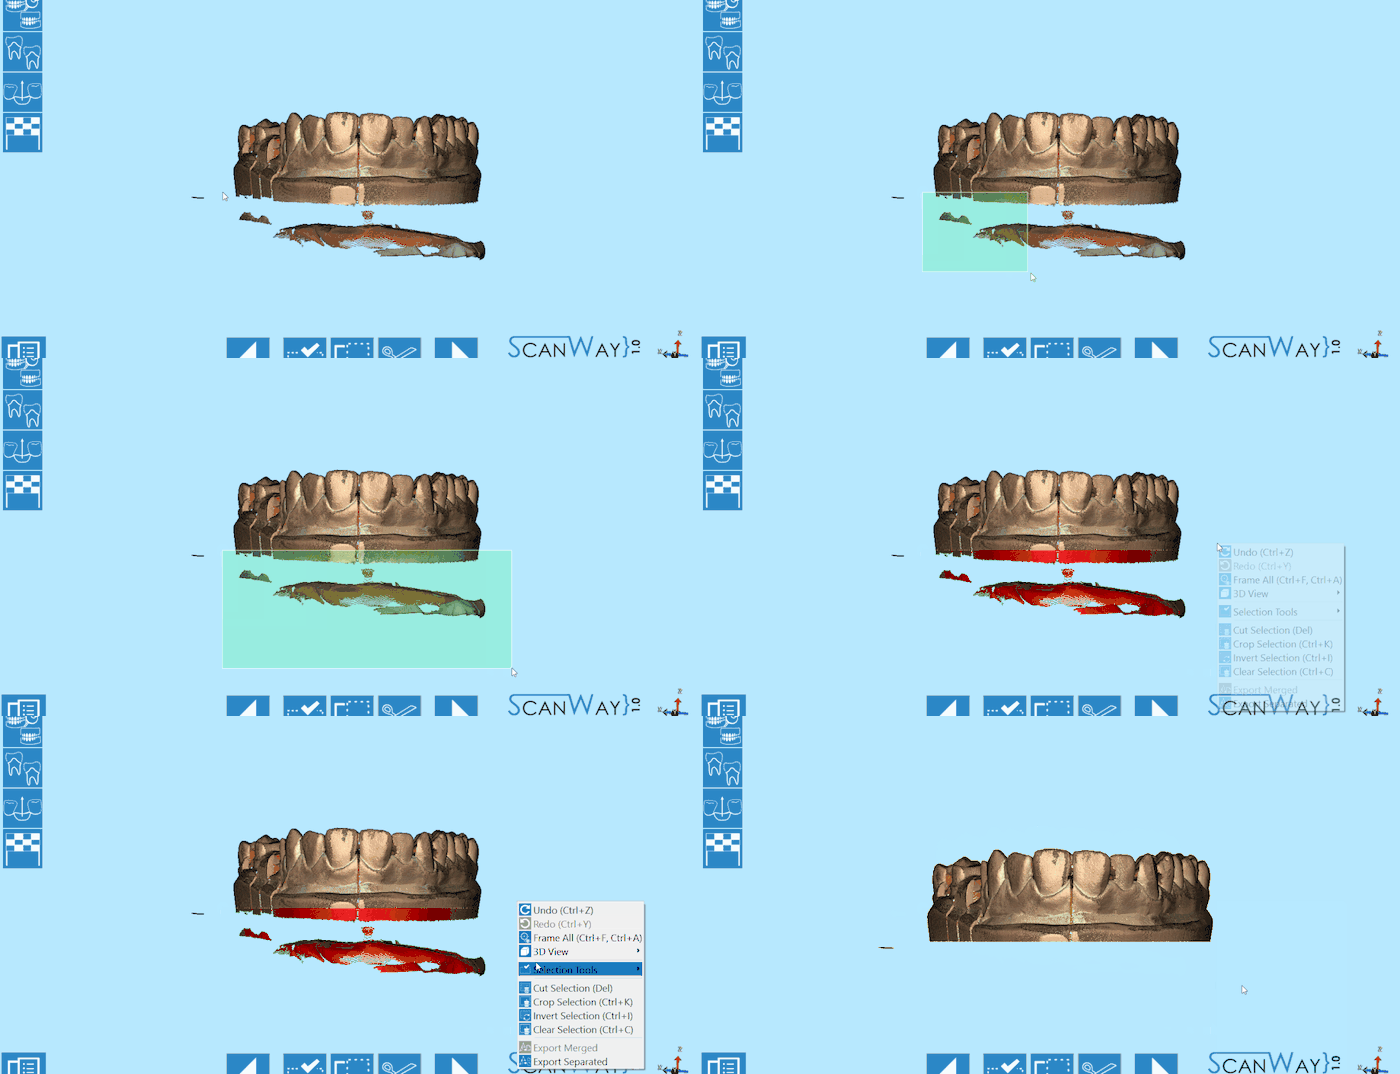
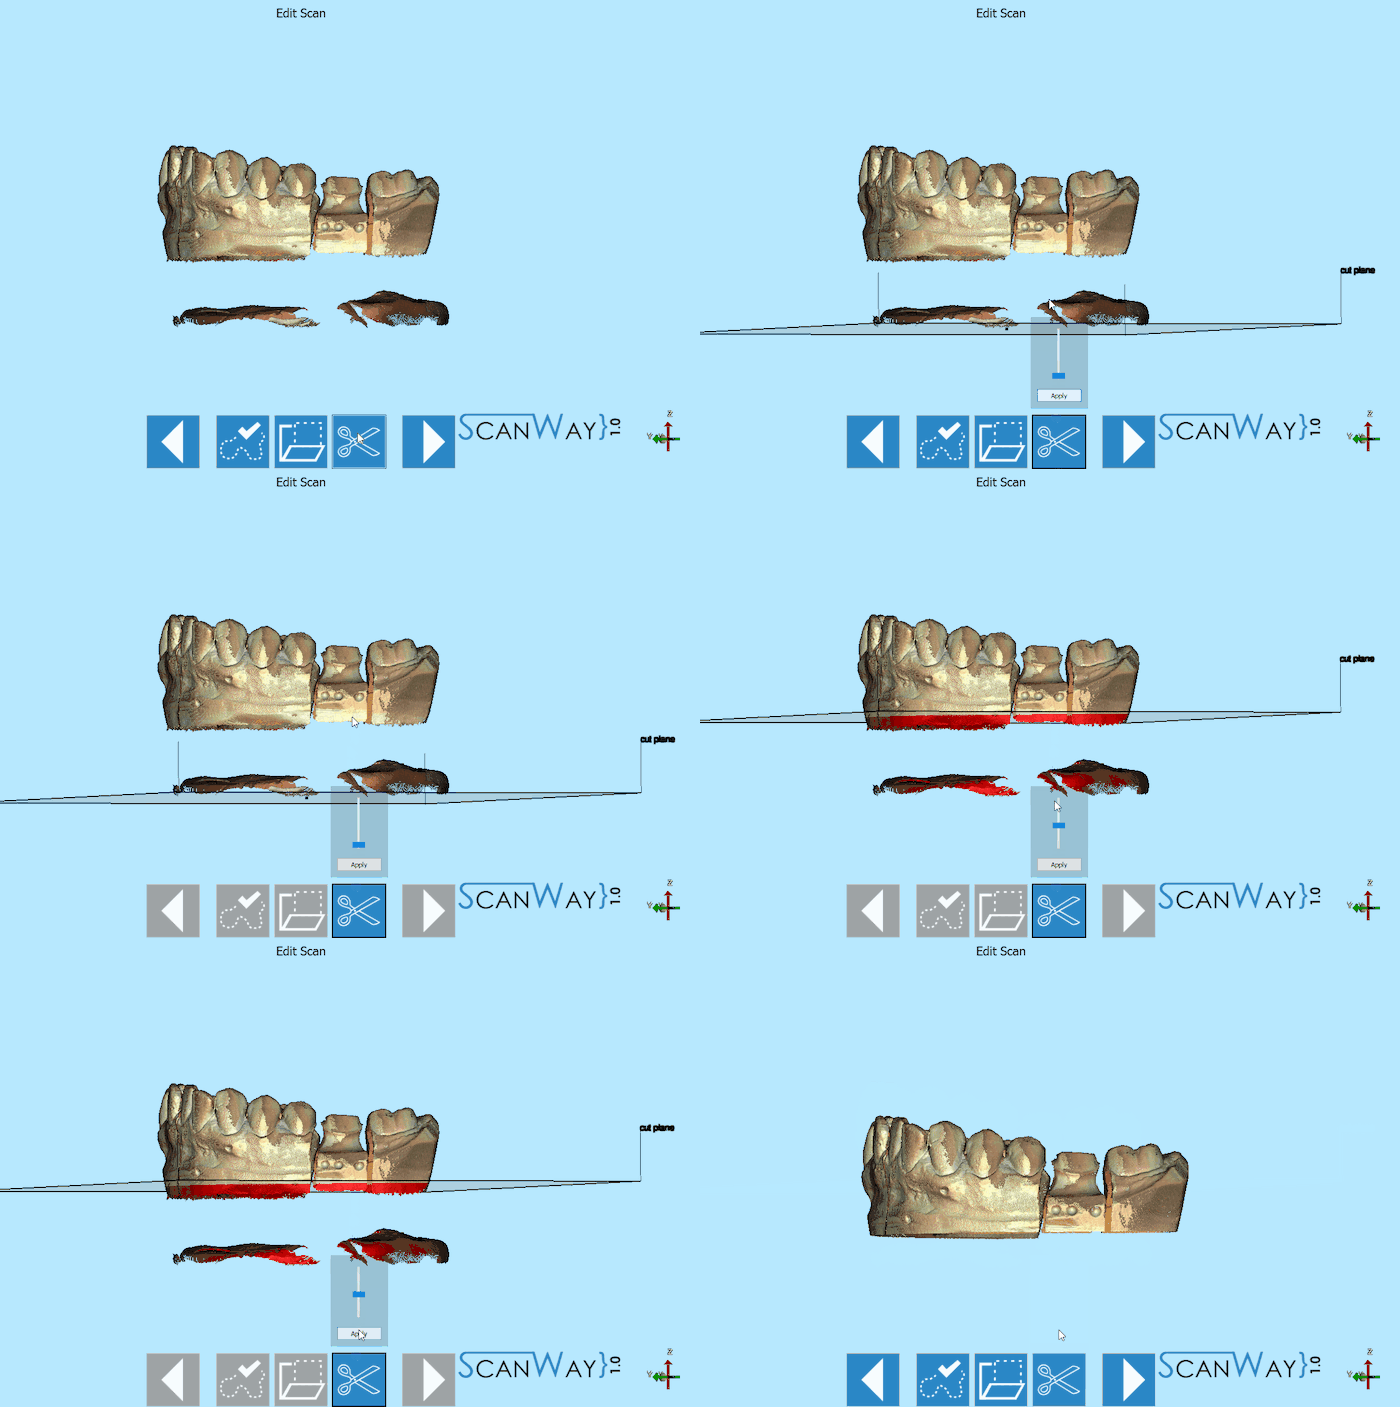
The image at this step can be both edited or trimmed. At this stage it is actually important not to edit too much the image or cutting big chunks of information, since it would make it more difficult for the software to calculate the automatic alignment of the object to its reference.
The edit of the image can be carried out using the selection tools.
On the other hand, trimming gets very easy when the cut base tool is used.
When you are satisfied with the result click ![]() to access the next wizard step.
to access the next wizard step.
Step 3: Upper Model
The upper model Scan, like the lower model, requires the user to undergo two steps.
Scan Step
Place the upper model on the model holder and click the Scan Button![]() . Once the scan is finished the result will be shown.
. Once the scan is finished the result will be shown.
As before, if the reference rim is not placed on the model holder, the software will show the relevant message.
Click ![]() to access the edit step for the Upper model.
to access the edit step for the Upper model.
Edit Step
The upper model can still be edited as shown for the lower model. This time, we will edit the image using a different selection tool.
When you are satisfied with the result click ![]() to access the next wizard step.
to access the next wizard step.
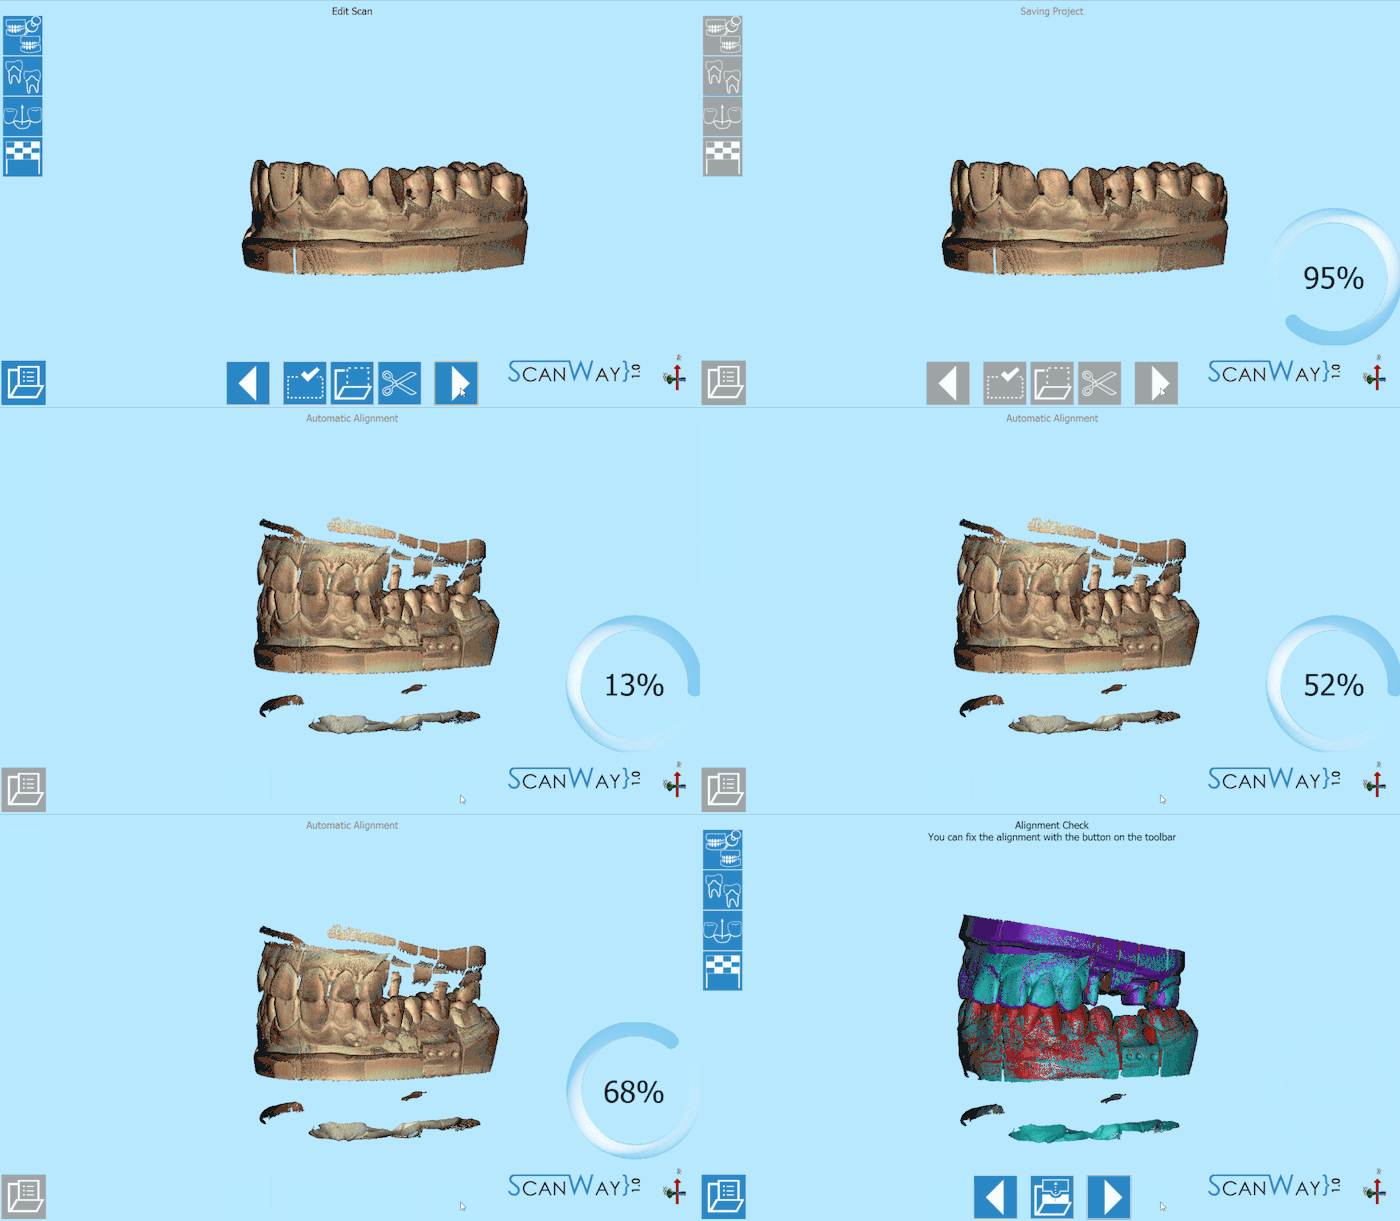
Save and Align
Immediately after having pushed the ![]() button, the software saves and tries to align automatically the scanned items to their reference.
button, the software saves and tries to align automatically the scanned items to their reference.
To learn more on the automatic alignment and the manual procedure visit our Alignment Interface page.
Step 4: Dies Scan
The steps necessary to successfully scan the dies vary depending on the scanning method that the user chooses to apply: the use of the multidie plate or the custom set-up.
With Multidie
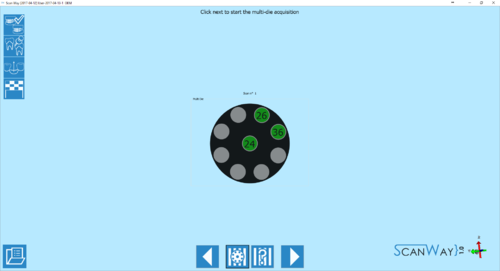
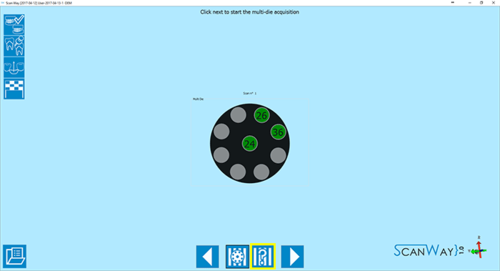
This method is applied by default by the software. It implies that the user will put the dies on the multidie plate in the position shown by the software, which will make each die immediately recognisable and cut the steps of the wizard.
- Definition
- As mentioned, the position of the dies in the multidie plate is pre-established by the software.
The multidie order is based on the Universal tooth numbering, starting from the last element of the first quadrant and following in a clock-wise order. Therefore the die that needs to be placed in the central element will always be the one closest to the last element of the first quadrant.
If there are more than 9 dies, a second definition step will be shown.
Click ![]() to access the multidie scan step.
to access the multidie scan step.
- Scan
- The multidie scan interface is similar to the other steps we just explained, except for the multidie reference that is kept as a reminder on the right side of the window, under the live view.
To proceed click the Scan Button . Once the scan is finished the result will be shown.
Click ![]() to access the edit step for the multidie scan.
to access the edit step for the multidie scan.
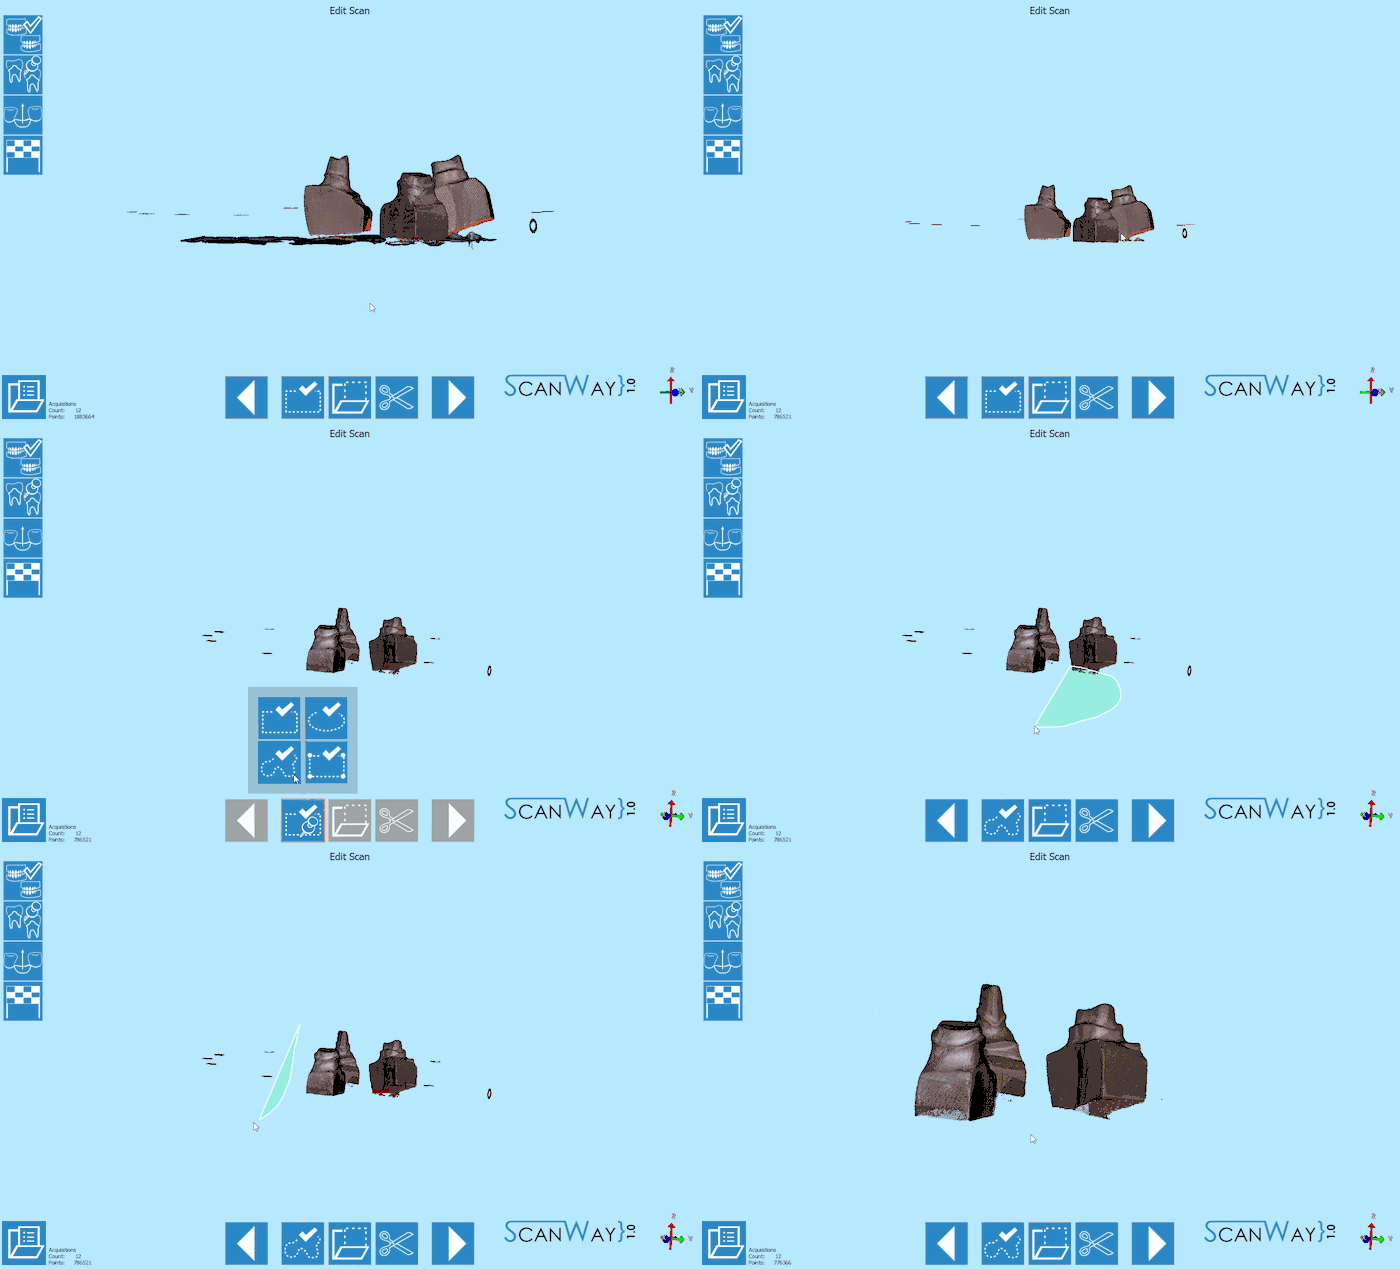
- Edit
- The edit step offers the same tools we saw in previous steps. In this case, more than one tool may need to be applied.
When you are satisfied with the result click ![]() to access the next wizard step.
to access the next wizard step.
- Alignment
- After being edited the dies get aligned to their references. The result is then showed on the monitor. To learn how to change, fix or redo the alignment check the Alignment Interface page.
Custom Set-Up (Without Multidie)
The user can also decide to scan the dies in a custom order, for instance if he needs to scan the dies on the model base. To access the custom set- up definition, click on the ![]() icon when the software presents the multidie definition.
icon when the software presents the multidie definition.
- Definition
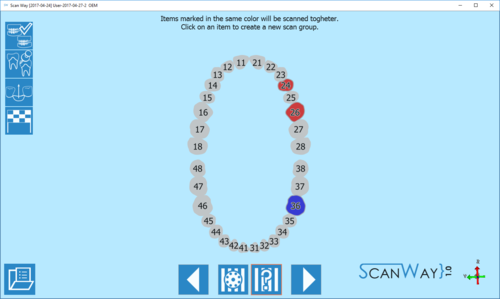
- The software proposes by default a unique scan group which means that, if not defined otherwise, the software will ask the user to scan all the stumps together. In this case I have created a second scan group, to divide the scan of the upper dies from the scan of the lower dies. Click
 to access the scan steps.
- Scan
- Depending on the number of scan groups created, the software will propose one or more scanning steps.
First, the software requires the user to insert the dies in the scanner and acquire the items of the first group.
As a reminder, it marks the items to be scanned together on the right of the window, under the live view.
Then it will ask the user to insert the item selected for the second group. Since the second scan is an individual die, there will be no reminder on the right. Click ![]() to continue.
to continue.
- Dies Identification
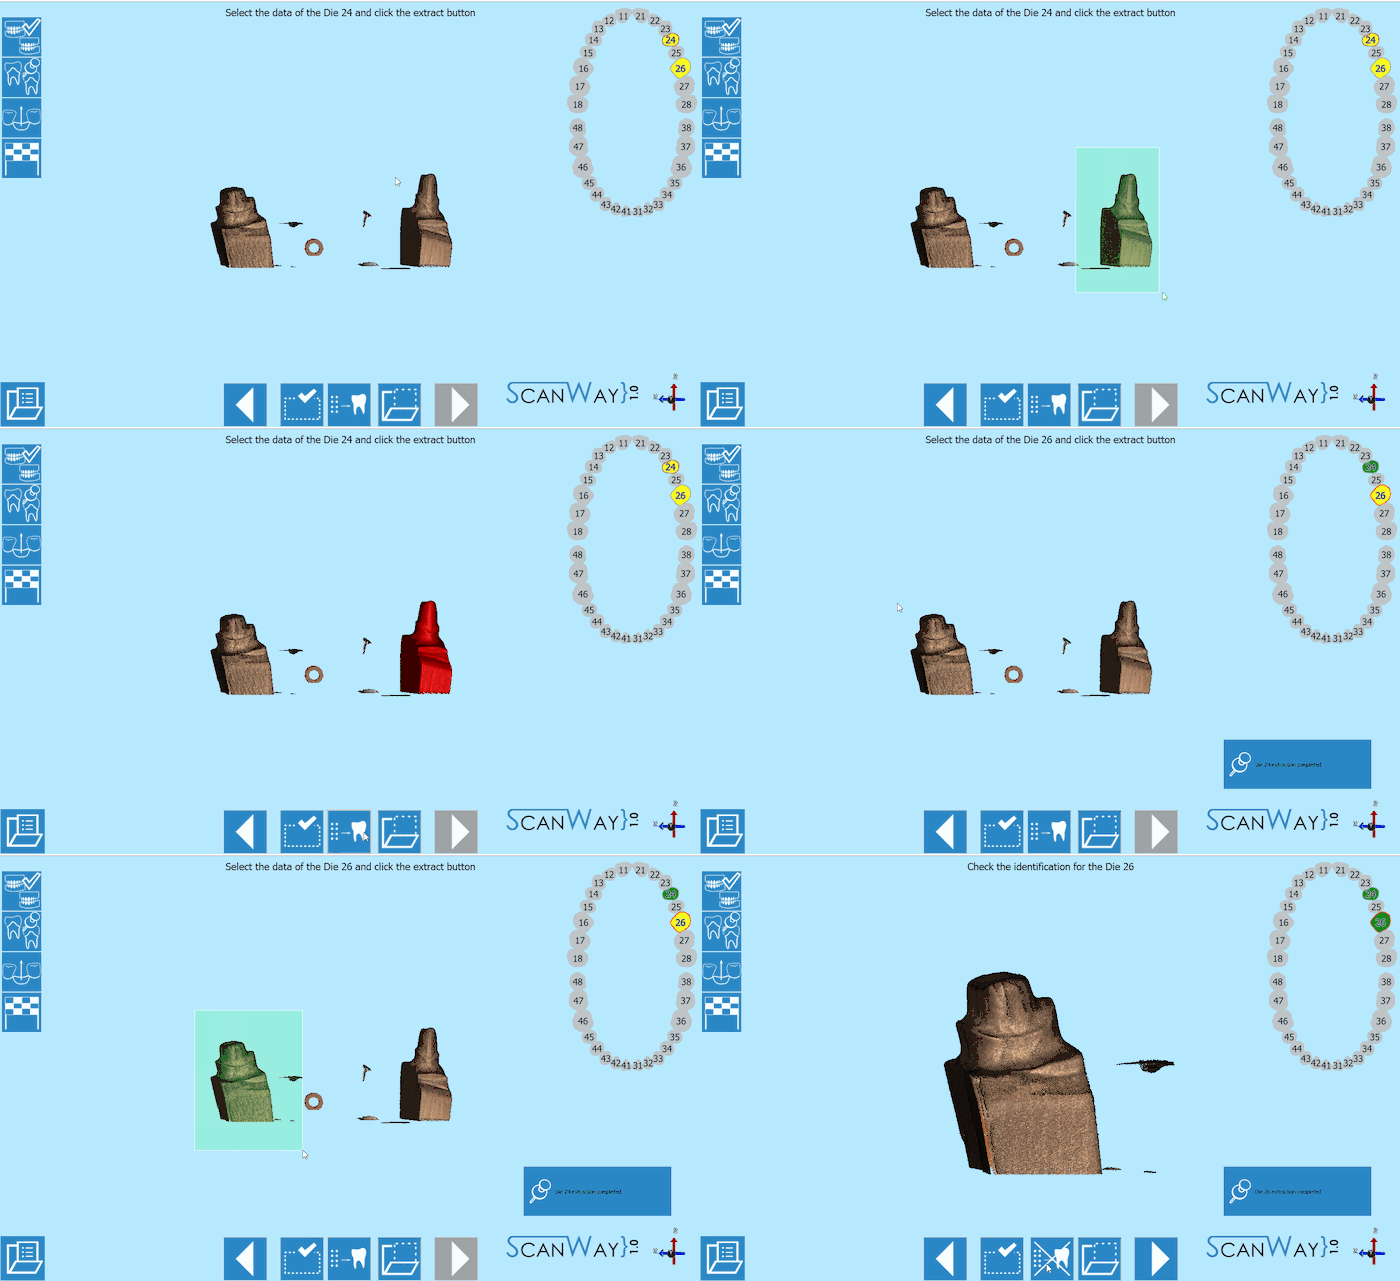
- When a scan group has more than one item, the user will be asked to separate each die from the others to correctly identify it.
This step occurs in between the scanning steps. To learn more on the identification of the dies visit the Scan Interface page. Click to continue.
- Edit
- If the scan group is formed by one individual die, there will be no identification step. Instead, the edit step will be presented. Click
 to continue.
- Alignment
- After being edited or identified the dies get aligned to their references. The result is then showed on the monitor. To learn how to change, fix or redo the alignment check the Alignment Interface page.
Step 5: Healthy and Pontics
At this stage the project has been scanned, unless the user wants to rescan the healthy and pontics. This step is infact a result of the scan of the scanned reference model, trimmed to exclude the parts that have been scanned individually (in this case, the dies). It sometimes happens that in the first model scan, the contact points on the healthy are not correctly recognised, which would require the user to rescan the model. Otherwise, just click ![]() to continue.
to continue.
The software will then propose a further edit step to allow the user to modify the healthy image. Proceed in the edit step as previously explained.
Step 6: Mesh Generation and Export
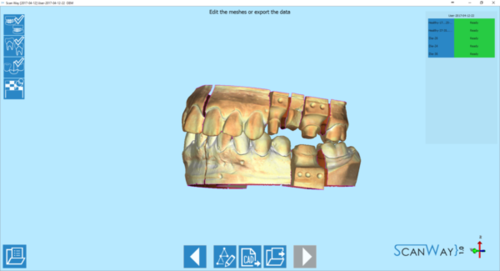
At this point the software immediately starts mesh generation. The meshes can be edited and exported individually or as a unique image. To learn more about mesh editing visit our Mesh Tools page.
Click on the Export Button ![]() to export to CAD.
to export to CAD.
If the project has been started from Exocad, the CAD will automatically open and the design can be started immediately. Otherwise the software will ask the user how to export the file.
