Difference between revisions of "ExamplesFullJ/ja"
(Created page with "全顎プロジェクト例") |
(No difference)
|
Revision as of 09:15, 25 September 2017
In this page will be followed and explained the wizard for scanning 2 full models in occlusion.
Contents
Project definition
Launch the scanning software double-clicking on the ScanWay icon on your desktop. The Welcome Page will open; to create the project click on the first icon.
For detailed information on how to define a project visit the specific page: Create a New Project.
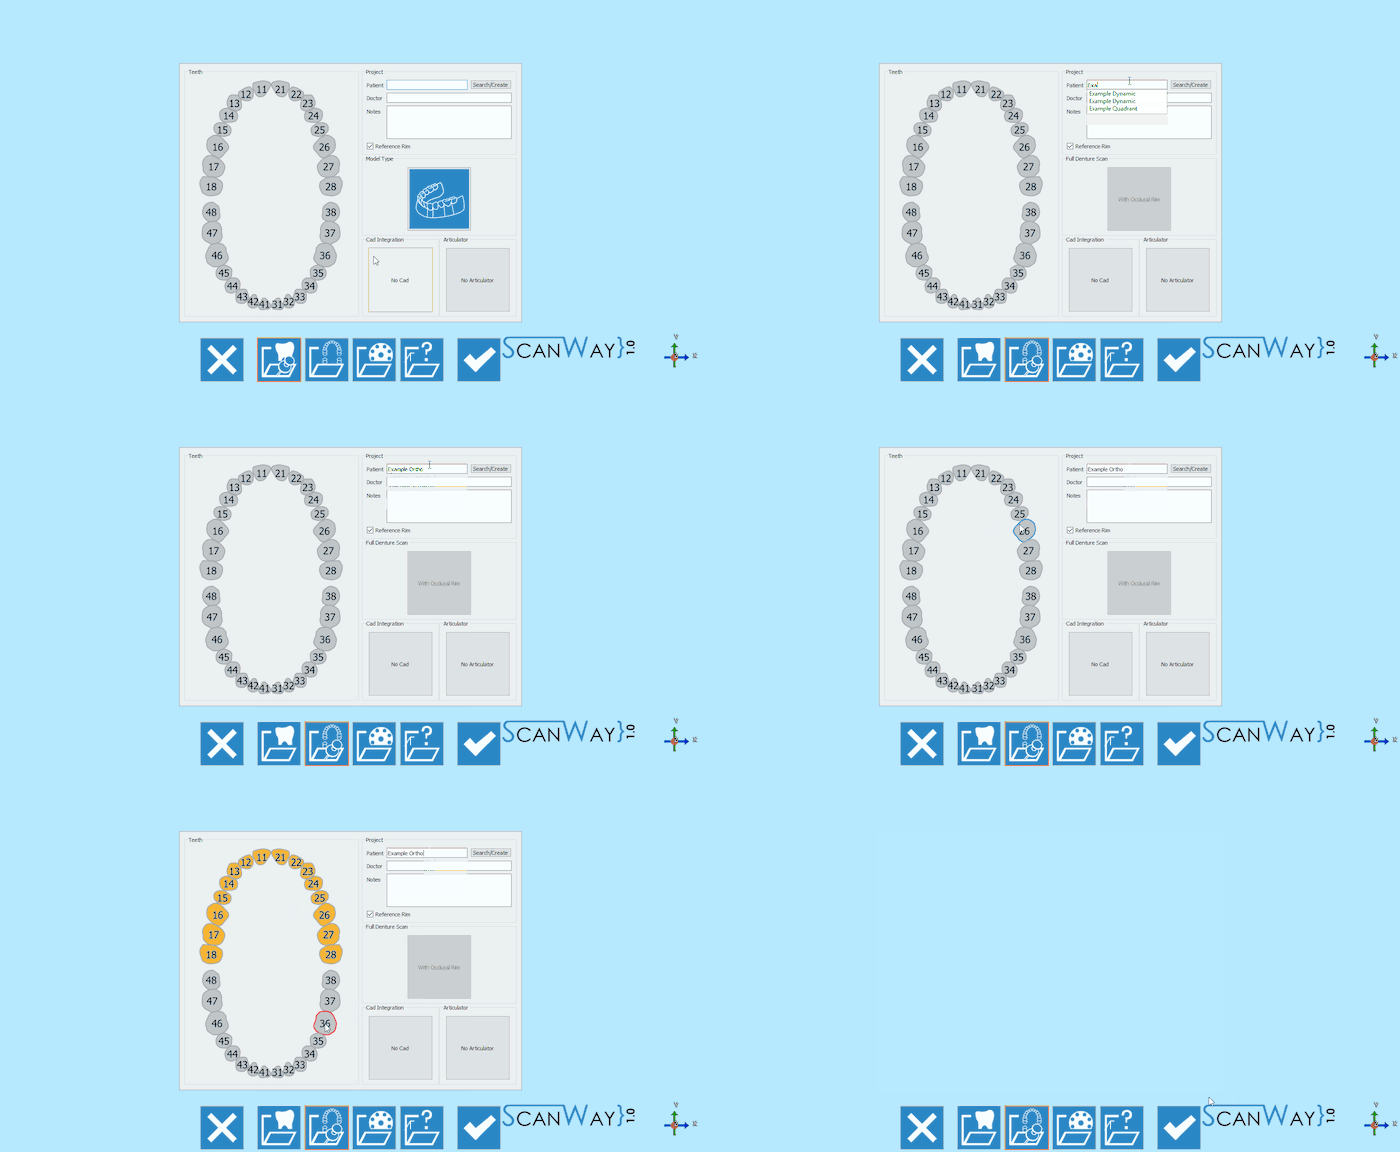
Here is the definition of our demo project:
Step 1: Articulator Scanning
The first step of any project that has been set to have both jaws, is the Articulator Scan.
For Articulator scan it is not necessarily meant that an Articulator needs to be scanned; the required scan is the acquisition of the occlusion either using the articulator on its specific support or putting the two models in occlusion on the model holder
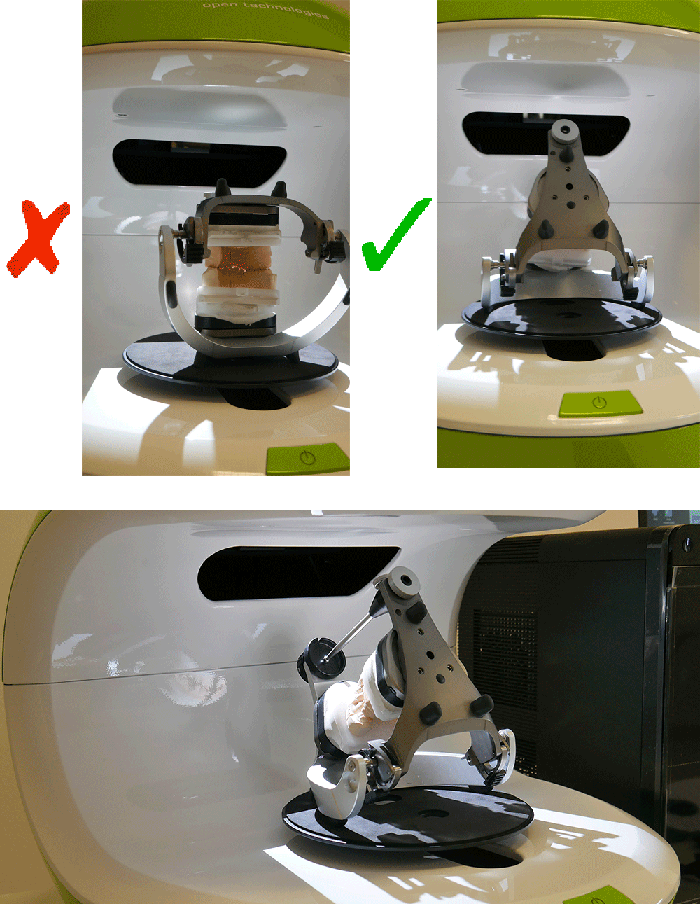
If the user needs to scan an articulator, we suggest to tilt it backwards, to be able to get as much information as possible. This is just a suggestion as not all articulators can be tilted.
In the live view of the scanning interface you can actually see that if the articulator is standing straight it will be difficult to acquire the occlusion properly.
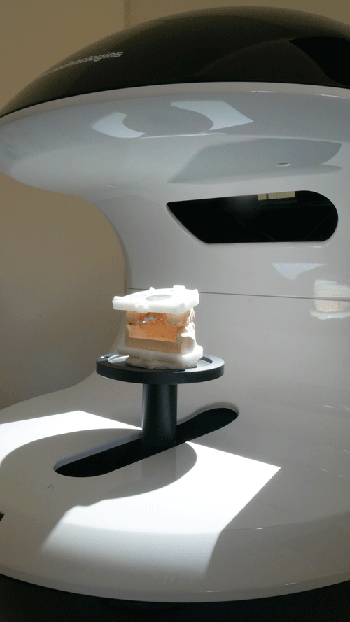
On the other hand, as previously mentioned, it is also possible to scan the two models in occlusion on the normal model holder held together with rubber bands or wax if necessary.
Once the objects have been placed in the scanner (either the articulator or the models one on top of the other), the scan can be started with the Scan Button![]() . Once the scan is finished the result will be shown.
. Once the scan is finished the result will be shown.
For further information on the other available functions check the Scan Interface page.
Click ![]() to access the second step of the wizard.
to access the second step of the wizard.
Step 2: Lower Model
The second step of any project that has been set to have both jaws, is the Lower Model Scan. All steps, except for the articulator one, include two sub-steps: the actual scan and the edit of the acquired image.
Scan Step
Place the lower model on the model holder and click the Scan Button![]() . Once the scan is finished the result will be shown.
. Once the scan is finished the result will be shown.
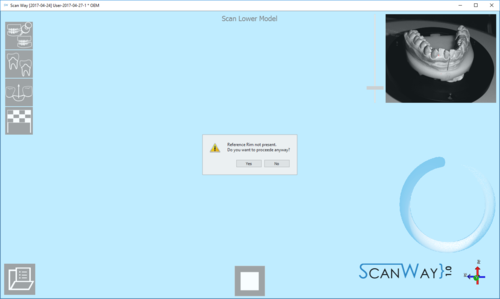
This scan has been performed with the Reference Rim. Everytime the user launches a scan for models, dies or markers, if the software recognises that the reference rim has not been used the following message shows.
The user can therefore decide whether to cancel the scan, put the reference rim on the model holder and start a new scan, or to scan without using the reference rim. For information on the reference rim visit the Accessories page.
Click ![]() to access the second part of the Lower model step.
to access the second part of the Lower model step.
Edit Step
This step allows to edit the acquired image; for detailed information on all the available options in this step visit the Edit Tools page.
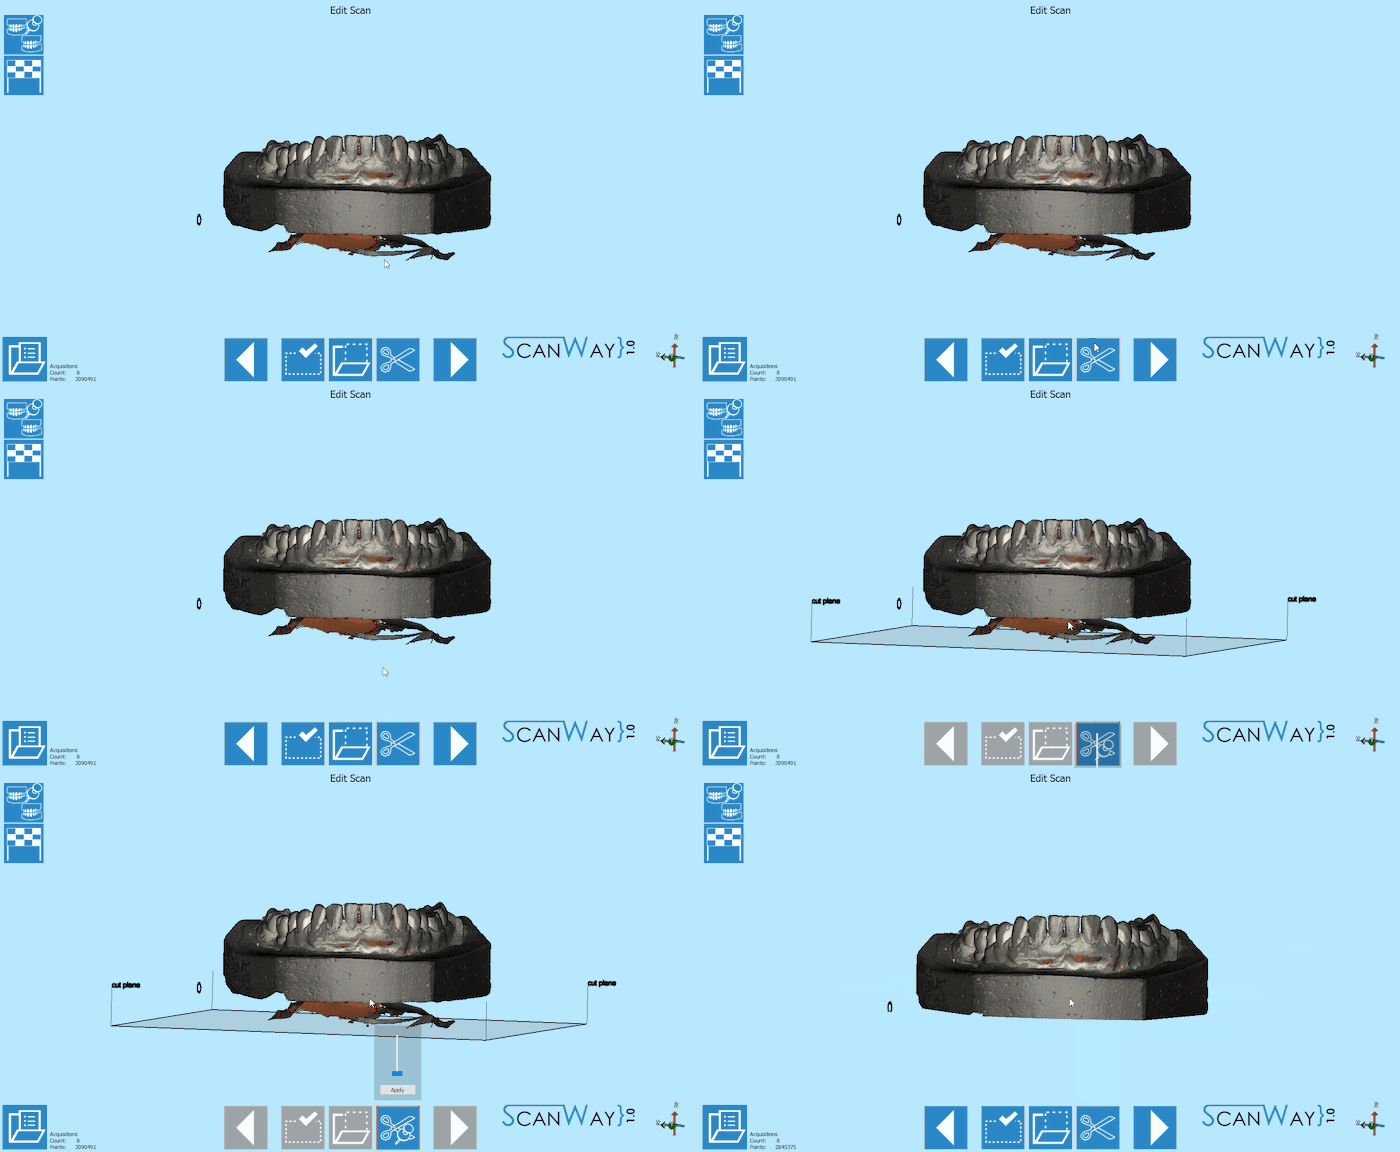
The image at this step can be both edited or trimmed. At this stage it is actually important not to edit too much the image or cutting big chunks of information, since it would make it more difficult for the software to calculate the automatic alignment of the object to its reference.
In this case, to trim the object, the base cut tool has been used and accepted by double clicking on the model.
When you are satisfied with the result click ![]() to access the next wizard step.
to access the next wizard step.
Step 3: Upper Model
The upper model Scan, like the lower model, requires the user to undergo two steps.
Scan Step
Place the upper model on the model holder and click the Scan Button![]() . Once the scan is finished the result will be shown.
. Once the scan is finished the result will be shown.
As before, if the reference rim is not placed on the model holder, the software will show the relevant message.
Click ![]() to access the edit step for the Upper model.
to access the edit step for the Upper model.
Edit Step
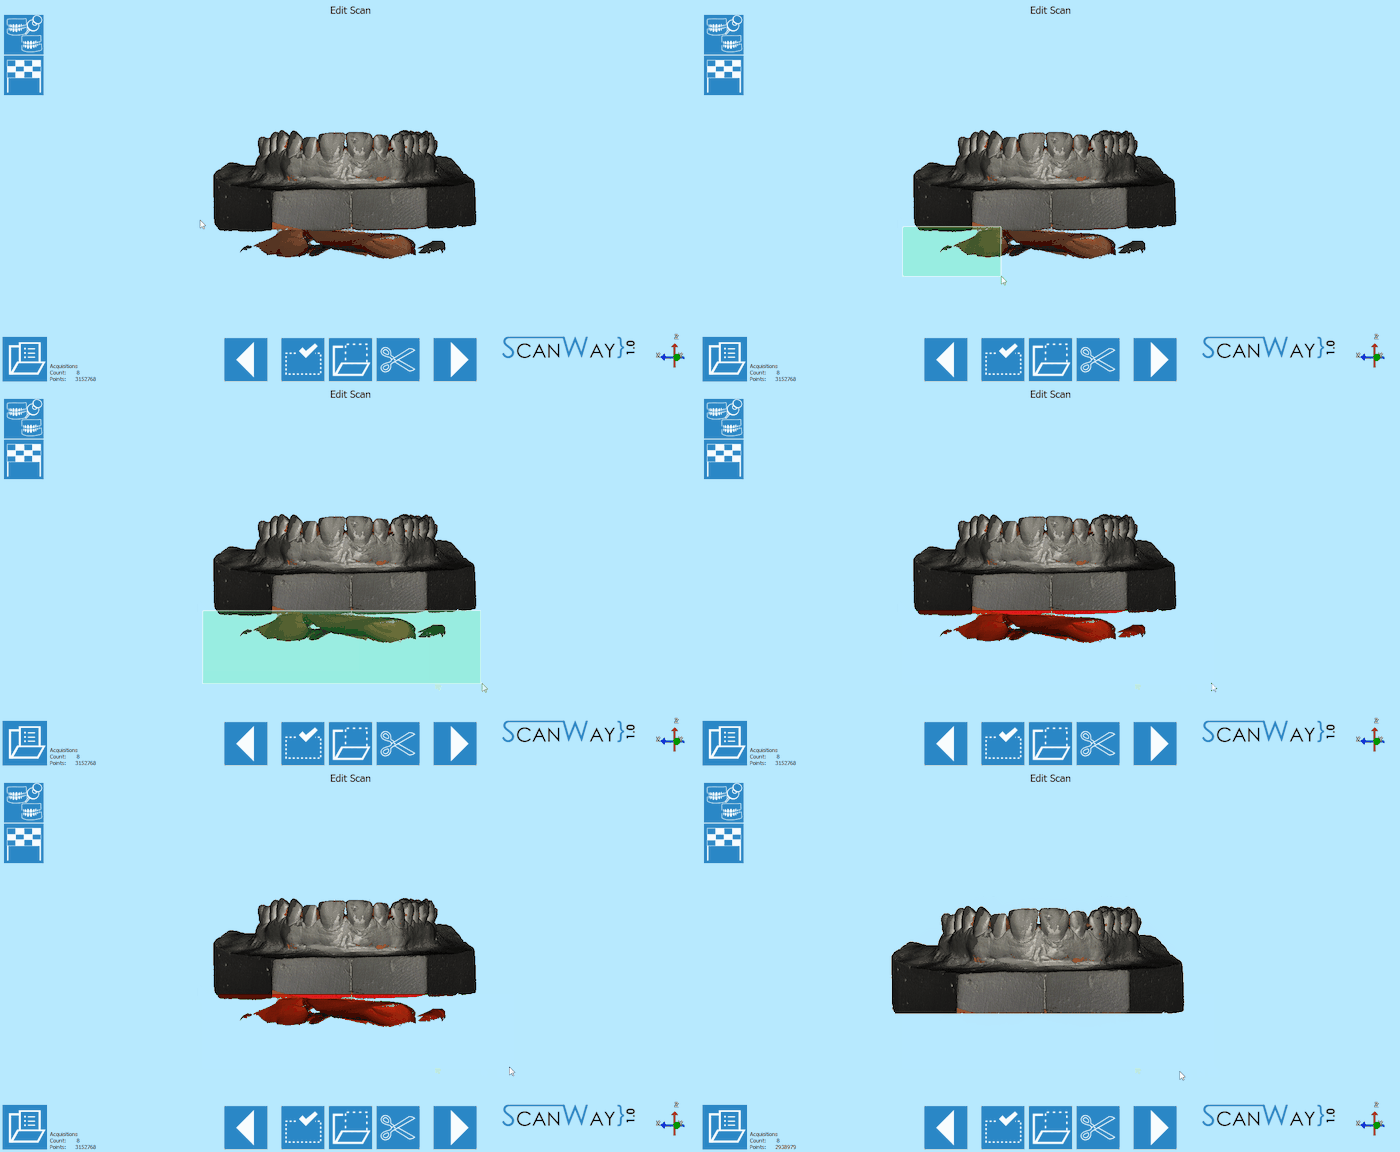
The upper model can still be edited as shown for the lower model. This time, we will edit the image using a selection tool and cutting with the delete button on the keybord.
When you are satisfied with the result click ![]() to access the next wizard step.
to access the next wizard step.
Save and Align
Immediately after having pushed the ![]() button, the software saves and tries to align automatically the scanned items to their reference.
button, the software saves and tries to align automatically the scanned items to their reference.
To learn more on the automatic alignment and the manual procedure visit our Alignment Interface page.
Step 6: Mesh Generation and Export
At this point the software immediately starts mesh generation. The meshes can be edited and exported individually or as a unique image. To learn more about mesh editing visit our Mesh Tools page.
Click on the Export Button ![]() to export to CAD and select the folder to save the STL files.
to export to CAD and select the folder to save the STL files.
