Difference between revisions of "ExamplesFullJ/ja"
(Created page with "適切な結果が取得できたら、{{Inline button|nextAction.png}} をクリックして次の手順に進みます。") |
(Created page with "===ステップ3: 上顎モデル===") |
||
| Line 69: | Line 69: | ||
適切な結果が取得できたら、{{Inline button|nextAction.png}} をクリックして次の手順に進みます。 | 適切な結果が取得できたら、{{Inline button|nextAction.png}} をクリックして次の手順に進みます。 | ||
| − | === | + | ===ステップ3: 上顎モデル=== |
The upper model Scan, like the lower model, requires the user to undergo two steps. | The upper model Scan, like the lower model, requires the user to undergo two steps. | ||
Revision as of 09:37, 25 September 2017
このページでは、咬合する2つの全顎モデルをスキャンする例を、ウィザードに従って説明します。
Contents
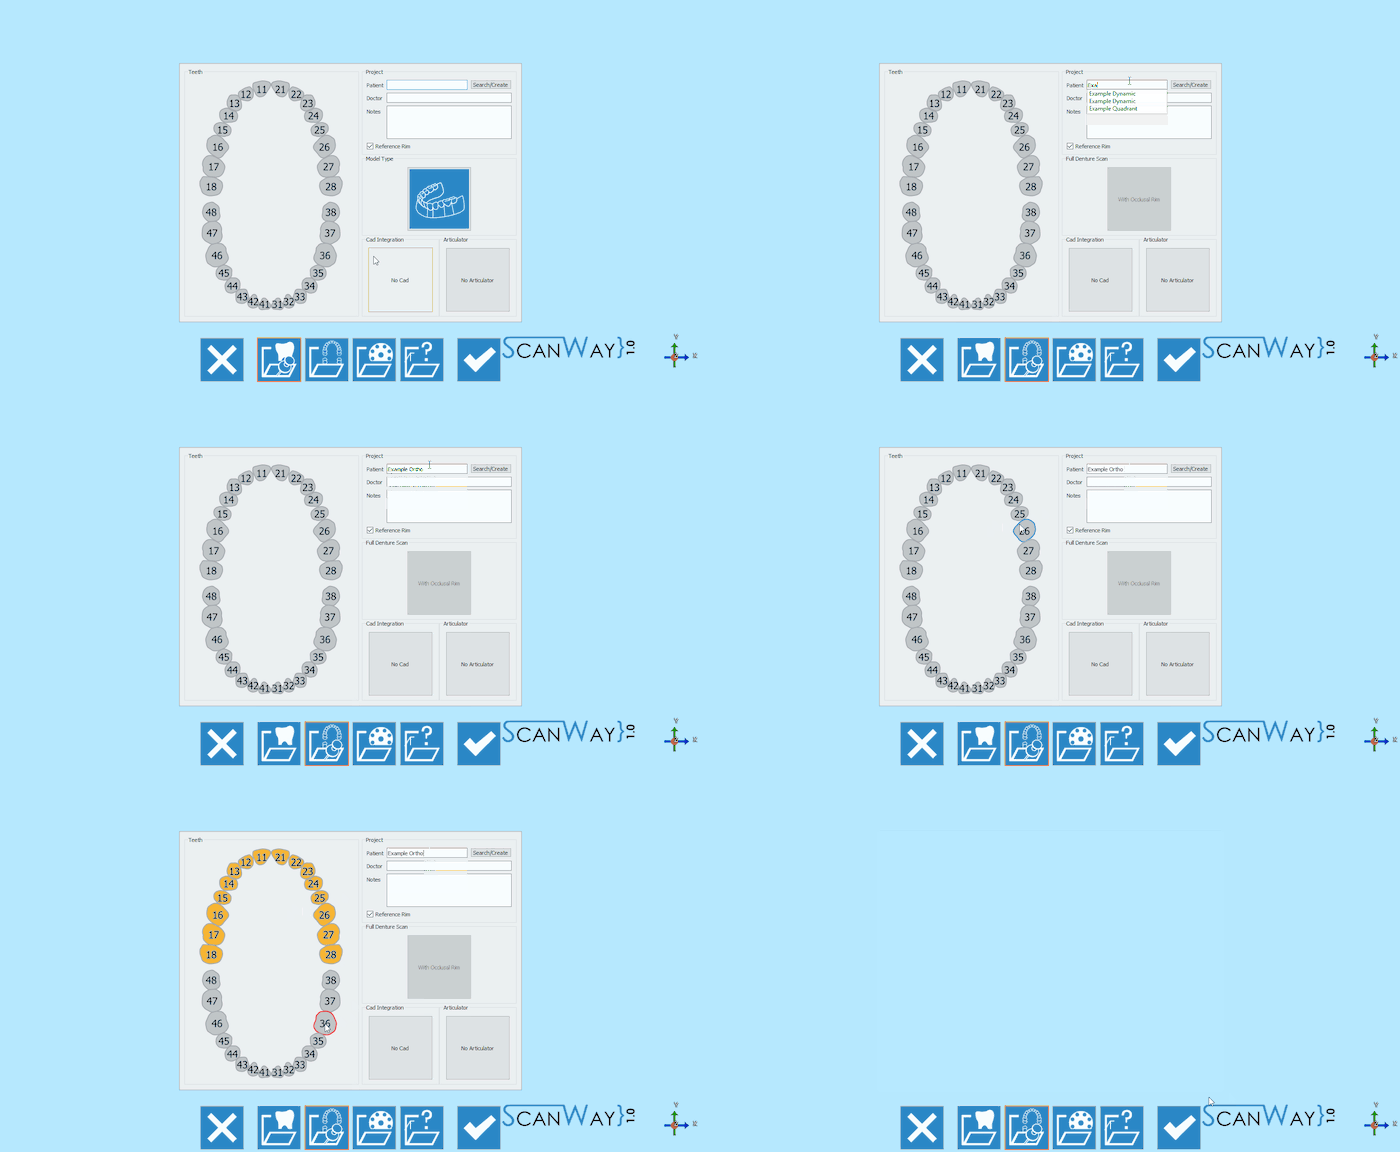
プロジェクト定義
デスクトップのScanWayアイコンをダブルクリックして、スキャンソフトウェアを起動します。ようこそページが開きます。プロジェクトを作成するには、最初のアイコンをクリックします。
プロジェクトの定義方法について詳しくは、新規プロジェクトの作成のページを参照して下さい。
今回のデモ用プロジェクトでは以下の通り定義します。
ステップ1: 咬合器スキャン
両顎を持つように設定されたすべてのプロジェクトの最初のステップは、咬合器スキャンです。
咬合器スキャンでも、常に咬合器をスキャンする必要はありません。このスキャンに必要なのは、専用サポート上の咬合器を使った咬合スキャン、またはモデルホルダー上での2つのモデルの咬合スキャンです。
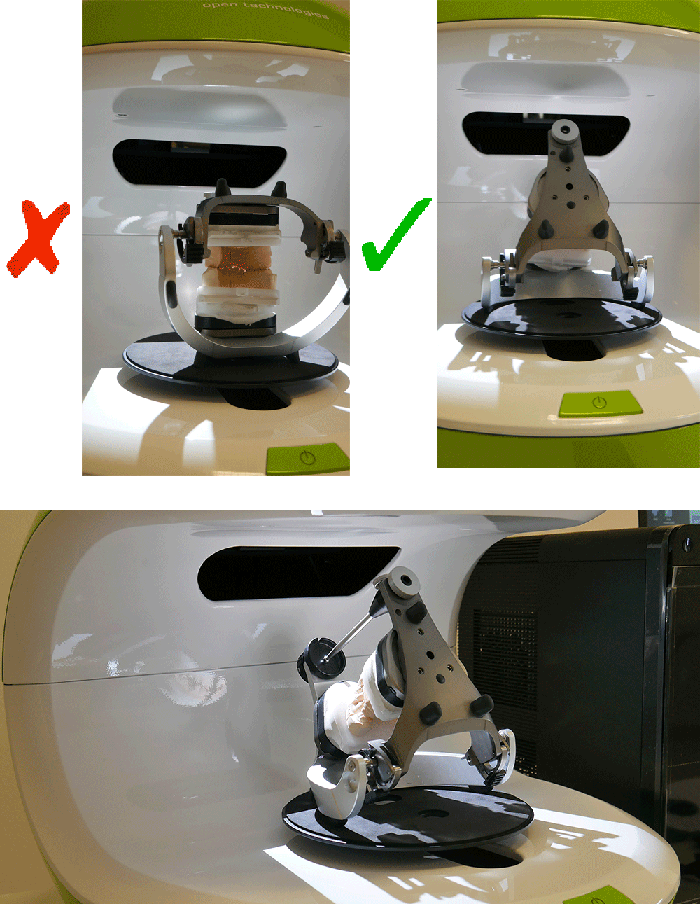
ユーザーが咬合器をスキャンする必要がある場合は、後ろへ傾けることをおすすめします。こうすることで、できるだけ多くの情報を得ることができるようになります。傾けることができない咬合器もあるので、その場合は不要です。
スキャンインターフェースのライブビューでは、咬合器が実際にまっすぐ置かれていると、咬合状態を正確に取得するのが難しくなることが確認できます。
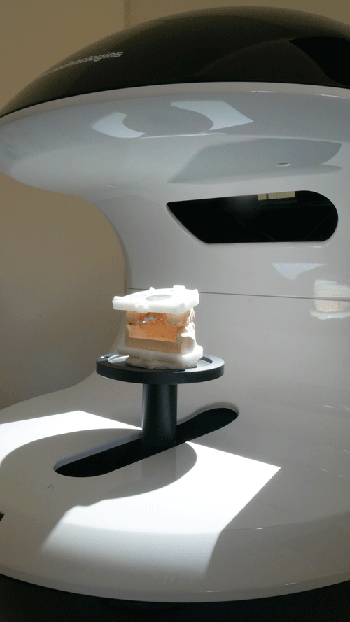
一方、前述のように、咬合させた2つのモデルを輪ゴムやワックスで固定してスキャンすることも可能です。
オブジェクトをスキャナーに置いたら(咬合器を使って、またはモデルを重ねて)、スキャンボタン![]() でスキャンを開始できます。スキャンが終了すると、結果が表示されます。
でスキャンを開始できます。スキャンが終了すると、結果が表示されます。
利用可能なその他の機能については、スキャンインターフェースのページを参照して下さい。
ステップ2: 下顎
両顎を持つように設定されたすべてのプロジェクトの2つ目のステップは、下顎スキャンです。咬合器を除くすべてのステップには、2つのサブステップ(実際のスキャンと、取得された画像の編集)があります。
スキャンステップ
下顎モデルをモデルホルダーに置き、スキャンボタン![]() をクリックします。スキャンが完了すると、結果が表示されます。
をクリックします。スキャンが完了すると、結果が表示されます。
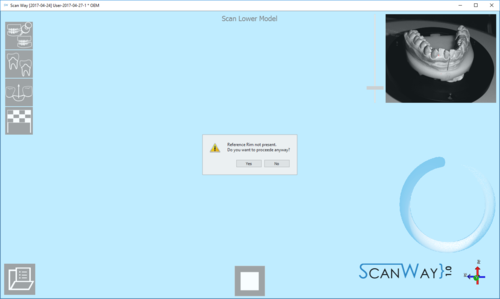
このスキャンはレファレンスリムを使って行われています。ユーザーがモデル、ダイ、またはマーカーのスキャンを起動する際、ソフトウェアでレファレンスリムが使用されていないことが検出されると、以下のメッセージが表示されます。
ユーザーは、スキャンをキャンセルしてモデルホルダーにレファレンスリムを置き、新しいスキャンを開始するか、レファレンスリムなしでスキャンを続行するかを決めます。レファレンスリムについて詳しくは、付属品のページを参照して下さい。
編集ステップ
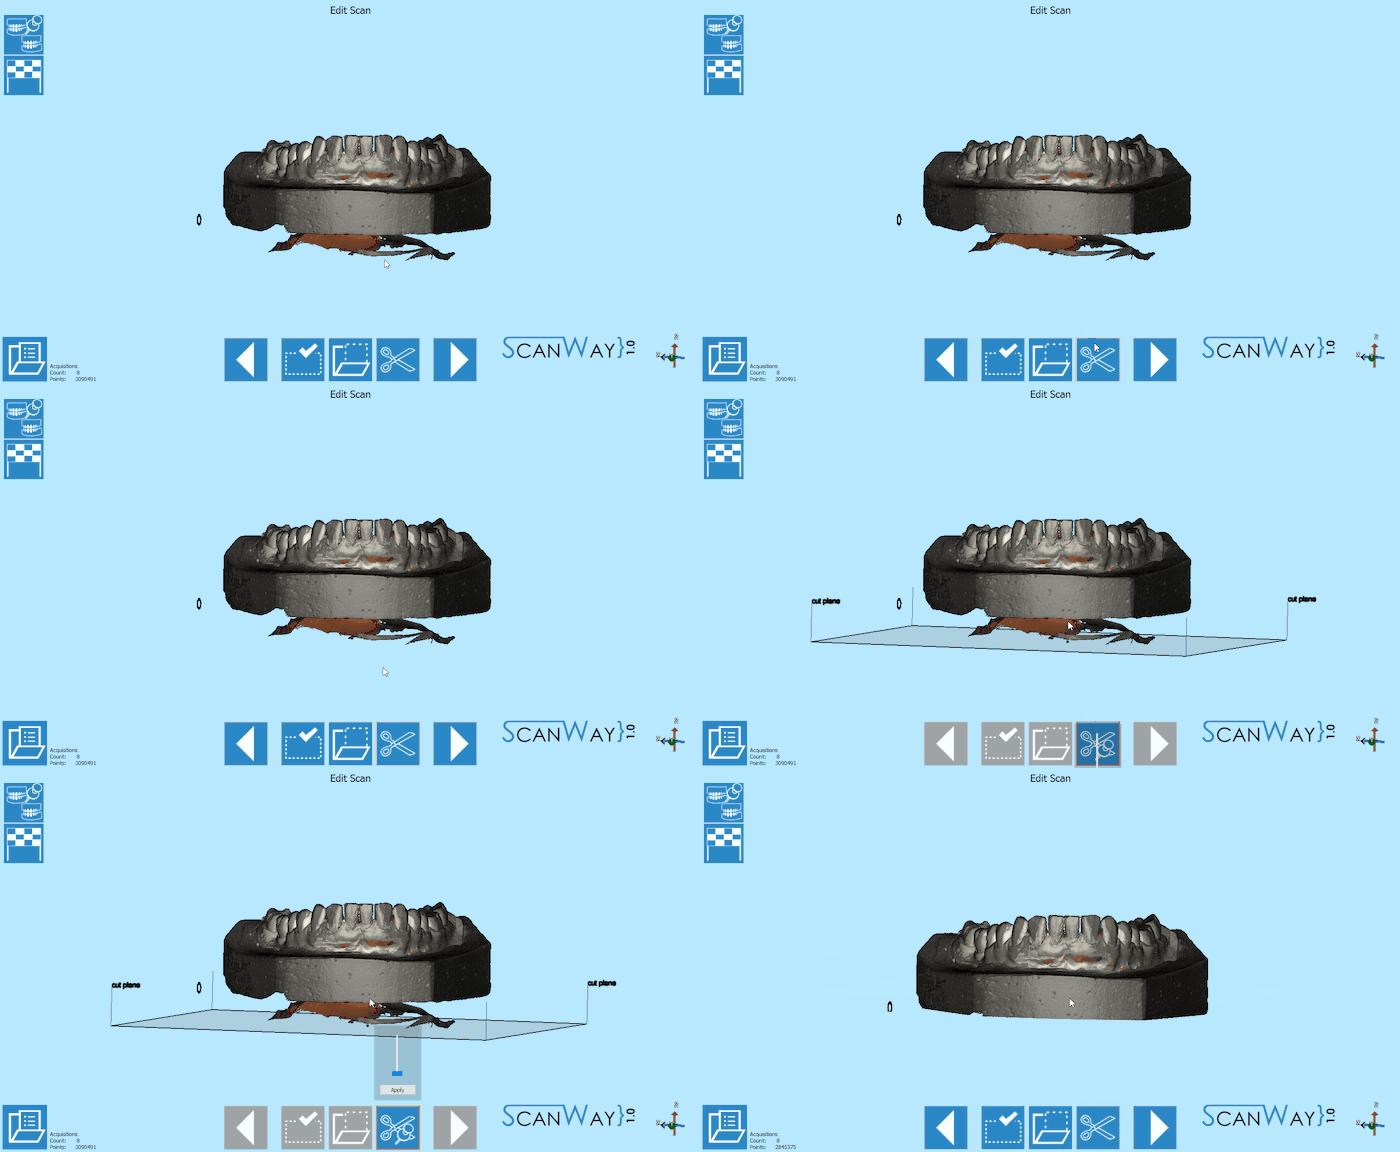
この手順では、取得した画像を編集できます。この手順で利用できるオプションについて詳しくは、編集ツールのページを参照して下さい。
この段階の画像は編集したりトリミングしたりできます。ただし、この段階では画像に対してあまり大きな編集を行ったり、多くの情報を切り取ったりしないことが重要です。この段階の画像は編集したりトリミングしたりできます。ただし、この段階では画像に対してあまり大きな編集を行ったり、多くの情報を切り取ったりしないことが重要です。
このケースでは、オブジェクトのトリミングにベースカットツールを使用し、最後にモデルをダブルクリックして確定しています。
適切な結果が取得できたら、![]() をクリックして次の手順に進みます。
をクリックして次の手順に進みます。
ステップ3: 上顎モデル
The upper model Scan, like the lower model, requires the user to undergo two steps.
Scan Step
Place the upper model on the model holder and click the Scan Button![]() . Once the scan is finished the result will be shown.
. Once the scan is finished the result will be shown.
As before, if the reference rim is not placed on the model holder, the software will show the relevant message.
Click ![]() to access the edit step for the Upper model.
to access the edit step for the Upper model.
Edit Step
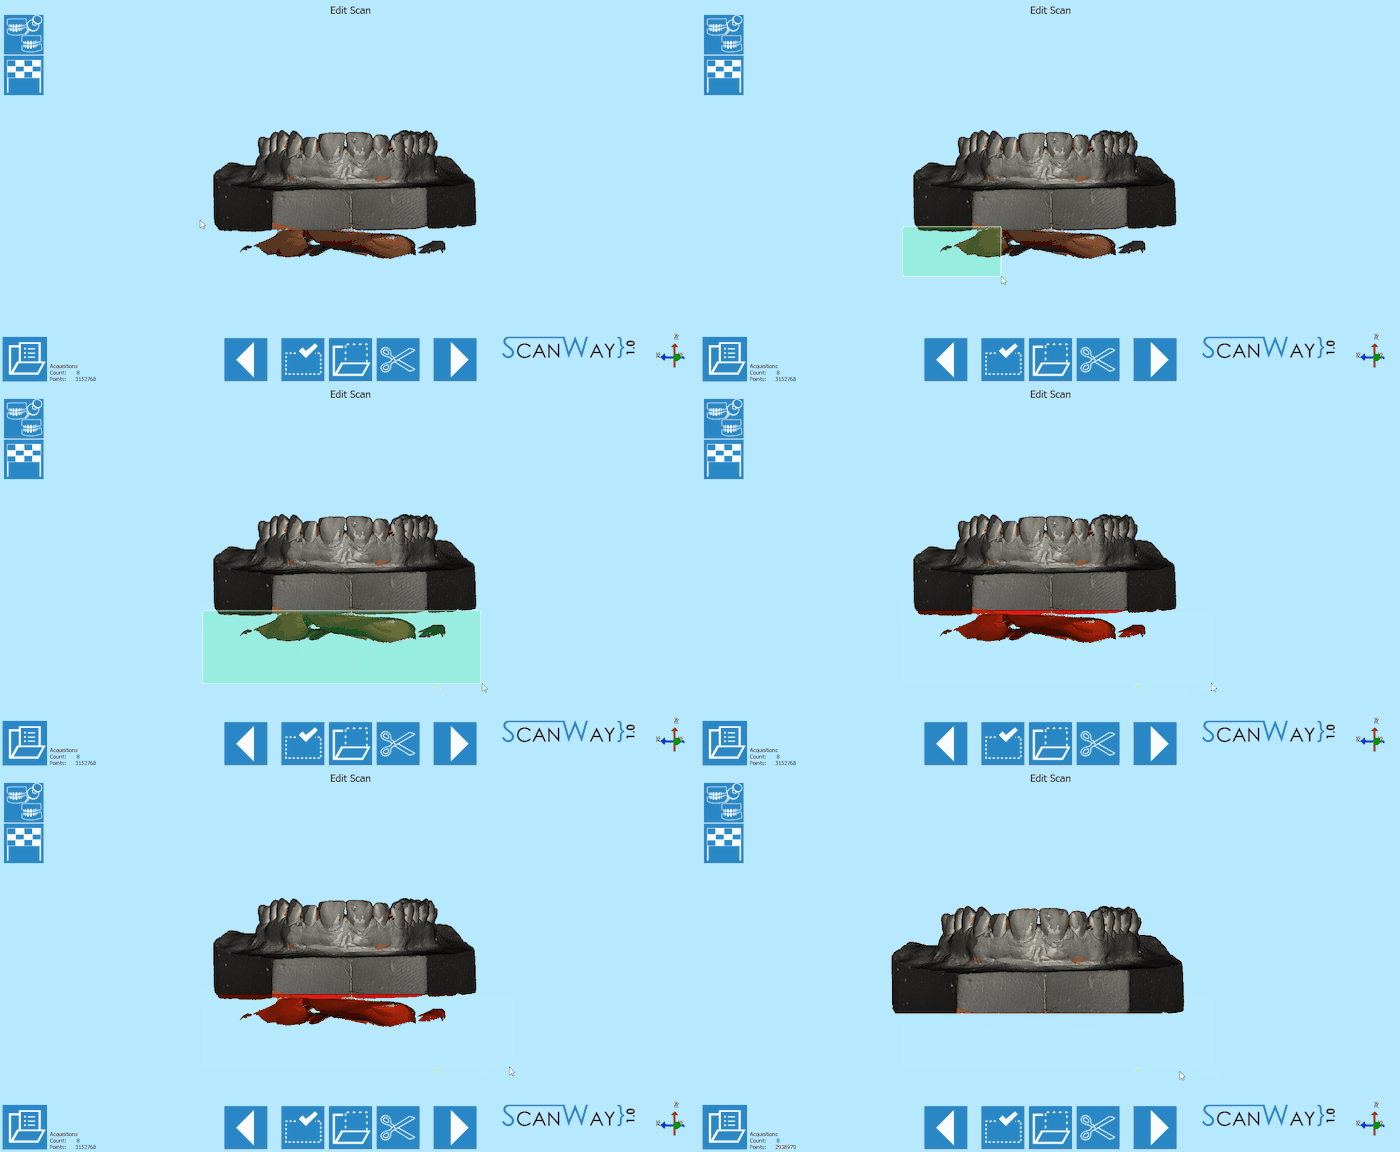
The upper model can still be edited as shown for the lower model. This time, we will edit the image using a selection tool and cutting with the delete button on the keybord.
When you are satisfied with the result click ![]() to access the next wizard step.
to access the next wizard step.
Save and Align
Immediately after having pushed the ![]() button, the software saves and tries to align automatically the scanned items to their reference.
button, the software saves and tries to align automatically the scanned items to their reference.
To learn more on the automatic alignment and the manual procedure visit our Alignment Interface page.
Step 6: Mesh Generation and Export
At this point the software immediately starts mesh generation. The meshes can be edited and exported individually or as a unique image. To learn more about mesh editing visit our Mesh Tools page.
Click on the Export Button ![]() to export to CAD and select the folder to save the STL files.
to export to CAD and select the folder to save the STL files.
