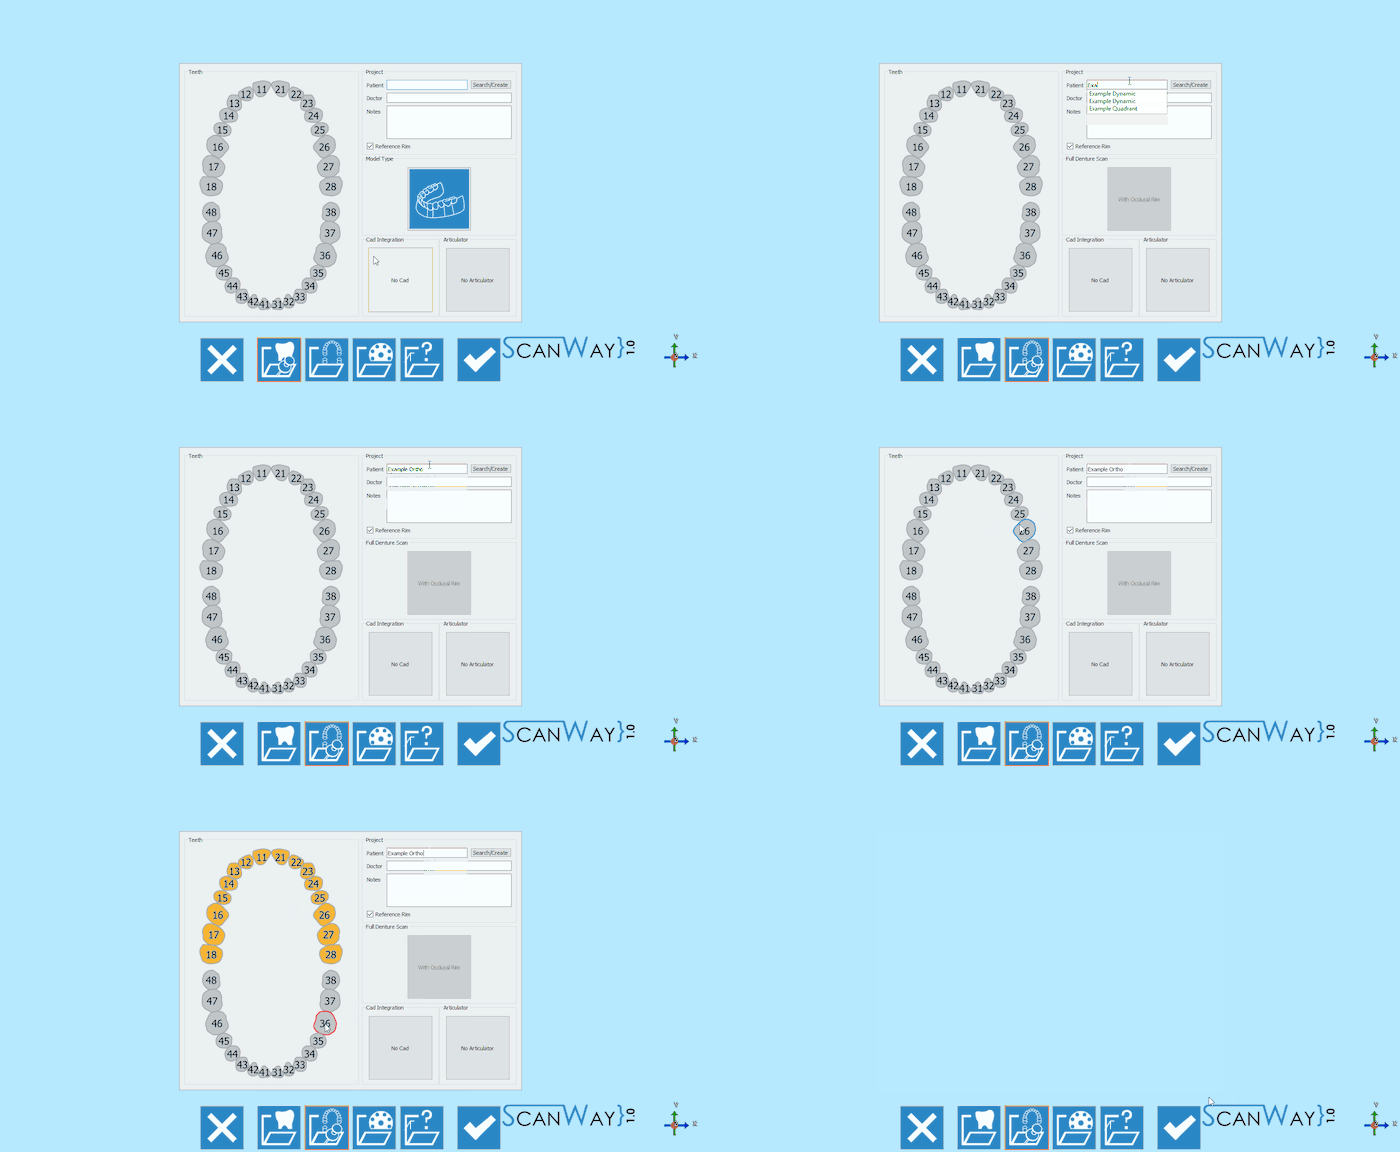
Example: Orthodontic
In questa pagina è mostrata e spiegata la procedura guidata da seguire per scansionare 2 modelli in occlusione.
Contents
Definizione del Progetto
Avviare il software facendo doppio click sull'icona ScanWay sul desktop. Si aprirà la Pagina di Benvenuto; per creare il progetto cliccare sulla prima icona.
Per informazioni più dettagliate su come definire un progetto, visitare la pagina: Creare un Nuovo Progetto.
Di seguito la definizione del nostro progetto esempio:
Passaggio 1: Scansione Articolatore
Il primo passaggio di ogni progetto impostato con entrambe le arcate è la Scansione Articolatore.
Con Scansione Articolatore non si intende necessariamente che un articolatore deve essere scansionato; l'acquisizione richiesta è l'occlusione, sia che si usi un articolatore sull'apposita basetta sia inserendo semplicemente i due modelli in occlusione sul piattello
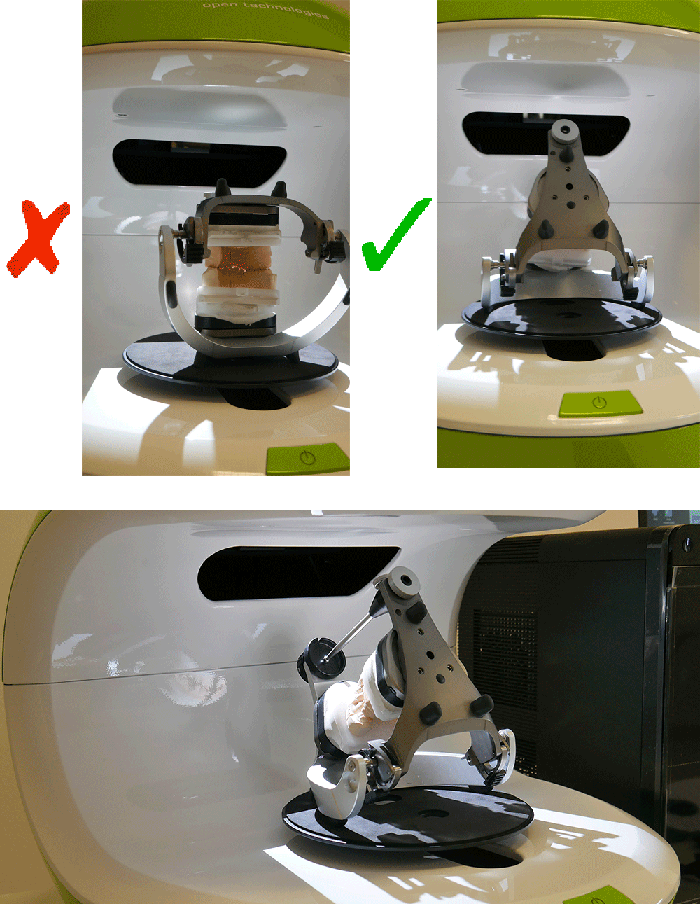
Se è possibile scansionare l'occlusione con un articolatore, è consigliato inclinarlo all'indietro, per ottenere quanti più dati possibili. Questo suggerimento potrebbe non applicarsi a tutti gli articolatori dato che alcuni non possono essere inclinati.
Nella sezione Vista Live dell'interfaccia di scansione è possibile notare in effetti che se l'articolatore rimane dritto risulta difficile acquisire i dati in modo completo.
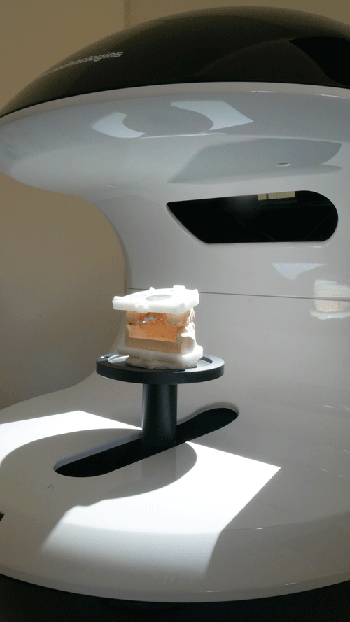
D'altro canto, come specificato in precedenza, è possibile acquisire i due modelli in occlusione sul piattello standard dello scanner, unendoli con degli elastici o della cera se necessario.
Una volta che i modelli sono stati inseriti nello scanner (con l'articolatore o uno sopra l'altro, in occlusione), è possibile avviare l'acquisizione con il Pulsante Scansiona![]() .. A scansione terminata, i risultati verranno mostrati sullo schermo.
.. A scansione terminata, i risultati verranno mostrati sullo schermo.
Per ulteriori informazioni sulle altre funzioni disponibili, visita la pagina Interaccia di Scansione.
Cliccare ![]() per accedere al secondo passaggio della modalità guidata.
per accedere al secondo passaggio della modalità guidata.
Passaggio 2: Arcata inferiore
Il secondo passaggio di ogni progetto con entrambe le arcate è la scansione del modello inferiore. Tutti i passaggi, escluso quello della scansione articolatore, prevedono due sotto-passaggi: la scansione e la modifica dell'immagine acquisita.
Scansione
Posizionare il modello inferiore sul piattello e cliccare il Pulsante Scansiona![]() . I risultati verranno mostrati sullo schermo.
. I risultati verranno mostrati sullo schermo.
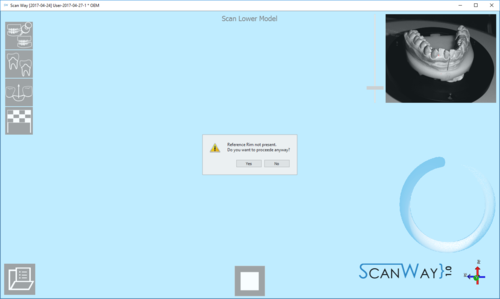
Questa scansione è stata effettuata con l'ausilio dell'Anello di Riferimento. Ogni volta che al software viene chiesto di acquisire modelli, monconi o marker e l'anello di riferimento non è presente appare il seguente messaggio:
The user can therefore decide whether to cancel the scan, put the reference rim on the model holder and start a new scan, or to scan without using the reference rim. For information on the reference rim visit the Accessories page.
Click ![]() to access the second part of the Lower model step.
to access the second part of the Lower model step.
Edit Step
This step allows to edit the acquired image; for detailed information on all the available options in this step visit the Edit Tools page.
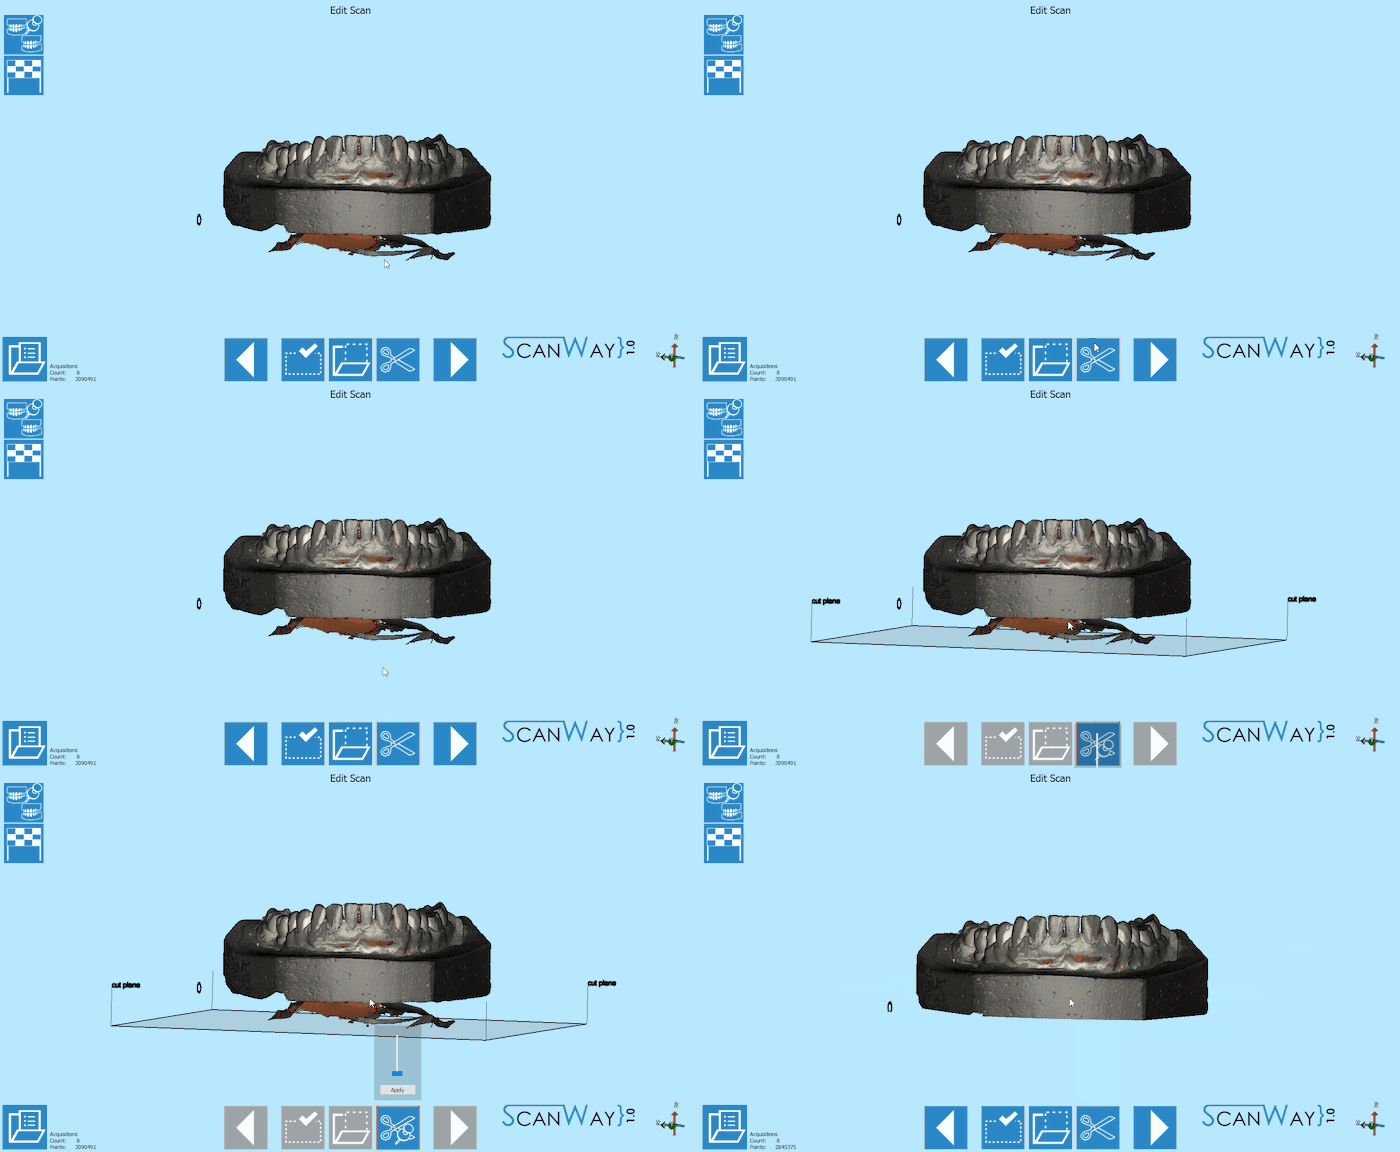
The image at this step can be both edited or trimmed. At this stage it is actually important not to edit too much the image or cutting big chunks of information, since it would make it more difficult for the software to calculate the automatic alignment of the object to its reference.
In this case, to trim the object, the base cut tool has been used and accepted by double clicking on the model.
When you are satisfied with the result click ![]() to access the next wizard step.
to access the next wizard step.
Step 3: Upper Model
The upper model Scan, like the lower model, requires the user to undergo two steps.
Scan Step
Place the upper model on the model holder and click the Scan Button![]() . Once the scan is finished the result will be shown.
. Once the scan is finished the result will be shown.
As before, if the reference rim is not placed on the model holder, the software will show the relevant message.
Click ![]() to access the edit step for the Upper model.
to access the edit step for the Upper model.
Edit Step
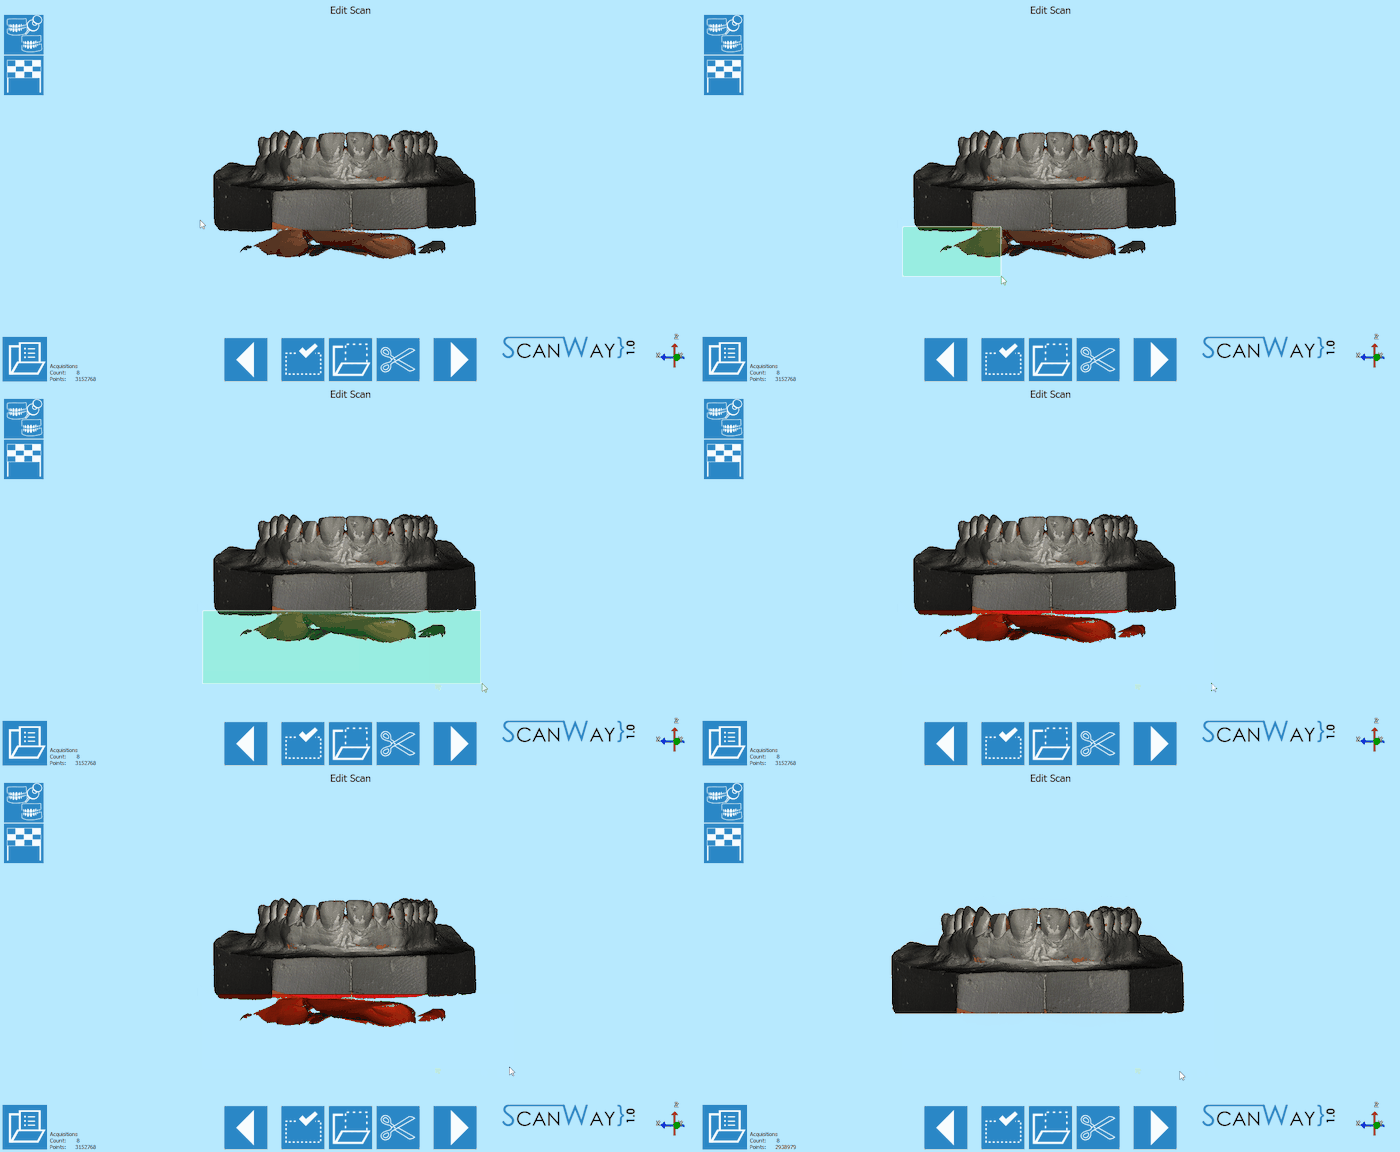
The upper model can still be edited as shown for the lower model. This time, we will edit the image using a selection tool and cutting with the delete button on the keybord.
When you are satisfied with the result click ![]() to access the next wizard step.
to access the next wizard step.
Save and Align
Immediately after having pushed the ![]() button, the software saves and tries to align automatically the scanned items to their reference.
button, the software saves and tries to align automatically the scanned items to their reference.
To learn more on the automatic alignment and the manual procedure visit our Alignment Interface page.
Step 6: Mesh Generation and Export
At this point the software immediately starts mesh generation. The meshes can be edited and exported individually or as a unique image. To learn more about mesh editing visit our Mesh Tools page.
Click on the Export Button ![]() to export to CAD and select the folder to save the STL files.
to export to CAD and select the folder to save the STL files.
