Multi Die Project
O terceiro ícone da página de definição do projeto abre a página do projeto Multi-Munhão.
Use o Projeto Multi-Munhão para verificar diferentes matrizes de diferentes pacientes em um único projeto.
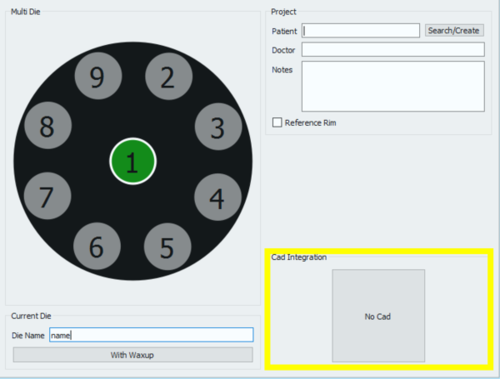
O painel de definição do Projeto é dividido em 3 seções
Definição MultiMunhão
Para definir o caso, clique em cada posição multi-munhão e defina o nome de cada paciente no campo Nome do Munhão .
Para adicionar o escaneamento do enceramento para esse elemento, clique no botão 'Com Enceramento' na seção Munhão Atual .
Projeto
A seção Projeto permite ao usuário inserir algumas 'Informações Gerais' :
- Nome do paciente
- Nome do médico (opcional)
- Notas (Opcional)
- Uma caixa de seleção para decidir se deve ou não usar a Margem de Referência:
É possível escrever livremente nas caixas do Médico e das Notas. Quanto ao Paciente, é possívelː
- Escreva livremente na caixa
- Crie um novo perfil clicando no botão Pesquisar / Criar
- Pesquise no banco de dados para um perfil já existente clicando no botão Pesquisar / Criar
O botão 'Pesquisar / Criar' abre a seguinte janela:
Esta janela permite pesquisar o banco de dados do projeto para pacientes já existentes. Um filtro pode ser aplicado e, para aqueles que usam protocolos VDDS, a pesquisa pode ser restrita a esse banco de dados específico
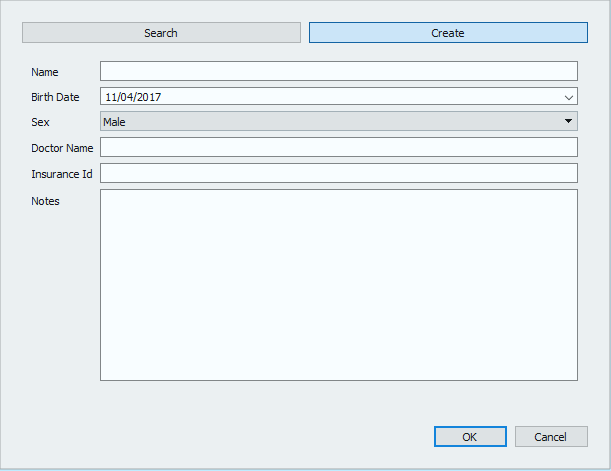
By clicking on the Create button, the following window opens:
The patient creation panel allows to input general information regarding the patient and the treatment, such as:
- The patient's name
- The patient's birth date
- The patient's sex
- The doctor's name
- The patient's insurance ID, where applies
- Some notes
Once all the information has been filled in, select Ok to accept the data or Cancel to discard the changes and go back to the project definition page.
CAD Integration
When the project is started directly from Exocad, the STL files produced in the scanning process will be transmitted to Exocad in just one click. On the other end, if the project gets created in the scanning software, the automatic export to CAD will not be configured, unless it is selected in this section.
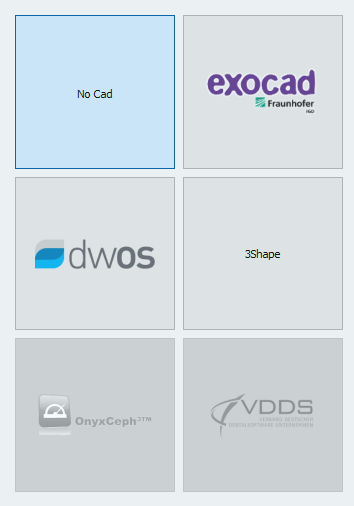
By clicking on the No CAD box the CAD selection window opens
and it allows to choose one of the software integrated with our scanning system for automatic trasmission of the STL information.
- Exocad
- VDDS protocol (for orthodontics)
- Onyx Ceph (for orthodontics)
If No Cad is selected, the software will then ask the user to define an export path for the STL files.
To start the project accept the definition with the ![]() button.
button.
To find specific information on how to scan in Free / Expert mode, go to the MultiDie Project example page.


